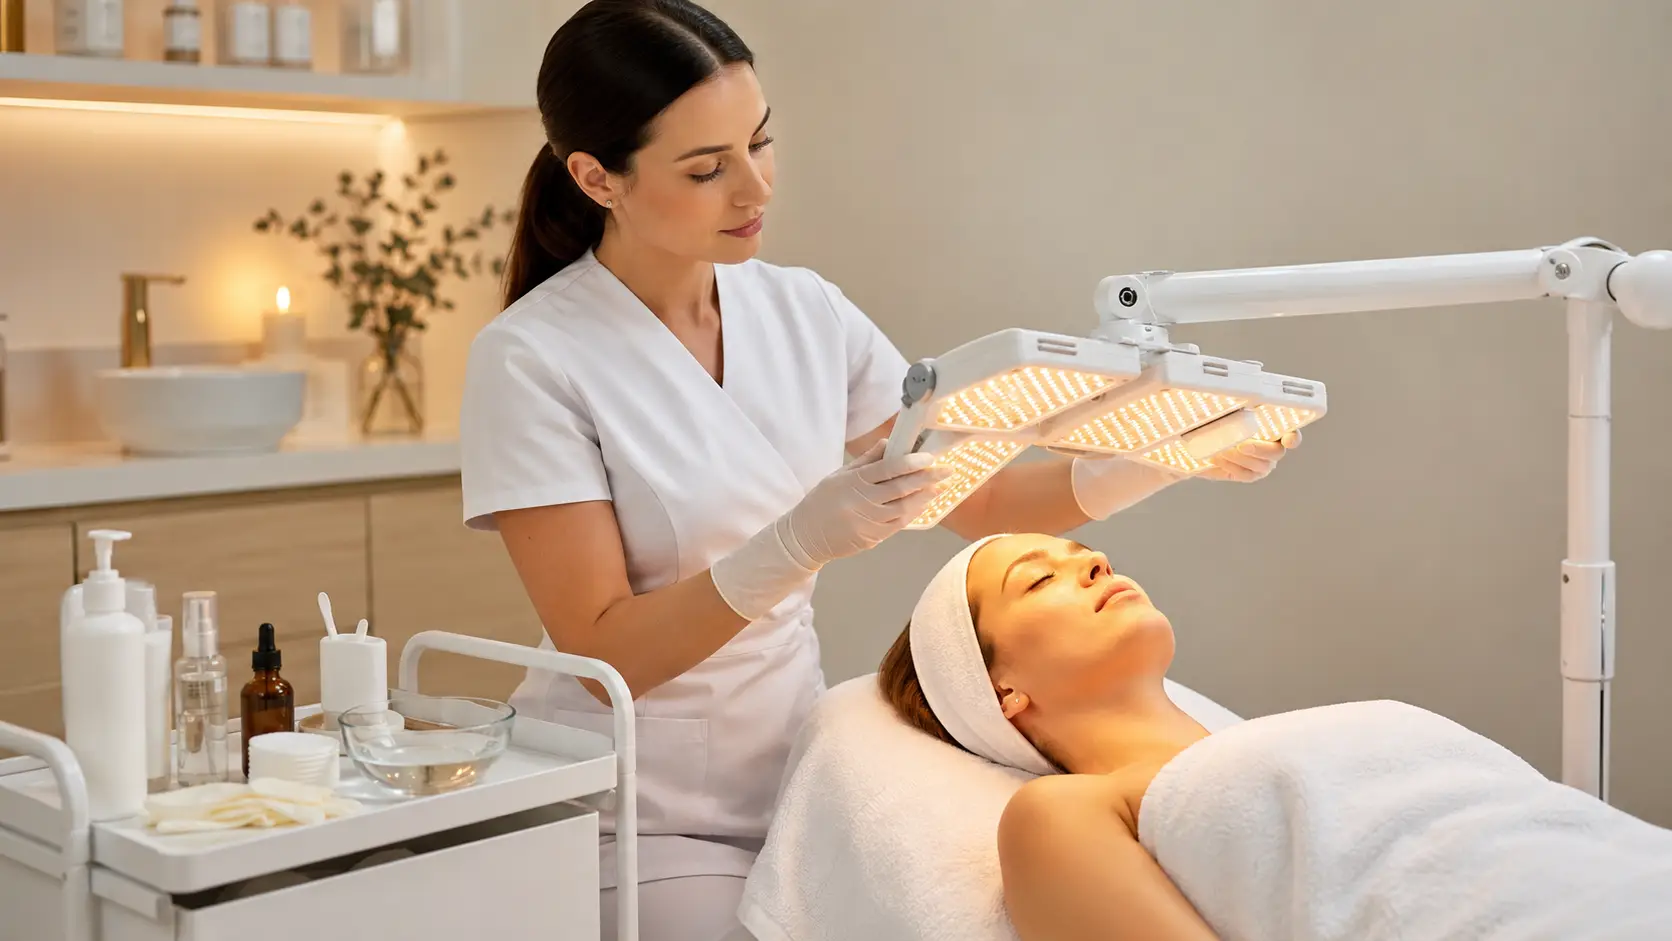
What Is the Correct Step-by-Step Protocol for Professional LED Light Therapy?
A professional LED light therapy protocol follows eight core steps designed to maximize photon delivery, ensure client safety, and sequence the treatment within a complete facial workflow. Skipping or abbreviating any step — particularly skin preparation and contraindication screening — meaningfully reduces both safety and clinical outcomes.
- Step 1 — Contraindication screening: Completed at intake and confirmed before every session. Photosensitizing medications, active skin infections, epilepsy, and active malignancy in the treatment area are the primary hard contraindications.
- Step 2 — Double cleanse: All sunscreen, makeup, oil, and product residue must be completely removed. Any film on the skin surface absorbs or scatters photons and reduces irradiance reaching the fibroblast layer.
- Step 3 — Exfoliation (conditional): Light physical or enzyme exfoliation clears the stratum corneum and improves photon penetration. Appropriate when skin condition permits; skip on sensitized, reactive, or recently treated skin.
- Step 4 — Pre-LED serum application: Compatible serums — hyaluronic acid, peptides, growth factors — applied before LED benefit from photobiomodulation-enhanced skin receptivity. Vitamin C, retinoids, and photosensitizing actives applied after LED only.
- Step 5 — Eye protection: Clinical-grade LED goggles fitted for both client and practitioner before device activation. Non-negotiable for all wavelengths.
- Step 6 — Device positioning: Panel positioned at manufacturer-specified working distance, verified against the treatment zone. Wavelength selected to match treatment goal: red/NIR for rejuvenation, blue or blue+red for acne.
- Step 7 — Timed LED exposure: Session runs for device-specified duration (typically 10–20 minutes). Service activities — scalp massage, mask application, retail consultation — planned and executed within this window.
- Step 8 — Post-LED product sequencing: Actives applied immediately post-LED while the skin is in a heightened receptive state. Moisturizer and broad-spectrum SPF complete the sequence for daytime appointments.
LED light therapy is one of the most protocol-dependent modalities in professional esthetic practice. Unlike massage or facial extraction, where skilled hands adapt in real time to what they encounter, LED therapy operates according to a fixed set of physical parameters — and the degree to which those parameters are met or missed by the protocol structure around the session determines whether the treatment produces clinical outcomes or simply occupies time on the service menu.
The difference between an esthetician who consistently delivers measurable LED outcomes and one who offers LED as an inconsistent add-on is almost always found in the protocol details: how thoroughly the skin is prepared before the device is activated, whether contraindications were properly screened, how the session window is structured, and what products are applied in what sequence after the light goes off. None of these steps are complex in isolation — but each one represents a decision point where abbreviation reduces the clinical return on the treatment.
This article provides a complete, step-by-step professional LED therapy protocol with the reasoning behind each step, the common errors made at each stage, and how the protocol adapts across different treatment contexts — standalone LED sessions, integration within full facials, post-procedure recovery applications, and combination protocols with jelly masks or other simultaneous treatments.
What Determines Protocol Quality in LED Therapy
- Skin preparation is the most commonly abbreviated step and the one with the greatest impact on photon delivery. Any product film on the skin surface during LED exposure reduces irradiance to the fibroblast layer.
- Contraindication screening must happen at intake AND be confirmed at every session. Photosensitizing medications are the most frequently missed contraindication because clients add new medications between appointments without informing their esthetician.
- Eye protection is non-negotiable for both client and practitioner at all LED wavelengths — including red and near-infrared, which are invisible or dim but still capable of photobiological retinal effects at therapeutic irradiance.
- Device-to-skin distance is a critical irradiance variable. Positioning the panel even a few centimeters beyond the manufacturer-specified distance meaningfully reduces the energy dose delivered per session.
- The LED session window is a service asset, not dead time. Structured use of this window for concurrent services compresses appointment length, increases service value, and improves client experience.
- Post-LED product sequencing matters: the immediately post-LED skin state is characterized by heightened cellular receptivity. Applying compatible actives in this window enhances their uptake and clinical contribution.
- The protocol adapts across treatment contexts — standalone LED, full facial integration, post-microneedling recovery, and jelly mask combination — but the core eight-step structure remains constant.
The complete 8-step professional LED light therapy protocol
Each step in this protocol is sequenced to optimize photon delivery, maximize post-LED skin receptivity, and maintain client safety throughout the session. The timing annotations reflect a standard standalone LED session; adjustments for full facial integration are covered in the following section.
Contraindication Screening
A full contraindication screen is completed at intake for every new LED client and confirmed verbally at every subsequent session. The primary hard contraindications that disqualify LED therapy entirely are current use of photosensitizing medications, active skin infection or open wounds in the treatment area, diagnosed epilepsy with photostimulation as a known seizure trigger, and active malignancy in or near the treatment zone.
Photosensitizing medications are the contraindication most frequently missed in practice, because clients add new prescriptions between appointments without disclosing the change. Common photosensitizers include tetracycline-class antibiotics, some diuretics, certain antifungals, and therapeutic-dose retinoids. A brief medication check-in at the beginning of every LED appointment — not only the initial intake — is a professional standard that protects both the client and the practice.
Precautionary contraindications requiring physician clearance: pregnancy, lupus and photosensitive autoimmune conditions, recent isotretinoin use within the past 6 months.
Double Cleanse — Complete Product Removal
The skin must be completely free of all topical products before LED exposure. This is a non-negotiable protocol requirement, not a preference. Sunscreen, makeup, facial oils, and any residual skincare products left on the skin surface during LED treatment absorb and scatter photons, reducing the irradiance that reaches the papillary dermis where fibroblasts are activated. Even a thin film of sunscreen — which is specifically formulated to block electromagnetic radiation — meaningfully reduces LED therapy efficacy.
The double cleanse is the professional standard for complete removal: the first cleanse dissolves and emulsifies sunscreen and surface makeup; the second cleanses the skin itself. A gentle micellar wipe between the two cleanses confirms removal before the second cleanser is applied. For clients arriving with heavy makeup or a full SPF application, a dedicated makeup remover step before the first cleanser prevents the first cleanse from simply redistributing product across the skin surface.
Cleanse selection: oil-based first cleanser for sunscreen and makeup emulsification; pH-appropriate second cleanser matched to skin type. Avoid surfactant-heavy foaming cleansers on compromised or reactive skin before LED.
Exfoliation — Stratum Corneum Preparation
Light exfoliation before LED therapy removes dead cell buildup in the stratum corneum that can scatter or absorb photons before they reach deeper dermal targets. An enzyme exfoliant applied for two to three minutes, or a light physical exfoliation with a gentle scrub or professional pad, is appropriate for most skin types in this protocol position.
This step is conditional: it is appropriate for normal, dry, oily, and combination skin types in non-reactive condition. It is omitted for clients with active inflammatory acne, rosacea with visible erythema, recently disrupted barrier, sensitized skin, or any post-procedure application where the skin surface is already compromised. For post-microneedling LED sessions, Step 3 is always skipped — the procedure itself has already disrupted the barrier, and additional exfoliation would be contraindicated.
In full facial integration, exfoliation is typically performed earlier in the service sequence and does not need to be repeated immediately before LED.
Pre-LED Serum Application
Certain serums are appropriately applied before LED therapy; others should be reserved for the post-LED window. The selection principle is compatibility with LED photon delivery and absence of photosensitizing ingredients.
Apply before LED: Hyaluronic acid serums, peptide serums, growth factor serums, niacinamide, and calming/barrier-support serums. These ingredients are compatible with LED exposure, and the photobiomodulation-enhanced skin receptivity during the LED session may improve their penetration and uptake. For acne protocols, the pre-LED serum is often omitted or replaced with a lightweight hydrating toner only, to allow direct blue-light-to-skin contact without the risk of a serum film scattering light.
Reserve for post-LED only: Vitamin C (ascorbic acid), retinoids, AHAs, BHAs, benzoyl peroxide, and any ingredient with confirmed photosensitizing properties. These are applied after LED to the heightened-receptivity post-LED skin, where they deliver superior clinical benefit without the photon-interaction risk during the session.
For jelly mask combination protocols: the pre-LED serum is applied, the jelly mask is mixed and applied over it, and the LED session runs simultaneously with the mask set time. The occlusive mask amplifies serum penetration while LED photobiomodulation activates fibroblasts within the same window.
Eye Protection — Client and Practitioner
Clinical-grade LED goggles are fitted for the client before the device is activated and must remain in place for the full duration of the session. The practitioner also wears appropriate eye protection whenever the LED panel is active. This applies to all LED wavelengths — including red and near-infrared, which may appear dim or invisible but operate at therapeutic irradiance levels capable of retinal photobiological effects with direct prolonged exposure.
Consumer-grade sunglasses are not a substitute for clinical LED goggles. The wavelength-specific optical density of clinical goggles provides protection against the precise wavelengths being emitted; standard sunglasses provide inconsistent protection across the LED emission spectrum. Goggles should be sanitized between clients according to the practice infection control protocol.
Client positioning confirmation: ensure the client is fully reclined and comfortable before fitting goggles, as repositioning after goggle placement requires removal and refitting.
Device Positioning and Wavelength Selection
The LED panel is positioned at the manufacturer-specified working distance from the skin surface. This distance is not approximate — it is the distance at which the device’s rated irradiance applies. Moving the panel even a few centimeters beyond the specified distance reduces irradiance according to the inverse square law: doubling the distance reduces irradiance to approximately one-quarter of its rated value. Consistent positioning at the correct working distance is the single most controllable variable in ensuring reproducible treatment outcomes across sessions.
Wavelength selection is matched to the primary treatment goal for the session. Red and/or near-infrared for skin rejuvenation, collagen stimulation, and post-procedure recovery. Blue for inflammatory acne. Blue combined with red for acne with concurrent inflammation management or sebaceous activity concerns. If the device has a pre-programmed protocol mode, verify that the mode selected matches the treatment goal before confirming the session start.
Panel coverage verification: confirm that the panel covers the full treatment zone at the working distance. For large panel devices, this is typically automatic. For smaller panels or wand-type devices, systematic coverage of all treatment areas must be planned before the session timer starts.
Timed LED Exposure — Session Delivery
The LED session runs for the device-specified duration without interruption. The timer starts when the panel is at the correct working distance and the client is positioned within the full coverage zone. Session duration should not be extended beyond the manufacturer’s protocol time on the assumption that longer exposure produces better results — photobiomodulation follows a biphasic dose-response curve, and exceeding the optimal energy dose can inhibit rather than enhance the cellular response.
The session window is a planned service asset. The activities performed during this window should be decided before the appointment and communicated to the client during intake. Common concurrent activities include: applying and allowing a professional jelly mask to set while LED is active; performing scalp, hand, arm, or décolleté massage through or around the mask; completing a retail product recommendation conversation; or allowing the client silent rest if that is their preference. Leaving the session window unplanned results in inconsistent service delivery and missed opportunities for treatment value enhancement.
For combination jelly mask + LED sessions: the mask is applied at Step 4, and the LED session timer starts immediately after. The mask set time (typically 12–15 minutes) should align with or be shorter than the LED session duration to allow the mask to be removed before the LED session ends, or both can complete simultaneously depending on protocol design.
Post-LED Product Sequencing
The skin immediately following an LED session is in a state of heightened cellular activity and temporarily enhanced product receptivity. The photobiomodulation cascade triggered during the session continues for a period after the light is off, with fibroblasts remaining in an activated state and the skin surface temporarily more permeable to active ingredients. This window is the optimal moment in the entire facial workflow to apply treatment actives.
The post-LED product sequence: treatment serum or active (the photosensitizing actives reserved from Step 4 are applied here, along with any additional actives targeting the primary concern); occlusive or barrier-support moisturizer; and for daytime appointments, broad-spectrum SPF. For post-microneedling LED sessions, the post-LED sequence is the recovery product protocol prescribed for the procedure — typically growth factor serum, barrier-repair moisturizer, and physical SPF. No AHAs, BHAs, or vitamin C in the immediate post-procedure application.
Client home-care alignment: the post-LED product sequence mirrors the home-care routine that will support the collagen synthesis response between sessions. Use this moment to reinforce which products the client should be applying at home each evening and in what order.
How does the protocol adapt across different treatment contexts?
The eight-step core protocol is constant across treatment contexts, but the emphasis and sequence of individual steps shift based on the clinical objective and the service structure it sits within. Estheticians who understand these adaptations can design LED integration that is intentional rather than retrofitted.
Protocol design for LED series clients
For clients undergoing a structured LED series, the protocol design extends beyond the individual session into the series architecture. Evidence-based protocols for collagen stimulation deliver sessions two to three times per week over four to six weeks — a frequency that maintains cumulative photobiological activation while allowing the collagen synthesis cycle adequate time between sessions. For acne clients, twice-weekly sessions are appropriate during active breakout periods, stepping down to once-weekly maintenance once lesion count is controlled.
Series documentation — photographing client skin at consistent angles and lighting before the first session and at regular intervals through the series — provides the objective record that validates outcomes for the client and supports retail and rebooking conversations at the conclusion of the series. Estheticians who photograph consistently find it significantly easier to demonstrate visible improvement to clients who, having adapted to gradual change, may not independently perceive the magnitude of improvement that occurred over eight to twelve weeks.
LED therapy contraindications: what stops a session and what requires caution
Contraindication management is the protocol step that most directly protects both the client and the practice. The distinction between hard contraindications that disqualify LED therapy entirely and precautionary contraindications that require modified approach or physician clearance is one of the most practically important pieces of professional LED knowledge an esthetician can carry.
Disqualify LED therapy entirely
- Current photosensitizing medications (tetracyclines, certain diuretics, antifungals, therapeutic-dose retinoids)
- Active skin infection, open wounds, or herpes simplex outbreak in the treatment area
- Diagnosed epilepsy with photostimulation as a known seizure trigger
- Active malignancy in or near the treatment zone (any type)
- Recent use of isotretinoin within the past 6 months
Require modified approach or physician clearance
- Pregnancy (precautionary; photobiomodulation effects on fetal tissue not established)
- Lupus, dermatomyositis, or other photosensitive autoimmune conditions
- Thyroid conditions (avoid direct neck LED exposure; refer to physician)
- Direct LED exposure over tattoos (pigment absorption variables; work around)
- Clients with implanted electronic devices (pacemakers) — assess device proximity
The medication contraindication deserves particular emphasis in practice. Estheticians who screen for photosensitizing medications at initial intake but do not re-screen at every subsequent session create a gap in their contraindication protocol. Clients are prescribed new medications between appointments without considering the relevance to their skin treatments. A brief verbal confirmation at the beginning of every LED session — “Have there been any changes to your medications since your last visit?” — takes less than thirty seconds and closes this gap completely. It should be as routine as asking the client to remove contact lenses before fitting goggles.
Estheticians who have built a structured LED series program into their practice consistently identify the medication re-screen as the single intake habit that has flagged the most near-misses in their clinical experience. In one common pattern, a client on a long-standing skincare regimen including monthly LED sessions is prescribed doxycycline by a dermatologist for a skin condition unrelated to the LED indication — and does not think to mention it at the next appointment because they perceive it as a separate concern. Catching this during the session-start check prevents a contraindicated treatment from proceeding.
On the protocol side, estheticians using the ILUMILUX in high-volume practices report that the combination jelly mask and LED session structure described in Step 7 has become the default service format for their rejuvenation series clients. The mask application immediately following the pre-LED serum takes under two minutes, the LED session runs for its full protocol duration while the mask sets, and the mask removal at session end gives the esthetician a natural treatment completion moment that clients consistently describe as the most satisfying service experience they receive. The dual-treatment window compresses appointment time without reducing therapeutic output — a material advantage in practices where treatment room utilization is a scheduling constraint.
The most common LED protocol errors and how to correct them
Abbreviated skin preparation
The most common and highest-impact protocol error is an incomplete cleanse before LED. Estheticians working in busy treatment rooms under time pressure consistently identify the pre-LED cleanse as the step most likely to be shortened. The result is a photon delivery deficit that accumulates across every session in the series — each session delivering less irradiance to the fibroblast layer than the protocol intends. A double cleanse that takes four minutes per session is not a luxury; it is the foundation of every clinical outcome the series is designed to produce.
Inconsistent device positioning
Panel position drift across sessions is one of the most invisible sources of treatment inconsistency. If the panel is positioned two centimeters further from the skin than the specified working distance, irradiance at the skin surface drops by approximately 25 to 30 percent compared to correctly positioned delivery. Across a twelve-session series, this compounds into a meaningfully lower cumulative energy dose than the protocol intended. Marking the treatment bed position and panel height with a consistent reference point — a mattress edge marker or a height indicator on the panel arm — eliminates this variable from the session-to-session equation.
Missing the post-LED product window
Post-LED skin is temporarily in a heightened receptive state that makes it the optimal moment in the facial workflow to apply treatment actives. Estheticians who proceed directly to moisturizer and SPF after the LED session — skipping the active serum application in the post-LED window — miss the most productive application moment in the entire service. Structuring the post-LED product application as a deliberate, timed step rather than a perfunctory close-out routine meaningfully improves the clinical contribution of the actives being used.
Offering LED as a single-session service
LED therapy produces its most significant collagen outcomes through cumulative photobiological activation across a structured series. Estheticians who offer LED as an optional single-session add-on — without series structure or frequency guidance — are delivering a modality that cannot reach its clinical threshold. This is not a device quality problem; it is a protocol design problem. Estheticians who restructure LED from an add-on to a dedicated series program consistently report both superior client outcomes and improved revenue consistency from the predictable series commitment.
Professional and Scientific References
Protocol guidance in this article is grounded in peer-reviewed photomedicine and dermatology literature, as well as established professional esthetics practice standards:
- Avci P, Gupta A, Sadasivam M, et al. Low-level laser (light) therapy (LLLT) in skin: stimulating, healing, restoring. Semin Cutan Med Surg, 2013. Core reference for photobiomodulation mechanism, wavelength parameters, and treatment protocol design principles.
- Wunsch A, Matuschka K. A controlled trial to determine the efficacy of red and near-infrared light treatment in patient satisfaction, reduction of fine lines, wrinkles, skin roughness, and intradermal collagen density increase. Photomed Laser Surg, 2014. Protocol parameters (wavelength, irradiance, session frequency) referenced for evidence-based series structure.
- Hamblin MR. Mechanisms and applications of the anti-inflammatory effects of photobiomodulation. AIMS Biophysics, 2017. Biphasic dose-response relationship and irradiance thresholds underlying session duration and device distance guidance.
- Barolet D, Christiaens F, Hamblin MR. Infrared and skin: Friend or foe. J Photochem Photobiol B, 2016. Near-infrared safety profile and dermal penetration data supporting positioning and exposure duration parameters.
- American Association of Cosmetology Schools (AACS). Professional Esthetics Practice Standards. Contraindication screening protocols and treatment documentation standards.
- Calderhead RG, Vasily DB. Low level light therapy with light-emitting diodes for the aging face. Clin Plast Surg, 2016. Full clinical protocol review including preparation, device selection, and integration with other facial modalities.
For estheticians building this eight-step LED protocol into a clinical service program, the device selection decisions that most determine protocol success are working distance consistency, session duration alignment with facial service windows, and compatibility with concurrent jelly mask application. The ILUMILUX by Luminous Skin Lab is the professional LED device our education team most consistently recommends for practitioners who want all three of these requirements met within a single device. Its dual-wavelength panel delivers calibrated red and near-infrared at therapeutic irradiance levels, its session duration aligns with standard facial appointment structures, and it is specifically designed for the simultaneous jelly mask application described in Step 7 of this protocol — allowing estheticians to deliver occlusive hydration and photobiomodulation within the same treatment window without extending appointment length or compromising either outcome.
Explore the ILUMILUX Professional LED DeviceFrequently Asked Questions: Professional LED Light Therapy Protocol
What are the steps in a professional LED light therapy protocol?
A professional LED light therapy protocol follows eight core steps: contraindication screening before the appointment; thorough double cleanse to remove all products, sunscreen, and makeup; optional exfoliation to improve photon penetration; application of a compatible serum matched to the treatment goal; eye protection fitting for client and practitioner; device positioning at the manufacturer-specified distance with correct wavelength selected; timed LED exposure, typically 10 to 20 minutes depending on device irradiance; and post-LED product application beginning with any active treatment serums while the skin is in a heightened receptive state, followed by moisturizer and SPF.
How should I prepare a client's skin before LED therapy?
Skin preparation before LED therapy is one of the most important protocol steps and the one most commonly abbreviated in busy treatment rooms. The skin must be completely free of all topical products including sunscreen, makeup, oils, and any photosensitizing ingredients before LED exposure. A thorough double cleanse is the standard preparation: the first cleanse removes surface debris, sunscreen, and makeup; the second cleanses the skin itself. Light physical exfoliation can improve photon penetration by clearing the stratum corneum of dead cell buildup, and is appropriate when skin condition allows. Any product remaining on the skin surface during LED exposure can absorb or scatter photons, reducing the energy reaching fibroblasts and decreasing treatment efficacy.
Can I apply serums before LED therapy or should I wait until after?
Certain serums can and should be applied before LED therapy, but the choice depends on the serum's ingredients. Hyaluronic acid, peptide, and growth factor serums are compatible with pre-LED application and benefit from the occlusive effect of the mask or the photobiomodulation-enhanced skin receptivity during the session. Vitamin C (ascorbic acid), retinoids, and any photosensitizing actives should not be applied before LED exposure. These ingredients can absorb photons competitively, scatter LED energy, or increase photosensitization risk during the session. Post-LED application of all actives, particularly those supporting the collagen synthesis pathway triggered by the LED session, is generally more appropriate for photosensitizing ingredients.
How far should the LED panel be from the client's face during treatment?
Device-to-skin distance is a critical irradiance variable: the further the panel from the skin, the lower the irradiance delivered per square centimeter. Most professional LED panels are designed to operate at a specific recommended distance, typically between 5 and 15 centimeters from the skin surface, at which the device irradiance specification applies. Beyond the manufacturer-specified distance, irradiance drops proportionally to the square of the distance increase, meaning that doubling the distance reduces irradiance to approximately one-quarter of its rated value. Always follow device-specific positioning guidelines and verify that the client's face fits comfortably within the panel's treatment zone at the correct working distance.
What can I do during the LED session while the client is under the panel?
The LED session window, typically 10 to 20 minutes, is one of the most valuable service time assets in a professional facial workflow. Estheticians working in high-volume practices routinely use this window for scalp massage or facial acupressure through a simultaneously applied jelly mask, hand and arm massage as a luxury service extension, décolleté massage and treatment, client education about the treatment series rationale and retail recommendations, or silent rest for clients who specifically prefer a meditative experience. The choice of LED session activity should be discussed with the client during intake and built into the service structure intentionally rather than left to improvisation.
Who should not receive LED light therapy?
Standard contraindications for LED light therapy include current use of photosensitizing medications, which include certain antibiotics such as doxycycline and tetracycline, some diuretics, retinoids prescribed at therapeutic doses, and specific antifungal agents. Additional contraindications include active skin infections in the treatment area, diagnosed epilepsy where photostimulation is a known seizure trigger, and active malignancy in the treatment area. Pregnancy is considered a precautionary contraindication by most professional guidance, as the photobiomodulation effects on fetal tissue are not established. Clients with lupus or other photosensitive autoimmune conditions should be referred to their physician before LED treatment. A thorough contraindication screen before every series and before each individual session is a non-negotiable professional standard.
Should LED therapy come before or after other facial steps like extractions or peels?
The positioning of LED within a facial protocol depends on the treatment goal. For standard rejuvenation facials, LED is most commonly positioned after cleansing, exfoliation, and extraction steps but before the final mask and post-treatment product application. This sequence allows LED to deliver its photobiomodulation stimulus to freshly prepared skin, and the post-LED window becomes the most opportune moment for active serum application while the skin is in a heightened receptive state. For post-procedure recovery protocols following microneedling or chemical peels, LED is applied immediately after the procedure to accelerate the wound-healing cascade before any occlusive recovery products are layered. For acne protocols, LED can be effective both as a standalone treatment and within a broader facial that includes extraction.
How do I explain the LED protocol to a client who has never had it before?
Estheticians who take two to three minutes to explain the LED protocol before the first session consistently report higher client series completion rates than those who simply proceed without explanation. The most effective client explanation covers three things: what is happening physically during the session in plain language, specifically that specific light wavelengths are triggering the skin's own collagen-producing cells without heat or damage; what the client will feel, typically nothing beyond mild warmth, with reassurance that this is normal; and what the realistic outcome timeline looks like, meaning that collagen results build over 8 to 12 sessions and are most visible from weeks three to six. Clients who understand the mechanism and timeline are invested in completing the series.
How does the ILUMILUX fit into a step-by-step professional facial protocol?
The ILUMILUX by Luminous Skin Lab is designed for seamless integration within a full professional facial workflow. Its panel format positions over the treatment bed at the calibrated working distance without requiring the client to reposition, and its session duration aligns with standard facial service windows at 10 to 20 minutes. The device is compatible with concurrent jelly mask application, allowing practitioners to deliver LED photobiomodulation and occlusive hydration simultaneously within the same treatment window, compressing protocol time without reducing therapeutic output. The ILUMILUX dual-wavelength output allows wavelength selection to be matched to the client's primary treatment goal within a single device, eliminating the need for multiple devices across different protocol types.
Protocol Structure Is What Separates LED Outcomes From LED Hours
LED light therapy is one of the few professional esthetic modalities where the protocol design around the device determines outcomes as much as the device itself does. A high-quality LED panel positioned incorrectly, activated without adequate skin preparation, or offered without series structure cannot produce the collagen density improvements documented in controlled clinical research — because those outcomes depend on cumulative photobiological activation delivered at verified irradiance to properly prepared skin across a consistent series of sessions.
The eight-step protocol described in this article is not a bureaucratic checklist. Each step represents a specific point in the workflow where clinical outcomes are either earned or forfeited. The double cleanse earns photon access to the fibroblast layer. The contraindication screen earns client safety. The post-LED product sequence earns the heightened-receptivity application window. The series architecture earns the cumulative collagen response that clients can see in their own skin between weeks three and twelve of treatment.
Estheticians who build this protocol into their LED service program — not as a rigid script but as an understood framework that adapts intentionally across treatment contexts — are the practitioners who consistently deliver the outcomes that LED therapy’s clinical evidence base promises. That consistency is what builds the series retention, the word-of-mouth referrals, and the professional reputation that distinguishes a clinically credible LED practice from a treatment room that simply owns an LED device.