What Are the Infection Control Requirements for Professional Microneedling?
Professional microneedling infection control requires single-use disposable cartridges for every client without exception, thorough pre-treatment skin disinfection, nitrile gloves throughout the procedure, EPA-registered hospital-grade disinfection of all surfaces and equipment between clients, and a clean post-treatment wound care protocol using only fragrance-free, barrier-safe products on the treated skin. Because microneedling intentionally disrupts the skin barrier and may produce pinpoint bleeding, it carries blood-borne pathogen exposure risk and must be treated with the same level of infection control discipline applied to any invasive procedure.
- Single-use disposable needle cartridges are the universal standard — reuse between clients is never acceptable under any circumstances and constitutes a serious infection control violation with blood-borne pathogen implications.
- Pre-treatment skin disinfection requires full removal of makeup, sunscreen, and all topical products followed by 70% isopropyl alcohol application and full evaporation before the device contacts the skin.
- Nitrile gloves are non-negotiable for all microneedling procedures and must be changed if torn at any point during the treatment.
- Post-treatment skin remains in a heightened permeability and vulnerability state for 24 to 72 hours — infection control responsibility extends to homecare product guidance provided at client departure.
- Disposed cartridges must be treated as sharps waste and placed in a puncture-resistant container — standard trash disposal is not acceptable.
- Surface disinfection between clients must cover all contact surfaces including the pen body, treatment table, tray surfaces, and any device the esthetician touched during the procedure.
Microneedling is one of the most powerful treatments in the professional esthetician’s scope of practice — and one of the most infection-control-intensive. Unlike facial massage, chemical exfoliation, or even dermaplaning, microneedling deliberately creates controlled disruption of the skin barrier across the entire treatment zone. That disruption is precisely what makes it effective: the wound response it triggers initiates the collagen synthesis cascade and transient growth factor release that drive visible results. But those same open microchannels represent a direct portal for microbial entry.
The infection control discipline required for microneedling is not an optional professional enhancement — it is a foundational safety standard with legal, ethical, and clinical weight behind it. Every breach in protocol, from reusing a cartridge to applying a fragranced post-treatment product to skipping surface disinfection between clients, represents a potential adverse event waiting to occur. In a worst-case scenario, infection control failures in microneedling have resulted in bacterial infections, viral transmission, and permanent scarring.
This guide provides estheticians with a complete, operationally actionable infection control framework for microneedling — covering every phase of the client encounter from pre-treatment room preparation through post-treatment homecare guidance and room breakdown. Understanding not just what to do but why each step is required is what elevates protocol compliance from a rote checklist into genuine professional mastery.
What Every Esthetician Must Know About Microneedling Infection Control
- Microneedling creates intentional skin barrier disruption — this elevates its infection control requirements above most other esthetic treatments.
- Single-use cartridges are not a best practice suggestion — they are the non-negotiable universal standard with blood-borne pathogen implications.
- Pre-treatment skin disinfection must be thorough and complete, with alcohol fully evaporated before the device touches the skin.
- Nitrile gloves are required throughout every microneedling procedure; hand hygiene must be performed before gloving.
- Post-treatment skin permeability remains elevated for up to 72 hours — infection control responsibility does not end when the treatment ends.
- Only fragrance-free, sensitizer-free, barrier-safe products should contact treated skin immediately post-procedure.
- Used cartridges are sharps waste and must be disposed of in a puncture-resistant container — never in standard trash.
- Surface disinfection between clients must cover every surface touched during the treatment, including the pen body and adjustment collar.
- Documenting infection control compliance is as important as performing it — records protect both the client and the practitioner.
Why Microneedling Demands Its Own Infection Control Category
Most professional esthetic treatments operate on intact skin. Even treatments that cause temporary redness or sensitivity — chemical peels, dermaplaning, high-frequency treatments — generally do not create open portals through the skin barrier in the same way microneedling does. Understanding why microneedling sits in a different infection control category requires a clear picture of what the procedure actually creates on a tissue level.
What Happens to the Skin During Microneedling
Each needle pass across the skin surface creates thousands of microchannels penetrating through the epidermis and, depending on depth settings, into the papillary dermis. These channels are not microscopic scratches — they are intentional breaches of the skin’s primary barrier against microbial entry. At treatment depths of 0.5mm and above, the dermis is exposed. At 1.0mm and above, dermal capillaries may be perforated, producing the pinpoint bleeding that is a normal and expected finding at those depths.
This means that during and immediately following a microneedling treatment, the skin’s first line of defense against bacterial, viral, and fungal pathogens has been deliberately compromised across the entire treatment area. Any pathogen — including blood-borne pathogens such as hepatitis B, hepatitis C, and HIV — present on the skin surface, on treatment instruments, or on the esthetician’s hands has a direct path into the body that does not exist on intact skin.
Blood-Borne Pathogen Risk Is Real
The presence of pinpoint bleeding at therapeutic microneedling depths creates a clinical scenario in which blood-borne pathogen exposure is a genuine occupational and client safety risk, not a theoretical concern. Used needle cartridges are contaminated sharps. The esthetician’s gloved hands may contact blood during treatment. The pen body may contact blood-contaminated product that migrates back from the treatment zone. Every one of these exposure pathways requires the same disciplined response.
Microneedling needle cartridges are single-use disposable items without exception. There is no sterilization method available in a standard treatment room — including autoclave, UV, chemical disinfection, or alcohol soaking — that renders a used microneedling cartridge safe for reuse on a second client. Any practitioner who reuses cartridges between clients is engaged in a practice that constitutes a serious infection control violation and creates direct blood-borne pathogen transmission risk. This is not a matter of professional opinion or budget management — it is a non-negotiable safety standard.
The Infection Risk Window Extends Well Beyond Treatment Completion
Microneedling’s infection control requirements do not end when the device is put down. The microchannels created during treatment begin closing within minutes but the skin barrier remains compromised in terms of permeability and immune function for 24 to 72 hours post-treatment, depending on needle depth, pass density, and the individual client’s skin integrity. During this window, contaminated surfaces, improperly selected post-treatment products, environmental exposure, and client hygiene behaviors all carry infection risk that extends the esthetician’s infection control responsibility into homecare guidance.
Pre-Treatment Room Preparation and Surface Disinfection
Infection control for microneedling begins before the client enters the room. The treatment environment itself must meet a disinfection standard appropriate for a procedure that involves potential blood exposure — not merely the general-cleanliness standard sufficient for non-invasive facial services.
Treatment Table and Surface Standards
The treatment table must be covered with a clean, fresh barrier for each client. Disposable paper barriers are the professional standard for microneedling; reusable fabric covers require laundering at the correct cycle and temperature between every client. All frequently touched surfaces in the treatment area — the tray, the pen stand, the counter, the disposal container lid, any device controls — must be cleaned and disinfected with an EPA-registered hospital-grade disinfectant prior to each client setup. Allow the required contact time specified by the disinfectant manufacturer; wiping immediately after application does not achieve disinfection.
Setting Up a Clean Field
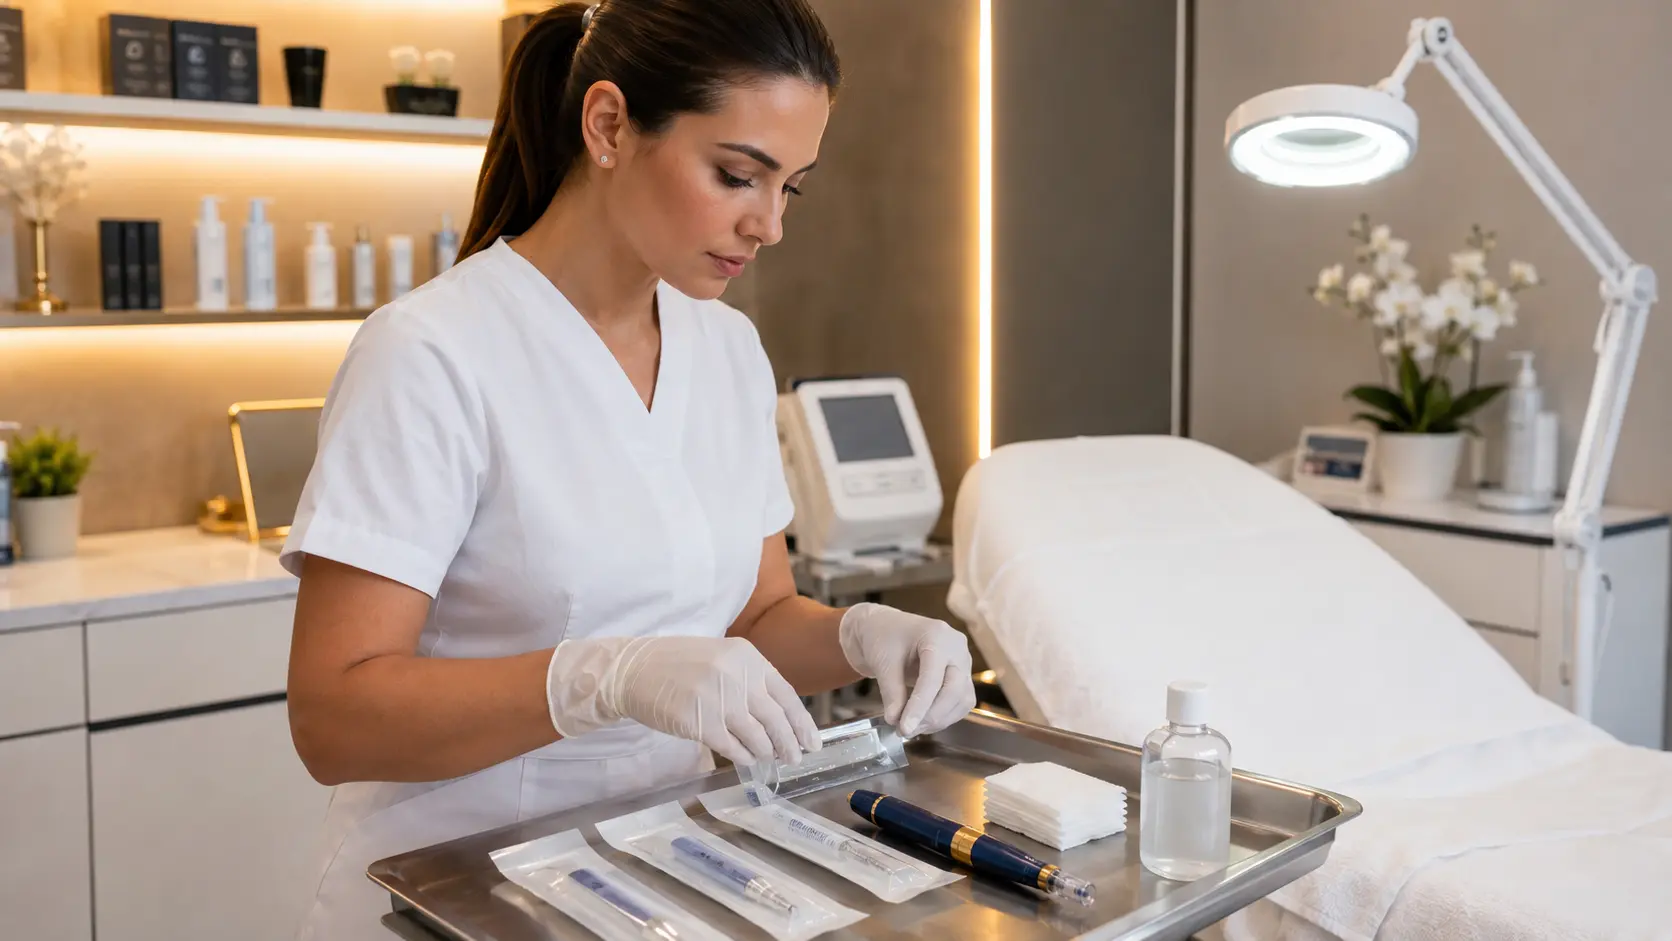
A clean treatment field means arranging all supplies needed for the treatment before gloving, so that once gloves are on and the client is on the table, the esthetician does not touch non-sterile surfaces to retrieve forgotten items. This includes pre-setting: the sealed, unopened cartridge in its packaging; sterile gauze; pre-measured skin disinfectant; any approved serum or hydration product for post-treatment application; the post-treatment mask if used; and the sharps disposal container within arm’s reach of the treatment position. Reaching across the treatment field after treatment has begun introduces contamination risk that clean-field setup prevents.
Personal Protective Equipment Setup
Nitrile gloves are required for all microneedling procedures. Hand hygiene — thorough washing with soap and water for a minimum of 20 seconds, or use of an alcohol-based hand rub with appropriate rub-in time — must be performed before donning gloves. Gloves that tear during treatment must be changed immediately, with hand hygiene performed before re-gloving if the situation permits. Some practitioners performing higher-depth treatments use double-gloving as a precautionary measure. Eye protection is recommended when performing microneedling at depths that routinely produce pinpoint bleeding, as blood-borne pathogen transmission risk includes mucosal membrane exposure through the eyes.
Pre-Treatment Skin Disinfection: Step-by-Step Protocol
The skin disinfection protocol performed immediately before microneedling is one of the most critical infection control steps in the entire procedure. Its purpose is to reduce the microbial load on the skin surface to the lowest achievable level before the needles create the pathway that would allow those microorganisms to enter the tissue.
- Full makeup and product removal. Remove all makeup, sunscreen, moisturizer, and any other topical product from the entire treatment zone. Use a professional micellar water or gentle oil-based cleanser, followed by a thorough double-cleanse with a professional fragrance-free cleanser appropriate for the client’s skin type. Any product residue remaining on the skin at the time of needling will be driven into the microchannels.
- Thorough cleanse and rinse. Ensure the cleanser is fully removed with warm water. Residual cleanser, surfactants, or product emulsifiers left on the skin surface represent unnecessary chemical exposure to post-treatment microchannels. Pat dry with a clean, disposable esthetic wipe or fresh towel.
- 70% isopropyl alcohol disinfection. Apply 70% isopropyl alcohol generously to sterile gauze and wipe across the entire treatment zone in a systematic, overlapping pattern. Ensure full coverage including the hairline border, lateral face, and ear-adjacent areas if those zones will be treated. Do not rush this step.
- Allow full alcohol evaporation — critical step. Wait until the alcohol has fully evaporated from the skin surface before applying any serum or beginning treatment. Alcohol on the skin at the moment of needling will be carried into the microchannels and may cause additional irritation. This typically requires 60 to 90 seconds of air-drying. Do not fan or blow on the skin to speed evaporation, as this introduces airborne contamination.
- Apply pre-treatment serum in clean-field conditions. If your protocol uses a serum applied before microneedling to facilitate transdermal delivery, apply it now using a clean applicator or your gloved fingertips with a fresh glove surface. Confirm the serum is approved for microneedling pre-application and contains no ingredients contraindicated for use on barrier-disrupted skin.
It is important for estheticians to understand the difference between skin disinfection and skin sterilization. Sterilization of the skin surface is not achievable or even desirable — the skin is a living organ with its own resident microbiome that contributes to barrier defense. The goal of pre-treatment skin disinfection is to reduce transient pathogenic microbial load to the lowest achievable level, not to create a sterile surgical field. This is why protocol consistency, product selection, and thorough technique matter more than the belief that any single disinfection step provides absolute protection.
Single-Use Cartridge Standards: What Every Esthetician Must Understand
The single-use cartridge standard is the most important infection control rule in microneedling, and it is also the standard most likely to be rationalized away under cost pressure or misinformation. A thorough understanding of why this standard is absolute — not just a regulatory formality — is essential for every practitioner.
Why Sterilization Does Not Solve the Cartridge Reuse Problem
Some practitioners mistakenly believe that soaking a used cartridge in alcohol, running it through a UV sterilizer, or placing it in a chemical sterilant renders it safe for reuse. None of these approaches is adequate for cartridge reuse for several compounding reasons. First, microneedling needle tips have microscopic surface features including burrs and micro-fractures that develop during use and that harbor biological material in areas that disinfectant cannot penetrate. Second, the interior of the cartridge body — the mechanism that drives the needles — cannot be effectively cleaned of blood and tissue debris. Third, the barrier created by the cartridge design between the needle mechanism and the pen body relies on an intact, unused device; a previously used cartridge may have compromised this barrier. The only safe cartridge is a factory-sealed, never-used, individually packaged disposable cartridge opened in the client’s presence.
How to Open and Handle Cartridges Correctly
Open the cartridge packaging at the bedside in the client’s presence immediately before use. Inspect the sealed packaging for integrity — any cartridge with a damaged seal, visible moisture inside the packaging, or damaged packaging should not be used. Attach the cartridge to the pen device without touching the needle end. Confirm the depth setting is correct before the device contacts the skin. Never place a used cartridge back on a surface where it could be confused with an unused one.
Cartridge Disposal as Sharps Waste
Used microneedling cartridges are sharps waste. They must be placed immediately after use into a puncture-resistant, closeable sharps disposal container, not into a standard waste bin. This protects the esthetician, the client, and downstream waste handlers from needle-stick injury and blood-borne pathogen exposure. Sharps containers must be disposed of according to your local jurisdiction’s medical waste requirements — check with your state board and local health authority for the applicable rules in your area.
The Complete Microneedling Infection Control Protocol: Phase by Phase
Professional infection control for microneedling spans three distinct operational phases: pre-treatment room preparation and client setup, intra-treatment sterility management, and post-treatment wound care and room breakdown. Practitioners who conceptualize infection control as a single-phase activity — typically limited to cartridge use — leave significant safety gaps in the other two phases.
Intra-Treatment Sterility: Managing the Active Procedure Phase
Once treatment has begun, the esthetician’s ability to maintain a sterile field depends heavily on the pre-treatment setup discipline described above. The intra-treatment phase introduces two infection control challenges that are specific to the active procedure: managing any pinpoint bleeding and maintaining glove integrity throughout a procedure that involves sustained contact with blood-contaminated serums and skin surfaces.
Managing Pinpoint Bleeding Correctly
At treatment depths of 0.75mm and above, pinpoint bleeding is a normal and expected intra-procedural finding. Its management must be clean, precise, and consistent. Use only sterile gauze — not standard facial tissue or cotton rounds — to blot bleeding points. Apply gentle pressure without wiping, as wiping disturbs the microchannels and spreads blood-contaminated serum across a larger skin surface. Any gauze that contacts blood is biohazardous waste and must be disposed of in an appropriate container, not in the open treatment room waste bin.
Practitioners should also be aware that serum pooling in areas of pinpoint bleeding can create a reservoir of blood-contaminated liquid on the skin surface. If the pen contacts this pooled serum and then travels to another zone, it carries contaminated material across the treatment field. Managing serum application volume in active bleeding zones — and pausing to blot before resuming — is an intra-treatment infection control practice that is not always covered in basic training.
The Pen Body Is Not Sterile
The pen body itself is not a sterile instrument. Its role in the procedure is to drive the needle cartridge, which creates a barrier between the pen mechanism and the treatment field. However, blood-contaminated serum can migrate back along the cartridge toward the pen collar during treatment. Handling the pen body with blood-contaminated gloves, then placing it on a surface, then picking it up again creates a contamination pathway that will transfer to the next client if the pen body is not disinfected between clients. Some estheticians wrap the pen body in a disposable barrier sleeve during treatment to reduce this risk.
Serum Selection During Active Treatment
The serums applied during or immediately following microneedling pass through barrier-disrupted skin with significantly greater penetration than they would on intact skin. Infection control implications of serum selection include not only ingredient safety for compromised skin — avoiding retinoids, strong antioxidants like ascorbic acid, and AHAs — but also contamination risk. Serums should be dispensed into a single-use container or onto a sterile gauze square before treatment begins, so that the original product container is never contacted by a blood-contaminated applicator. Double-dipping into a shared product container with a contaminated applicator is an infection control violation that can contaminate the entire container for future clients.
Post-Treatment Wound Care: The Infection Control Phase Most Estheticians Underestimate
The post-treatment phase of microneedling infection control encompasses two distinct responsibilities: what the esthetician applies to the client’s skin during the in-room recovery phase, and what guidance the esthetician provides to the client to protect their skin during the 24 to 72 hour barrier vulnerability window after they leave the treatment room.
What Belongs on Post-Microneedling Skin — And What Does Not
The criteria for post-treatment product selection are more restrictive than for any other phase of esthetic practice because the skin’s primary barrier against pathogen entry and chemical penetration has been deliberately compromised. Products appropriate for post-microneedling immediate application share several characteristics: they are fragrance-free, dye-free, and free of synthetic sensitizers; they contain no active ingredients that would be irritating on compromised skin; they support barrier recovery rather than actively challenging the skin with potent actives; and they have been verified for safety on barrier-disrupted skin specifically rather than just for general professional use.
Products Safe for Immediate Post-Microneedling Application
- Fragrance-free, sensitizer-free hydrating serums (hyaluronic acid, polyglutamic acid)
- Growth factor serums approved for post-needling use
- Peptide serums with clean ingredient profiles
- Fragrance-free, clean-label professional jelly masks for occlusive recovery
- Fragrance-free mineral SPF for departure protection
- Saline or sterile water for gentle surface rinsing if needed
Products That Must Never Contact Skin Immediately Post-Microneedling
- Any product containing synthetic fragrance or parfum
- Retinoids (retinol, retinoic acid, retinaldehyde)
- Vitamin C (ascorbic acid form) — can cause significant stinging and sensitization
- AHAs and BHAs (glycolic, lactic, salicylic acids)
- Benzoyl peroxide or other acne actives
- Alcohol-primary formulations as post-treatment products
The Occlusive Jelly Mask as Post-Treatment Infection Control Support
A well-formulated professional occlusive jelly mask applied immediately after microneedling serves a dual function that has both comfort and infection control dimensions. The occlusive layer created as the mask sets physically seals the treated skin surface, creating a temporary barrier that limits environmental contamination exposure during the initial microchannels-closing window. This is not a substitute for proper sterilization technique during the procedure itself, but it is a meaningful additional protection layer during the most vulnerable post-treatment minutes.
Beyond the physical occlusion benefit, formulations containing polyglutamic acid have been shown to upregulate hyaluronic acid synthase expression and strengthen stratum corneum components including filaggrin and involucrin — both of which are central to the skin’s barrier defense architecture. Supporting this barrier recovery pathway pharmacologically, through the choice of what is applied post-treatment, is a legitimate clinical consideration that intersects directly with infection control outcomes.
Estheticians who incorporate the Poly-Luronic™ Jelly Mask by Luminous Skin Lab into their post-microneedling protocols consistently describe a workflow where the mask is mixed and applied as the final in-room step before the client enters their recovery period. The typical application sequence runs as follows: immediately after the microneedling pass is complete and any serum residue has been gently blotted, a clean 2:1 powder-to-water ratio mix of the Poly-Luronic™ mask is applied in a full facial layer over the fragrance-free hyaluronic serum that was applied post-needling. The mask sets over the standard 12 to 15 minute window, during which most practitioners complete their documentation and room breakdown tasks around the client. The occlusive set layer seals the post-treatment skin surface through that initial recovery window, and practitioners consistently report that clients show noticeably reduced visible redness and describe immediate hydration comfort upon removal compared to recovery protocols that omit the occlusive mask step entirely.
From an infection control standpoint, the mask’s fragrance-free, clean-label formulation is specifically why it qualifies for post-microneedling use — the same occlusive format in a fragranced or sensitizer-containing formula would be contraindicated on freshly needled skin regardless of its hydration benefits.
Post-Treatment Homecare Infection Control Guidance
What happens to the client’s skin during the 24 to 72 hours after they leave your treatment room is outside your direct control — but it is not outside your professional responsibility. The barrier vulnerability window that follows microneedling means that the infection control guidance you provide at departure is a continuation of the clinical care you delivered in the room.
What Clients Must Know Before They Leave
Every microneedling client must receive clear, specific homecare instructions before departure. Verbal instructions alone are insufficient for this level of clinical guidance — written instructions reinforce compliance and serve as documentation evidence if adverse events occur. Essential homecare infection control guidance includes:
- Do not touch the treated skin with unwashed hands for at least 24 hours.
- Do not apply any products not approved by your esthetician during the 72-hour barrier recovery window.
- Do not use makeup on treated skin for a minimum of 24 hours, and confirm with your esthetician before resuming based on your specific treatment depth.
- Do not submerge the treated face in pool water, ocean water, lakes, or hot tubs for at least 72 hours.
- Do not expose the treated skin to steam, sauna, or excessive heat for at least 24 hours.
- Sleep on a clean pillowcase the night of and night after treatment.
- Contact your esthetician immediately if you observe any signs of possible infection: purulent discharge, increasing pain beyond 48 hours, spreading redness with defined borders, or fever.
- Apply only the approved fragrance-free SPF and moisturizer products to the treated area until cleared for full product resumption.
Recognizing and Responding to Post-Treatment Infection Signs
Estheticians must be able to distinguish normal post-microneedling responses from early infection warning signs, both to advise clients correctly and to respond appropriately if a client contacts them with concerns after treatment. Normal post-treatment responses include erythema (redness), warmth and mild swelling in the treated zone, pinpoint crusting at deeper channel sites over the first 24 to 48 hours, and mild skin tightness during barrier recovery. These are expected and resolve within the normal recovery window without intervention beyond proper homecare.
Signs that may indicate developing infection include purulent or yellow-green discharge from treated areas, pain that worsens rather than resolves after 48 hours, spreading redness with defined or advancing borders (suggesting bacterial spread), significant swelling that does not decrease after the first 24 hours, fever, or flu-like symptoms developing within days of treatment. Any client reporting these signs must be referred to a medical provider immediately, the incident must be documented thoroughly, and no further treatments should be scheduled until the situation is fully resolved and evaluated.
Room Breakdown, Disinfection, and Documentation After Microneedling
The room breakdown protocol following microneedling is as infection-control-intensive as the pre-treatment setup. A systematic breakdown approach ensures that no contamination persists into the next client’s treatment environment.
Surface and Equipment Disinfection Sequence
Remove the client’s treatment barrier and dispose of it. Remove gloves and perform hand hygiene before donning fresh gloves for the breakdown protocol. Using an EPA-registered hospital-grade disinfectant, systematically wipe all surfaces that were touched during the treatment: the pen body, the adjustable depth collar or wheel, the tray surface, the counter surface, any device controls touched, the table surface beneath the barrier, and the sharps container exterior. Allow the required contact time before wiping. Some disinfectants specify a wet contact time of 1 to 4 minutes; simply applying the disinfectant and immediately drying it does not achieve efficacy.
Biohazardous Waste Management
Any gauze, wipes, or materials that contacted blood during the treatment are biohazardous waste. Depending on your state and local regulations, biohazardous waste may require red-bag disposal separate from standard waste. Check with your local health authority and state board for the applicable requirements in your jurisdiction. The sharps container used for cartridge disposal must be sealed when it reaches the appropriate fill line — never overfilled — and disposed of per local medical waste regulations.
Documentation as Infection Control Evidence
Documentation of microneedling treatments should include not only the clinical protocol details — depth settings, passes, zones treated, serums used, post-treatment products applied, client response — but also infection control specifics: the cartridge brand and lot number, confirmation that a single-use cartridge was used, and any notable observations from the procedure. In the event of a future adverse event or complaint, this documentation is your professional evidence of standard-of-care compliance. Many estheticians also have clients sign a post-treatment acknowledgment confirming they received and understood their homecare instructions, which adds further documentation evidence of professional responsibility fulfillment.
Why Post-Treatment Barrier Recovery Matters for Infection Outcomes
Understanding the biology of what microneedling does to the skin barrier — and what supports its recovery — allows estheticians to make genuinely evidence-informed decisions about post-treatment protocols rather than simply following instructions without understanding the reason behind them.
What Happens to Barrier Function After Microneedling
Microneedling disrupts the stratum corneum — the outermost skin layer that serves as the primary physical barrier against microbial entry, transepidermal water loss, and chemical penetration. At treatment depths of 0.5mm and above, disruption extends through the epidermis into the dermis. Transepidermal water loss (TEWL) increases substantially immediately post-treatment, indicating a temporarily impaired barrier. The heightened permeability window that follows means both beneficial actives and harmful pathogens or sensitizers have significantly easier access to deeper tissue layers than on intact skin.
Recovery of barrier integrity depends on the skin’s own wound response mechanisms — including the re-synthesis of filaggrin, involucrin, and the ceramide-rich lamellar body secretions that reconstruct the stratum corneum. Research demonstrates that polyglutamic acid supports this recovery process by upregulating filaggrin and involucrin expression, stimulating natural moisturizing factor production (pyrrolidone carboxylic acid, lactic acid, urocanic acid), and enhancing aquaporin-3 water channel expression — all of which accelerate restoration of the skin’s primary defense architecture.
The infection control implication is direct: faster barrier recovery means a shorter window during which the skin is vulnerable to microbial entry. Supporting barrier recovery through appropriate post-treatment product selection is not purely a cosmetic consideration — it is a contribution to the infection safety outcome of the treatment.
Professional and Scientific References
The infection control standards and biological mechanisms referenced in this article draw from the following sources:
- CDC — Guidelines for Infection Control in Dental Health-Care Settings and analogous principles for dermal-penetrating esthetic procedures. Blood-borne pathogen standards: OSHA Bloodborne Pathogens Standard 29 CFR 1910.1030.
- EPA-registered hospital-grade disinfectant standards for clinical surface disinfection in skin care practice environments. EPA registration and contact time requirements per manufacturer labeling.
- Gamma-PGA skin barrier strengthening: upregulation of filaggrin, involucrin, aquaporin-3, and HAS-1/2/3 mRNA expression in reconstructed human skin. MDPI, 2024.
- Post-microneedling skin permeability and transepidermal water loss dynamics. Established literature on collagen induction therapy recovery physiology.
- ABCDE infection recognition framework adapted from wound care clinical practice for esthetic practitioner reference.
- Sharps disposal requirements: applicable OSHA standards and state-level medical waste disposal regulations (jurisdiction-specific; estheticians should verify local requirements).
For estheticians looking to complete their post-microneedling infection control protocol with a barrier recovery product that meets the strict fragrance-free, sensitizer-free standard required for post-procedure skin, the Poly-Luronic™ Jelly Mask by Luminous Skin Lab is the formulation our education team most frequently references for this application. Its proprietary PGA + HA dual-humectant system supports the biological barrier recovery mechanisms that reduce the post-treatment vulnerability window — while its clean-label, fragrance-free formulation ensures it meets the ingredient safety threshold for application on barrier-disrupted skin. The occlusive jelly mask format provides a physical surface seal during the initial post-treatment phase, adding a meaningful additional layer of environmental protection during the minutes immediately following needling when the microchannels are still open.
Explore the ILUMIPEN Professional Nano Infusion DeviceFrequently Asked Questions: Infection Control for Microneedling
Can microneedling cartridges be reused between clients?
No. Microneedling cartridges must never be reused between clients under any circumstances. Single-use disposable cartridges are the universal professional and regulatory standard because used needles carry blood-borne pathogen risk, cannot be adequately sterilized in a standard treatment room environment, and reuse constitutes a serious infection control violation. Each client requires a fresh, sterile, individually packaged cartridge opened in their presence.
What do you put on skin before microneedling to disinfect it?
The standard pre-microneedling skin disinfection protocol uses 70% isopropyl alcohol applied with sterile gauze to remove surface contamination, followed by a thorough cleanse with a professional gentle cleanser to remove all product residue, oils, and makeup. Alcohol should be allowed to fully evaporate before treatment begins, as residual alcohol on the skin during needling can cause additional irritation to the compromised barrier.
How do you sterilize a microneedling pen between clients?
The pen body itself does not require sterilization between clients when single-use disposable cartridges are used correctly, because the needle cartridge is the only component that contacts the client's skin directly. However, the pen body, any adjustable depth collar, and all surfaces the esthetician touches during treatment must be disinfected with an EPA-registered hospital-grade disinfectant between every client. The cartridge must be disposed of immediately after each treatment in a puncture-resistant sharps container or appropriate biohazard disposal system.
What should you not put on skin right after microneedling?
Immediately following microneedling, practitioners must avoid applying any product containing synthetic fragrance, alcohol as a primary ingredient, retinoids, vitamin C (ascorbic acid), AHAs, BHAs, benzoyl peroxide, or any strong active that would be irritating or inflammatory on compromised skin. Heightened post-treatment permeability means these ingredients penetrate more deeply and can cause significant sensitization, inflammation, or barrier damage.
How long does skin stay open after microneedling?
The microchannels created by microneedling begin closing within minutes of the treatment ending, but the skin barrier remains in a heightened permeability and vulnerability state for 24 to 72 hours post-treatment depending on depth, density, and the individual client's barrier integrity. During this window, infection control guidance for homecare is as important as in-treatment sterility protocols, and only barrier-safe, fragrance-free, non-sensitizing products should contact the skin.
What are the signs of infection after microneedling that estheticians should watch for?
Normal post-microneedling responses include erythema (redness), warmth, mild swelling, and pinpoint bleeding during treatment. Signs that may indicate infection developing after the session include persistent purulent discharge, increasing pain or heat beyond 48 hours, spreading redness with defined borders, fever, or swelling that worsens rather than resolves. Any client reporting these signs should be referred to a medical provider immediately and the incident documented thoroughly.
Do estheticians need to wear gloves for microneedling?
Yes. Nitrile gloves are required for all microneedling treatments without exception. Microneedling involves intentional disruption of the skin barrier and may produce pinpoint bleeding, creating direct exposure risk to blood-borne pathogens. Gloves must be changed if torn, must not be reused between clients, and hand hygiene with soap and water or an alcohol-based hand rub must be performed before gloving. Double-gloving is a recommended precaution in higher-depth treatments.
Why does post-microneedling infection control matter even after the treatment ends?
The elevated skin permeability and compromised barrier that follows microneedling means the infection risk does not end when the pen is put down. Contaminated surfaces, improperly disinfected equipment, and products applied post-treatment that contain potential pathogens or sensitizers all carry infection and adverse reaction risk during the barrier recovery window. Comprehensive infection control spans the entire client encounter including room breakdown, cartridge disposal, surface disinfection, and post-treatment homecare instructions.
How does a professional-grade barrier recovery mask support infection control after microneedling?
A fragrance-free, clean-label professional jelly mask applied immediately after microneedling supports infection control outcomes in two ways. First, the occlusive layer physically seals the treated skin surface against environmental contaminants during the initial barrier recovery window. Second, formulations containing polyglutamic acid and hyaluronic acid actively support the skin's own barrier rebuilding mechanisms by upregulating hyaluronic acid synthase and strengthening stratum corneum integrity — accelerating the restoration of the skin's primary defense against microbial entry. The Poly-Luronic™ Jelly Mask by Luminous Skin Lab is formulated specifically to meet the fragrance-free, sensitizer-free standard required for safe post-microneedling application.
Infection Control Is the Foundation That Makes Microneedling Safe
The effectiveness of microneedling as a treatment modality is inseparable from the infection control discipline with which it is delivered. The same mechanism that makes it work — intentional, controlled disruption of the skin barrier — is precisely what makes rigorous infection control non-negotiable rather than optional. A practitioner who understands why each infection control step exists, not just what that step is, is equipped to maintain that discipline consistently across every treatment rather than applying it selectively when it feels convenient.
The three-phase framework outlined in this guide — pre-treatment preparation, intra-treatment sterility management, and post-treatment wound care and breakdown — represents the complete infection control scope of a microneedling client encounter. Each phase carries equal weight. Mastering all three, understanding the biological rationale behind each, and maintaining that standard across every client interaction is what separates genuinely professional microneedling practice from technically skilled but unsafe delivery.
As the esthetic scope of practice for microneedling continues to evolve across states and jurisdictions, the infection control standard will only become more scrutinized, not less. Building a practice on a foundation of disciplined, evidence-informed infection control is not just a safety imperative — it is the professional standard that protects your clients, your license, and your reputation over the long term.