How Should a New Esthetician Organize Their Treatment Room?
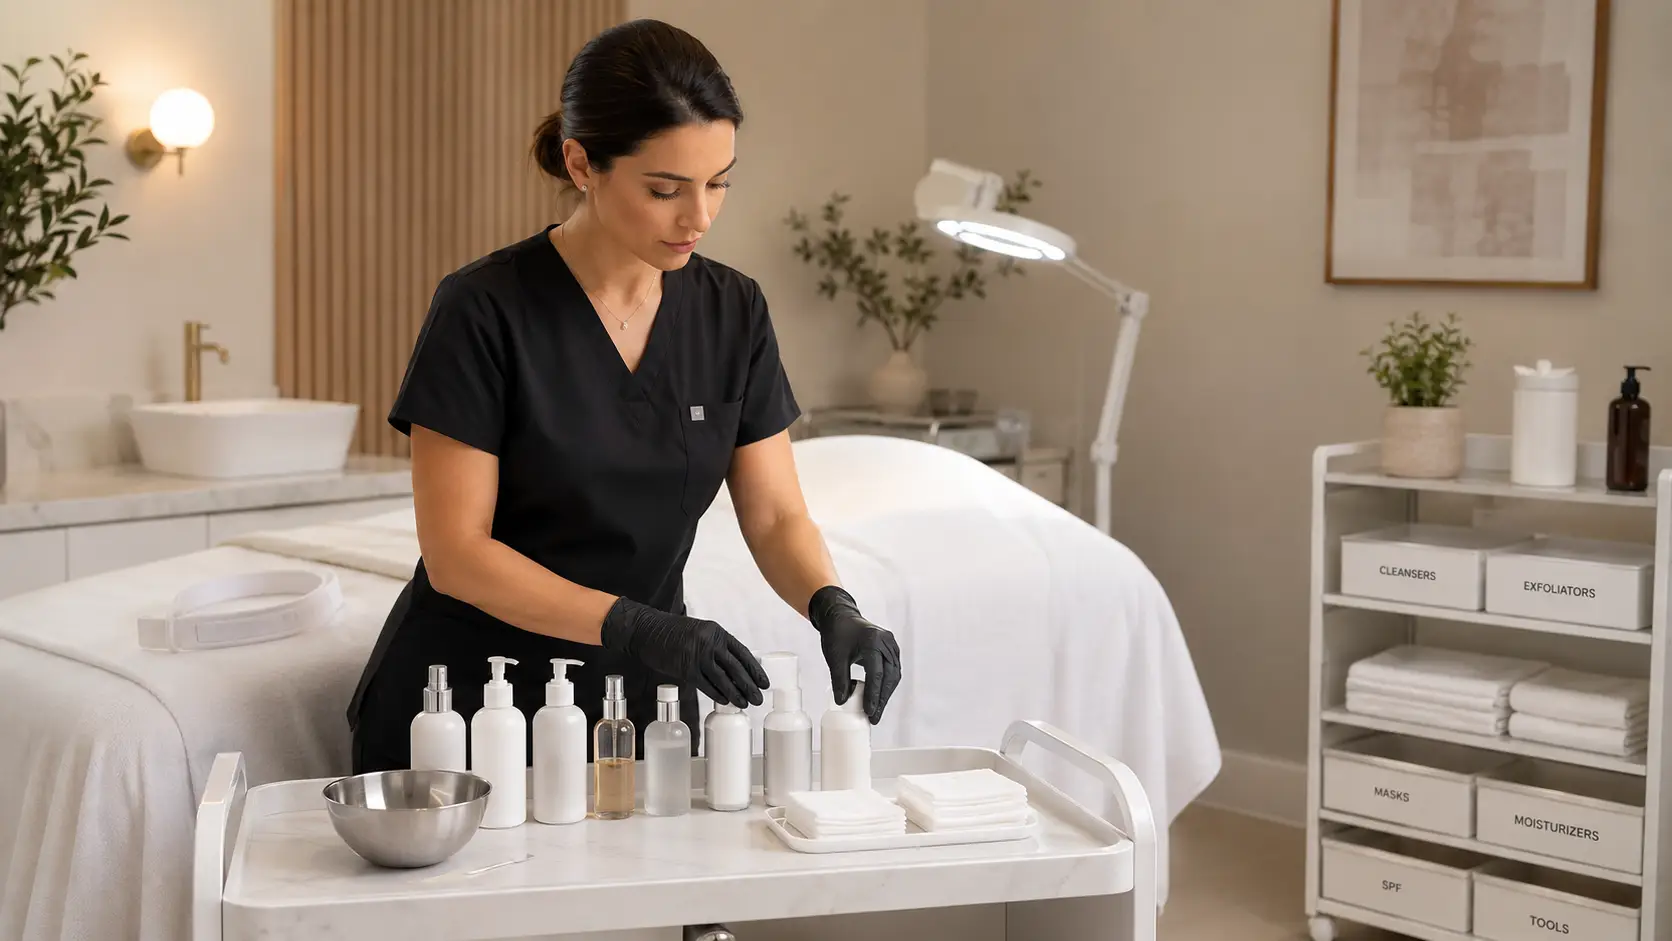
A new esthetician’s treatment room should be organized around three core functional zones — a clean supply zone, a sanitation zone, and a client comfort zone — with every supply staged in service-sequence order before the client arrives. Organization is not an aesthetic preference; it is a workflow system that frees your mental bandwidth for client care and technique execution during the critical early months of building a practice.
- Divide the room into three zones: clean supply, sanitation, and client comfort. These zones should never overlap and items should only travel in one direction — away from the client once used.
- Organize the back bar in left-to-right service sequence order: cleanse and prep on the left, treatment actives in the center, masks and finishing products on the right.
- Stage every supply needed for a service before the client enters the room — including pre-measured mask powders, pre-cut gauze, and pre-folded linens.
- Build a reset checklist and run it between every appointment rather than relying on memory during a compressed turnover window.
- Use labels on every container, shelf, and storage zone — including the inside of cabinets — for the first six to twelve months until placement is fully automatic.
- A rolling cart for active-service supplies and a fixed back bar for storage creates the most flexible and scalable organization system for beginners.
One of the things esthetician school does not fully prepare you for is how much mental bandwidth the physical environment of your treatment room consumes during your first months of practice. When you are simultaneously managing service sequencing, reading client skin responses, maintaining conversation, and tracking time — the last thing you can afford is a supply that is not where you expected it to be.
New estheticians often underestimate treatment room organization because they are focused on technique, products, and client communication. But experienced practitioners consistently point to environmental control as one of the key differentiators between a service that feels professional and one that feels uncertain. When your room is organized correctly, your hands move to supplies without conscious effort. When it is not, clients notice the hesitation — even if they cannot name what they are sensing.
This guide gives new estheticians a practical, systematic framework for organizing a treatment room that supports confident service delivery from the first appointment. We cover zone architecture, back bar sequencing, supply staging, sanitation workflow, reset routines, and the specific organizational considerations that come with adding more complex offerings like jelly masks and add-on treatments to your service menu.
What Every Beginner Needs to Know About Treatment Room Organization
- Organization is a workflow system, not an aesthetic — it exists to free your attention for the client and the treatment.
- Three-zone architecture (clean supply, sanitation, client comfort) is the foundational framework that everything else builds on.
- Back bar and cart organization should mirror the sequence of your services so your hands can find what they need without your eyes leaving the client.
- Pre-staging every supply before the client arrives is one of the most impactful habits new estheticians can build from day one.
- Labels are not a crutch — they are a professional system. Use them everywhere until placement is completely automatic.
- Build a room reset checklist and run it between every appointment, without exception, from your very first week in practice.
- As your service menu grows, your organization system must grow with it — each new service requires its own dedicated staging area.
Why Treatment Room Organization Matters More at the Beginning Than at Any Other Point
Experienced estheticians can work in an imperfect environment and compensate with instinct and muscle memory built over thousands of services. New estheticians do not have that buffer. In your first months of practice, every mental resource you have is already allocated: you are executing techniques you have practiced but not yet made automatic, communicating with a client who is evaluating whether to trust you, managing service timing with limited real-world experience, and processing the physical feedback of hands-on work in real time.
An organized treatment room removes one category of cognitive demand entirely. When your supplies are staged and sequenced correctly, you do not have to think about where anything is. That sounds like a small thing, but in the context of an active service it frees a significant amount of attention for the work that actually matters: the client in front of you.
There is also a direct client perception component. Clients who book with a new esthetician arrive with a slightly elevated uncertainty about what their experience will be. A clean, organized, clearly professional environment reduces that uncertainty within the first thirty seconds of entering the room. The physical environment signals competence before you have touched their skin. Conversely, a room that appears cluttered, where the esthetician is visibly searching for supplies, where the service flow is interrupted by preparation steps that should have been completed before the appointment began — all of these signal inexperience in a way that is very difficult to recover from during a single session.
The Three-Zone Framework: How to Divide Your Treatment Room for Efficient Workflow
The most effective organizational foundation for a treatment room — regardless of size — is a three-zone system. Every item in the room belongs permanently to one of three zones, and the movement of items between zones follows a strict one-direction rule: supplies move toward the client until they are used, then they move away from the client and never return to the clean supply area without being properly sanitized or replaced.
Zone 1 — The Clean Supply Zone
This is where all products, tools, gauze, cotton rounds, and pre-staged service supplies are stored and staged before use. Nothing used in a service should return to this zone. This zone includes your back bar, rolling cart, and any pre-staging surfaces. Items here are either unused and sealed, or staged-clean for the current service session.
Zone 2 — The Sanitation Zone
This is where used tools, contaminated spatulas, soiled gauze, and dirty linens go immediately after contact. This zone must be physically distinct from Zone 1, even in a very small room. It includes a lidded waste bin, a disinfectant tool jar, and a linen hamper. The sanitation zone is where the room resets happen — items here are either disposed of or moved to disinfection and then to proper storage, never back to Zone 1 without completing the full sanitation pathway.
Zone 3 — The Client Comfort Zone
This is the facial bed, headband, bolster, draping, and ambient environment. This zone is reset completely between every client and should be fully prepared before the client enters the room. Temperature, lighting, music, and linen placement belong to this zone. A client who enters a fully prepared Zone 3 before they lie down experiences a completely different level of perceived professionalism than one who waits while you finish making the bed.
Why the One-Direction Rule Is Non-Negotiable
The one-direction flow rule — clean items move toward the client, used items move away from the client — is not just an organizational principle. It is a basic infection control and sanitation standard that protects both your client and your professional license. Cross-contamination events in esthetic services are almost always the result of breaking this directional flow: a spatula returned to the product jar after touching skin, a cotton round placed back on the clean staging surface, a tool moved from the sanitation zone back to the active-service area without proper disinfection. Building the three-zone system from your very first day means this protocol becomes completely automatic before you have accumulated habits that are difficult to unlearn.
How to Organize Your Back Bar So It Supports Your Service Flow
The back bar is the organizational center of your clean supply zone. How you arrange it determines how efficiently you move through every service you perform. The most effective approach for new estheticians is a simple left-to-right sequencing system that mirrors the order in which products are used during a facial service.
The Left-to-Right Sequencing System
Arrange your back bar from left to right in the same order you use products during a service:
- Far left: Cleansers, makeup removers, pre-treatment prep products, toners, and any first-step items.
- Center-left: Exfoliants, enzymes, or active treatment serums that follow cleansing.
- Center: Treatment serums, targeted actives, spot treatments — the working products of the service.
- Center-right: Masks, including any powder-based masks and their mixing supplies.
- Far right: Finishing products — moisturizers, SPF, eye creams, and any client-facing retail items.
This layout means that during a service, your hand consistently moves in one direction across the back bar. You are never reaching over products you have already used to get to what you need next. After a few weeks of practice, your hand reaches for the correct product before your conscious mind has registered the thought.
Shelf Height Assignment
Assign shelf heights by frequency of use. Products you use in every service should be at eye level and fully within comfortable reach. Products you use occasionally belong on upper shelves. Bulk stock, replacement inventory, and supplies you do not need during active services belong in lower cabinets or under the cart. If you have to look up, crouch down, or move things aside during a service, those items need to be reorganized.
Labeling Everything — Without Exception
Label every shelf, every decanted container, every storage basket, and every drawer in your treatment room for the first six to twelve months of your practice. New estheticians often resist labels because they feel redundant or visually cluttered. Experienced practitioners know that labels eliminate cognitive friction during services — you are not deciding where something belongs, you are reading where it belongs. That distinction matters enormously when your mental attention is divided across multiple service demands simultaneously.
Pre-Staging Your Supplies: What to Have Ready Before Every Client Arrives
Pre-staging is the single most impactful organizational habit a new esthetician can build. It means that every item you will use during a service — every product, every tool, every disposable — is staged, opened, measured, and positioned before your client enters the room. The service should begin the moment the client lies down, not when you finish preparing.
The Five-Minute Pre-Client Ritual
The most effective way to ensure complete pre-staging is to build a five-minute pre-client ritual that you run in the same order before every single appointment, regardless of how busy your day is. This ritual functions as a final sweep of all five staging categories — client comfort, clean supplies, sanitation zone, tools, and documentation — and ensures nothing has been missed during room reset from the previous service.
Estheticians who build this ritual report that it also serves a secondary psychological function: the five-minute pre-client ritual is a deliberate transition between your own mental state and your service-delivery mode. You are not just checking supplies — you are mentally stepping into the service. That transition is particularly valuable for new estheticians who are still building the automatic confidence that comes with accumulated client hours.
Building a Room Reset Routine That Works Between Back-to-Back Appointments
The room reset is where treatment room organization is tested most severely. When you have a client finishing and another arriving in twelve minutes, the pressure to cut corners on your reset protocol is significant. Building a systematic reset routine from your very first week — before that time pressure is real — is what protects you when it becomes real.
The Five-Step Reset Sequence
- Remove and replace all linens immediately. Strip the facial bed, headband, and any draping the moment the client leaves the room. Place all used linens directly into the linen hamper in your sanitation zone. Fresh linens should be on the bed within sixty seconds of the previous client exiting.
- Disinfect all contact surfaces. Wipe down the facial bed, the rolling cart surface, any tool handles that were touched during the service, the stool, door handles, and any other surfaces that experienced contact. This step is non-negotiable for both infection control and professional standards compliance.
- Dispose of all single-use items. Spatulas, gauze, cotton rounds, gloves, mask applicators — all single-use items go directly into the lined waste bin. Check the mixing bowl, extraction area, and staging surfaces for any missed disposables.
- Restock depleted supplies. Check your cotton round count, gauze supply, and any product that is running low. It takes thirty seconds to restock now and six minutes to search for a replacement mid-service. Restock immediately.
- Re-stage for the next service. Pull and sequence the products for your next client based on their service booking. Pre-measure any mask powders. Position tools. Run your five-minute pre-client ritual to confirm everything is complete before their arrival.
Scheduling Your Reset Buffer Into Your Appointment Timing
A thorough room reset takes eight to twelve minutes when you are new to the practice and five to eight minutes once it is completely automatic. Building this time into your appointment scheduling — rather than treating it as optional buffer time — is a professional business decision, not just an organizational one. Estheticians who book appointments with no reset buffer consistently find themselves either rushing the reset (which compromises infection control and staging quality) or running late on client arrival time (which immediately erodes the client experience you are working to build).
Estheticians who offer Poly-Luronic™ Jelly Mask add-ons consistently note that the mixing station reset is the one step most likely to be rushed during a tight turnover window — and the one that most visibly affects the next service if it is. The mixing bowl needs to be fully rinsed and dried before the next use; residual water from a previous session changes the ratio and affects the consistency of the mask, which affects set time and removal. Practitioners who build jelly mask bowl rinse and dry into their formal reset sequence — as a named, numbered step rather than an afterthought — report completely consistent mixing results across back-to-back services, while those who treat it as optional report ratio inconsistency that takes several sessions to diagnose correctly.
The same principle applies to the mask station overall: Poly-Luronic™ Jelly Mask powder should be stored sealed between services, the measuring scoop returned to the container, and the water cup rinsed. A fully reset mask station before the next service means the jelly mask application step happens with the same ease and consistency as every other step in the protocol — rather than becoming the service moment where your workflow visibly breaks down in front of a client.
Rolling Cart vs. Fixed Back Bar: What Works Best for Beginners
New estheticians setting up their first treatment room frequently ask whether to invest in a fixed back bar or rely on a rolling cart. The answer depends on your specific situation — but for most beginners, a rolling cart is the more practical starting point, and a fixed back bar becomes more valuable as your practice stabilizes.
Why a Rolling Cart Works Better for Beginners
A rolling cart allows you to position your supplies exactly where you need them for each specific service, which changes as you build your menu and refine your protocols. If you discover that your natural working position places you on the right side of the bed rather than the left, you can reposition the cart in sixty seconds. If you add a new service that requires a different tool setup, you can reorganize the cart between appointments. A fixed back bar offers none of this flexibility.
Rolling carts are also significantly less expensive than built-in back bar installations, which matters enormously when you are in the capital-constrained early phase of building a practice. A well-organized stainless steel or acrylic rolling cart with three or four shelves, properly labeled and staged, projects just as much professionalism as a fixed installation — and often more, because the organization is visible to the client during the service.
When a Fixed Back Bar Makes Sense
A fixed back bar becomes the right investment once your service menu is established, your room layout is finalized, and your supply volume has grown to the point where a rolling cart cannot accommodate everything you need within reach. Most estheticians reach this point somewhere between six months and two years into independent practice, depending on how quickly their menu and clientele grow.
The Best System for Most Beginners: Both
The most functional setup for a growing practice is a rolling cart for active-service supplies and a fixed back bar or wall-mounted shelving for storage and restocking. The cart holds everything you need for today’s services. The back bar holds bulk inventory, backup supplies, and products you use less frequently. This hybrid system gives you workflow flexibility in the cart and storage efficiency in the back bar, without the limitations of relying on either alone.
Organization Strategies for Specific Supply Categories
Different supply categories have different organizational requirements based on how frequently they are used, how they are accessed during a service, and what storage conditions they require. The following strategies address the most common organizational challenges new estheticians encounter with specific supply types.
Powder Masks & Mixing Supplies
Store powder masks sealed and dry, away from steam and moisture sources. Keep mixing bowl, scoop, spatula, and water cup grouped together as a dedicated station. Pre-measure for each service before the client arrives.
Serums & Treatment Products
Organize by application sequence, not brand or alphabetically. Products used first go leftmost. Keep caps loosened before client arrival for one-handed access. Refrigerate any heat-sensitive actives per manufacturer guidance.
Single-Use Disposables
Store gauze, cotton rounds, and applicators in labeled covered containers or dispensers to prevent contamination. Count out what you need for each service before it starts. Replenish containers during each reset, not mid-service.
Reusable Tools
Disinfected tools belong in a clean, covered storage container — never left out on an open surface between services. Stage tools for the current service only. Tools awaiting disinfection go in the sanitation zone jar, not the clean tool storage.
Linens
Clean linens should be stored in a closed cabinet or covered basket, never on an open shelf where airborne contaminants can settle on them. Soiled linens go immediately into the lidded hamper. Never stack folded clean linens on top of the supply cart during a service.
Retail Products
Keep retail product display completely separate from your working supply area. Retail items should be visible to clients without being within the service workflow zone. A dedicated retail shelf or small display unit keeps sales inventory out of your sanitation and staging areas.
How Organization Evolves as Your Service Menu Grows
The treatment room organization system that works perfectly for a two-service menu will need to evolve as you add services. Every new service adds at least one new supply category, one new staging requirement, and potentially one new storage challenge. Building your organizational framework with this growth in mind from the beginning prevents the need for a complete overhaul six months into your practice.
Planning for Add-On Services From the Start
Even if you are not offering add-on services yet, reserve a dedicated section of your rolling cart or back bar for add-on supplies. When you add jelly masks, nano infusion, or any other service to your menu, the staging area is already there — you are filling an existing zone rather than restructuring your entire setup. This approach also gives you a visible prompt during pre-staging: an empty add-on station reminds you that the category exists, even before you have filled it.
The One-New-Service Rule
When adding any new service to your menu, add its organizational system before you add the service itself. Set up the staging area, label the storage zone, build the supply into your reset checklist, and do a practice pre-staging run before performing the service on a client for the first time. Estheticians who add services without first building the organizational infrastructure consistently report that the first few services feel disorganized in ways that have nothing to do with technique — it is the staging that is the problem, not the skill.
Professional References & Resources
The organizational frameworks outlined in this article draw from established esthetic practice standards and infection control principles:
- State cosmetology board sanitation and disinfection standards — contact your state licensing authority for jurisdiction-specific requirements applicable to treatment room setup and surface disinfection protocols.
- Associated Skin Care Professionals (ASCP) — professional organization guidance on treatment room setup, sanitation standards, and beginner practice development.
- Milady Standard Esthetics: Fundamentals — foundational esthetician education text covering treatment room organization, sanitation, and professional setup standards.
- National Interstate Council of State Boards of Cosmetology (NIC) — national standards framework for esthetic practice environments and infection control compliance.
For new estheticians building out their treatment room and looking for a high-impact, beginner-friendly add-on service to include in their initial setup, the Poly-Luronic™ Jelly Mask by Luminous Skin Lab is one of the most organizationally straightforward add-ons you can offer. It requires a single dedicated mixing station — bowl, scoop, spatula, water cup, and mask container — that fits within one section of a rolling cart. The pre-staged preparation step (measuring the powder before the client arrives) takes under thirty seconds and integrates seamlessly into a pre-staging routine. The result is a visually impressive, client-memorable service add-on that adds minimal organizational complexity while substantially elevating the perceived value of a beginner facial menu.
Explore the Poly-Luronic™ Jelly Mask Line →Frequently Asked Questions: Treatment Room Organization for New Estheticians
How should a new esthetician organize their treatment room before their first client?
Before your first client, organize your treatment room into three distinct functional zones: a clean supply zone where everything needed for the service is pre-staged and within arm’s reach, a sanitation zone where used tools are contained and dirty items never cross into clean areas, and a client comfort zone where the bed, linens, and ambient environment are ready before the client enters. Pre-staging every supply in the exact sequence you will use it prevents mid-treatment scrambling and projects the kind of quiet confidence that builds client trust immediately.
What is the best way to organize a back bar as a new esthetician?
The most effective back bar organization system for new estheticians follows a left-to-right workflow order that mirrors the sequence of a facial service: cleansers and prep products on the left, treatment serums and actives in the center, and finishing products and masks on the right. Label every shelf and container clearly. Keep daily-use products at eye level and supplementary or less frequently used items on upper or lower shelves. This layout reduces the mental load of searching for supplies mid-service and keeps your workflow moving smoothly.
How do you set up a sanitation zone in a small treatment room?
In a small treatment room, a sanitation zone does not need to be large — it needs to be clearly designated. Use a dedicated surface or rolling cart section where all used tools, contaminated spatulas, and soiled linens go immediately after use. This zone should be physically separate from your clean supply area, even if just a few inches away. Place a lidded waste container, a tool disinfection jar, and a linen hamper within this zone. The key principle is directional workflow: clean items flow toward the client, used items flow away from the client and never back.
How many products should I have staged and ready before a facial service starts?
Stage every single product you plan to use during the service before the client arrives on the table. This typically means four to eight products for a standard facial, plus any tools, gauze, cotton rounds, and masks pre-measured where possible. Products you are not using that day should be stored away, not visible on your working surface. A clear, minimal staging setup looks professional and prevents the confusion of reaching past unused items to find what you need mid-treatment.
Why does treatment room organization matter so much when you are just starting out?
Organization matters more when you are just starting out than at any other point in your career because a new esthetician’s mental bandwidth is already heavily occupied by service sequencing, client communication, and technique execution. A disorganized room forces you to divide attention between searching for supplies and performing the service — and clients can feel that hesitation. An organized room frees your full focus for the client and the treatment, which is what builds confidence and client trust in your early months.
What is the best way to store jelly mask supplies in a treatment room?
Jelly mask powders should be stored in a cool, dry location away from direct sunlight and moisture — humidity exposure before mixing will affect set consistency. Keep jelly mask containers sealed when not in use and store them in a designated mask station area of your back bar or cart. Pre-measure the powder into your mixing bowl before the client arrives so you are ready to activate and apply without delay. If you offer multiple jelly mask varieties, label containers clearly to prevent mid-service confusion between formulas.
How do I keep my treatment room organized between back-to-back client appointments?
Between back-to-back appointments, use a reset checklist rather than relying on memory. The reset sequence should cover five tasks in order: remove and replace all linens, disinfect all contact surfaces including the facial bed and any tool handles, dispose of all single-use items, restock any supplies that were depleted, and re-stage clean tools and products for the next service. With practice, a full room reset takes eight to twelve minutes. Building this reset routine into your appointment scheduling buffer prevents the rushed, incomplete turnover that leads to disorganized service starts.
Should I use a rolling cart or a fixed back bar as a new esthetician?
For most new estheticians, a rolling cart is more practical than a fixed back bar in the early stages of building a practice. A cart allows you to position your supplies exactly where you need them during each service, move your setup between rooms if needed, and reconfigure your layout as your protocols evolve. A fixed back bar works well once your service menu and workflow are stable and you have the space to dedicate to it. Many experienced estheticians use both: a rolling cart for active-service supplies and a fixed back bar for storage and restocking.
How does organizing your treatment room around a jelly mask add-on service change the layout?
Adding a jelly mask add-on service like the Poly-Luronic™ Jelly Mask by Luminous Skin Lab creates a specific new staging requirement in your treatment room: a dedicated mixing station. You will need a flat, stable surface with your mixing bowl, spatula, measuring scoop, and water source positioned close together so you can mix and apply the mask without interrupting the flow of the service. Many estheticians who offer jelly masks designate one section of their rolling cart specifically as the mask station, keeping all jelly mask supplies together so the preparation step feels seamless and professional rather than improvised.
An Organized Room Is Your Most Underrated Tool as a New Esthetician
The estheticians who build strong practices quickly are rarely the ones with the most expensive equipment or the longest service menu from day one. They are consistently the ones whose treatment room environment projects confidence, cleanliness, and control at every client touchpoint — from the moment a client walks in the door to the moment they leave.
Treatment room organization is the infrastructure that all of that confidence runs on. The three-zone framework, the left-to-right back bar system, the pre-staging ritual, the reset checklist — these are not complicated systems. But they require commitment to build consistently from your very first week, before the habits that are harder to change have had a chance to form.
Build your organizational systems first. Then build your service menu. Then build your clientele. The sequence matters more than most new estheticians realize until they are far enough into their practice to look back and see exactly where the foundation was set.