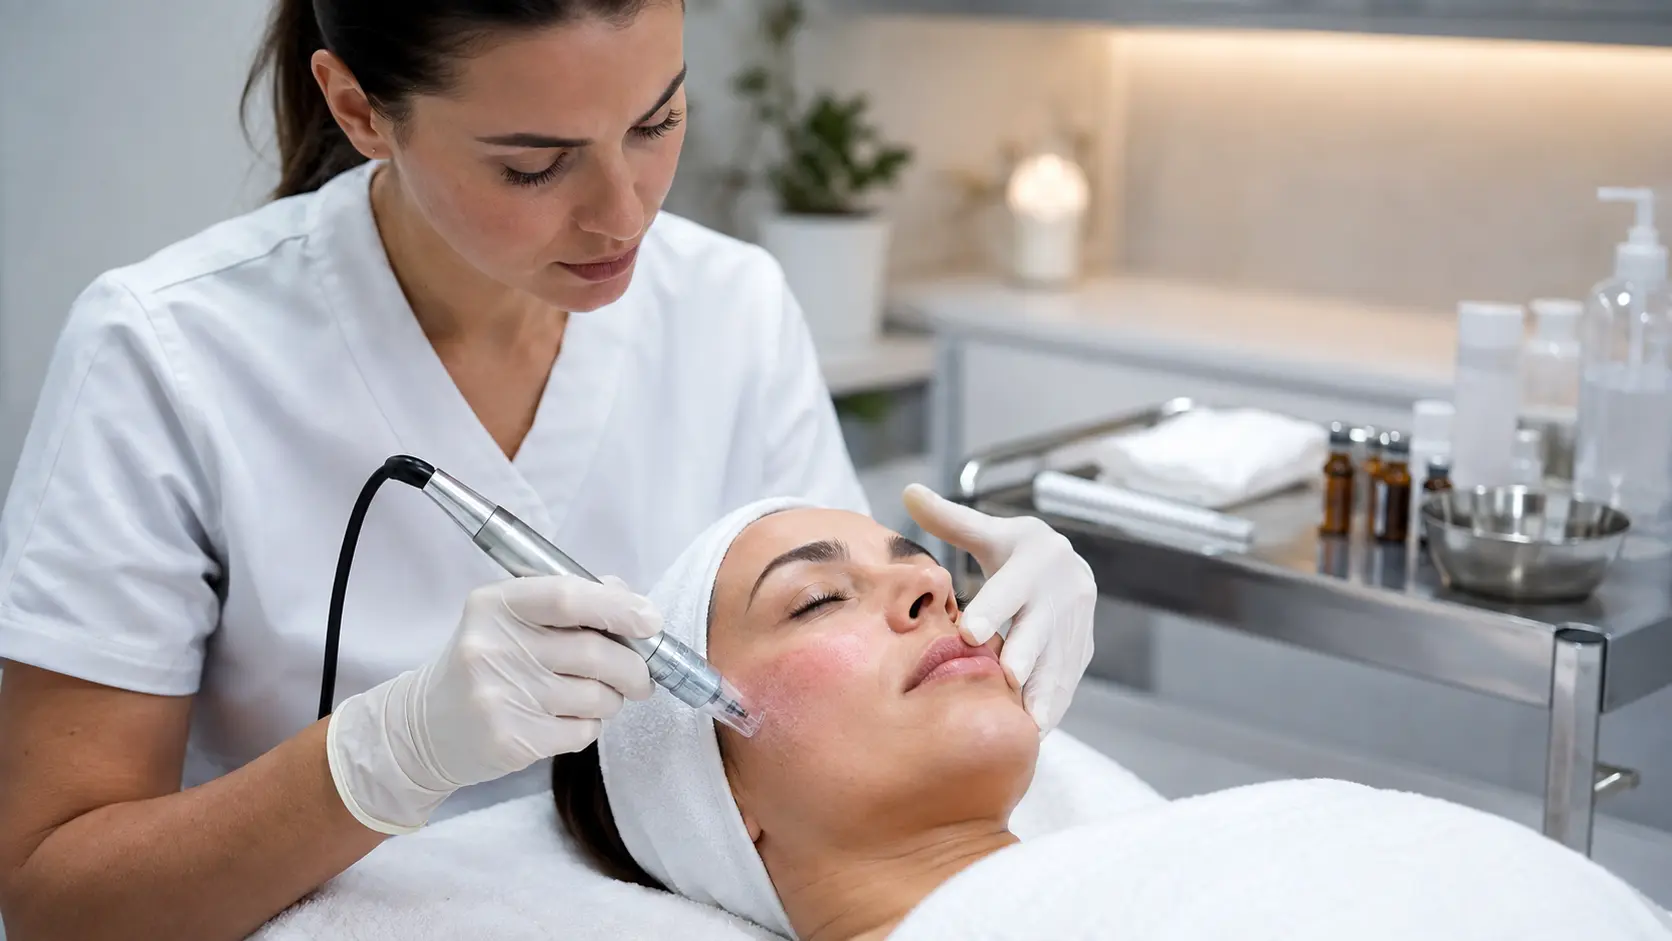
What Is the Crosshatch Microneedling Technique and Why Does It Matter?
The crosshatch microneedling technique is a structured approach to microchannel creation in which the practitioner makes a series of controlled passes over each treatment zone in two or more perpendicular directions — typically horizontal, then vertical, with optional diagonal passes for more intensive concern areas. This grid-like pattern distributes collagen induction stimulation evenly across the treatment surface, reducing the risk of uneven channel density that can occur with single-direction or unstructured circular motion approaches.
- The crosshatch pattern ensures each point within a treatment zone receives stimulation from multiple directional angles, producing more uniform collagen induction coverage than single-pass techniques.
- Needle depth must be adjusted zone-by-zone — skin thickness varies significantly from the forehead and cheeks to the periorbital, perioral, and nasal areas.
- Proper skin tension management from the non-dominant hand is essential to consistent channel depth and pattern uniformity throughout each directional pass.
- Pen speed, pass overlap, and number of directional passes determine channel density — more passes do not automatically produce better outcomes and can increase unnecessary trauma.
- Post-treatment recovery protocol quality directly influences how effectively the collagen induction response initiated during the session translates into visible skin improvement.
- The crosshatch technique is particularly effective for treating atrophic acne scars, textural irregularities, and rolling scars, where multi-directional stimulation across fibrous tissue produces more comprehensive remodeling.
Of the several movement patterns used in professional microneedling practice, the crosshatch technique is among the most disciplined and, when executed correctly, among the most clinically effective. It is not the fastest approach. It is not the simplest to learn. But for estheticians who understand what makes microneedling outcomes consistent and reproducible, the crosshatch pattern represents a level of technical control that unstructured motion approaches cannot match.
The concept behind crosshatch microneedling is straightforward: rather than moving the pen in a single direction or in continuous circular loops, the practitioner works through each treatment zone in deliberate perpendicular passes, building a controlled grid of microchannels that covers the treatment area with measurable, intentional uniformity. In practice, executing this correctly requires a systematic understanding of directional sequencing, zone-appropriate depth adjustment, skin tension management, pass overlap control, and endpoint recognition — none of which are instinctive to new practitioners but all of which become repeatable with structured learning.
This guide covers each of those components in depth. Whether you are learning the crosshatch technique for the first time or refining an existing approach, the framework here is designed to give you a clinically grounded, practically applicable understanding of why each element matters and how to execute it with precision in a real treatment room environment.
What Every Practitioner Needs to Know About the Crosshatch Microneedling Technique
- The crosshatch pattern is a deliberate, perpendicular-pass approach to microchannel creation — not a random movement style. Directional discipline is what produces its clinical advantage.
- Zone-specific depth adjustment is non-negotiable: the periorbital area requires significantly shallower settings than the cheek or forehead, and the lip line requires careful control at every pass.
- Skin tension applied by the non-dominant hand determines whether channels are created at consistent depth or inconsistently depending on skin mobility in each zone.
- The endpoint for each zone is visual: pinpoint erythema distributed uniformly across the treatment area indicates adequate stimulation. Pooling erythema or track lines indicate technique errors.
- Pass count and depth together determine channel density — increasing either independently without adjusting the other changes the inflammatory load on the tissue.
- Post-treatment recovery is part of the treatment, not an afterthought. The occlusive and hydration recovery steps taken immediately following the session directly affect barrier repair speed and final outcome quality.
- The crosshatch technique is suitable for estheticians practicing within applicable scope of practice — always verify local regulations governing microneedling depth and practice parameters before performing any treatment.
What Makes the Crosshatch Pattern Different From Other Microneedling Movement Approaches?
In microneedling practice, movement pattern determines how microchannels are distributed across the treatment surface. The two most common alternatives to crosshatch are stamp technique — where the pen is lifted and repositioned in a defined grid without dragging — and circular or gliding motion, where the practitioner moves the pen continuously in loops or strokes without a defined directional framework. Each approach has distinct characteristics.
Stamp Technique
Stamp technique involves pressing the active pen tip perpendicularly into the skin surface, lifting, repositioning, and repeating across the zone. It minimizes lateral drag across the skin surface and is often preferred for very thin or delicate zones where control over each individual contact point matters most. Its disadvantage is speed: stamping a full face systematically takes considerably longer than a gliding approach, which affects treatment room workflow. It also requires careful attention to ensuring complete coverage without visible gaps between stamp positions.
Circular and Gliding Motion
Circular or gliding motion moves the pen continuously across the skin in loops or strokes, covering territory quickly. The trade-off is directional control: continuous loops tend to produce variable channel density — heavier stimulation in areas where the loop turns and lighter in the linear segments — and make it difficult for the practitioner to accurately assess how much cumulative stimulation any given zone has received. For estheticians focused on producing even, reproducible results across a defined treatment area, unstructured gliding introduces variability that is difficult to compensate for.
Crosshatch Technique
Crosshatch combines the coverage efficiency of a gliding approach with the systematic control of a structured pass pattern. The practitioner works through each zone in a defined series of directional passes — one direction, then perpendicular, then optionally diagonal — maintaining consistent pen speed, overlap between passes, and depth setting throughout each directional sequence. The resulting microchannel distribution is more uniform than gliding and more efficient than stamping, with the added benefit that the practitioner can clearly assess zone coverage at the completion of each directional pass before proceeding to the next.
Why Directional Pass Sequencing Affects Collagen Induction Outcomes
When the microneedling pen passes over skin in a single direction, the microchannels created form a parallel linear pattern. Each subsequent pass in the same direction risks overlapping channels already created rather than stimulating adjacent untreated tissue. By rotating pass direction by 90 degrees for the second pass and optionally 45 degrees for third and fourth passes, the crosshatch technique ensures that channels created in each pass intersect with channels from previous passes at consistent intervals — producing a denser, more uniformly distributed grid of stimulation points across the entire treatment zone.
This multi-directional stimulation pattern is particularly relevant for treating fibrous scar tissue. Atrophic acne scars contain disorganized collagen and fibrous adhesions that run in multiple structural directions beneath the skin surface. Single-direction microchannel creation stimulates remodeling primarily along one axis. Multi-directional crosshatch passes create stimulation across the scar’s fibrous structure from several angles simultaneously, supporting more comprehensive disruption of the fibrous adhesions and more even collagen remodeling throughout the scar volume.
How to Execute the Crosshatch Technique: A Step-by-Step Professional Protocol
The following sequence describes the core crosshatch execution framework. Specific depth parameters, pass counts, and endpoint criteria must be adapted to individual client assessment, the specific device being used, and all applicable scope of practice requirements in your jurisdiction.
Zone Mapping and Depth Setting
Before beginning, divide the face into treatment zones: forehead, temples, cheeks, nose, perioral, periorbital, and chin. Set your device depth for the first zone based on your pre-treatment skin assessment. Deeper zones such as the cheeks and forehead are addressed at treatment depth; thinner zones such as periorbital and perioral require a significantly reduced setting. Confirm depth on the device before the first pass in each zone.
Non-Dominant Hand Skin Tension
Before each pass, position your non-dominant hand to apply gentle counter-tension to the skin perpendicular to the direction of travel. The tension should stabilize the skin without compressing or stretching it excessively. This ensures consistent needle engagement depth throughout the pass rather than variable engagement as skin moves or folds under the pen head.
First Directional Pass — Horizontal
Begin the first directional pass at the superior border of the treatment zone and work downward in parallel horizontal strokes, maintaining consistent pen speed of approximately 1 to 2 centimeters per second. Each stroke should overlap the previous by approximately 30 to 40 percent of the pen head width to ensure complete coverage without excessive double-stimulation of individual points. Complete the full zone before rotating direction.
Second Directional Pass — Vertical
Rotate pass direction 90 degrees and repeat the zone using vertical strokes, working from the medial to lateral border. Maintain the same pen speed and overlap ratio. The vertical passes will intersect the channels created in the horizontal pass at roughly perpendicular angles, building the characteristic crosshatch grid pattern. Reassess skin response after completing the vertical pass before deciding whether additional passes are warranted.
Optional Third and Fourth Passes — Diagonal
For zones requiring more intensive treatment — typically defined acne scars or significant textural irregularities — additional diagonal passes at 45 degrees in each direction may be appropriate. Diagonal passes are not routinely needed for general collagen induction or mild texture concerns. The decision to add them should be based on the treatment indication and the erythema response observed after the first two passes, not on a default assumption that more passes equal better results.
Endpoint Assessment
The clinical endpoint for each zone is uniform pinpoint erythema distributed evenly across the treatment area. Pinpoint bleeding may or may not occur depending on depth setting and skin type — it is a depth indicator, not a treatment goal. Areas showing track-line erythema indicate that passes were too slow or too overlapping. Areas showing uneven or patchy erythema indicate incomplete coverage. Both findings inform depth or technique adjustments for the next zone or session.
Zone Transition and Depth Adjustment
When transitioning from one zone to the next, adjust device depth before beginning the first pass in the new zone. Do not carry the same depth setting from a thicker zone into a thinner one without deliberate reassessment. Zone transitions are among the most common points where technique errors occur because practitioners are focused on movement pattern rather than device settings during the shift.
Post-Treatment Serum and Recovery Mask Application
Immediately following completion of all treatment zones, apply your chosen post-microneedling recovery serum while microchannels remain open and skin permeability is at its peak. Follow with an occlusive recovery mask applied gently over the serum layer. This recovery sequence is an integral part of the treatment protocol — not a separate add-on — and directly affects barrier repair speed and final outcome quality.
Zone-Specific Depth Guidelines for Crosshatch Microneedling
One of the most clinically important aspects of crosshatch technique execution is the systematic adjustment of needle depth by treatment zone. The face is not a uniform surface — skin thickness, underlying structure, proximity to bone and cartilage, and vascular density vary significantly from the cheek to the periorbital area to the nose. Applying a single depth setting across the entire face is a technique error that either undertreats thicker zones or creates excessive trauma in thinner ones.
The following zone-specific parameters represent general professional education guidelines. Individual assessment, device calibration, client skin type, Fitzpatrick classification, treatment indication, and all applicable scope of practice requirements in your jurisdiction must inform the final depth selection for every client and every session. These are not prescriptive treatment protocols.
Forehead
Generally tolerates 0.75 to 1.5 mm for collagen induction. Skin thickness here is moderate and consistent. Bony prominence below provides a firm base for controlled pen engagement. Horizontal passes along the hairline require attention to hairline border management.
Cheeks
Typically the most treatment-tolerant zone, supporting 1.0 to 2.0 mm for acne scar treatment or 0.75 to 1.5 mm for general collagen induction. Skin is thicker here than most other facial zones and the underlying fat pad provides a forgiving base. Primary area for diagonal passes in scar treatment protocols.
Periorbital
Requires significantly reduced depth — typically 0.25 to 0.5 mm. The skin in this zone is among the thinnest on the face. Slow pen speed and very light touch are critical. Many practitioners limit periorbital crosshatch to horizontal and vertical passes only without diagonal additions. Strict avoidance of the eyelid margin is mandatory.
Nose
Depth typically 0.5 to 0.75 mm. Nasal skin varies in thickness from the bridge to the tip to the alar regions. Proximity to cartilage on the nasal tip requires cautious engagement. Skin tension management is more challenging on the curved nasal surface and requires adaptation of hand position relative to flat-surface technique.
Perioral
Depth typically 0.5 to 0.75 mm. Fine lines in this zone are among the most requested treatment indications. Skin mobility around the lip line makes tension management particularly important. Working in small sub-zones while reapplying skin tension before each short pass produces more consistent results than attempting long strokes across the full perioral area.
Chin and Jaw
Generally tolerates 0.75 to 1.25 mm. The jawline presents a curved surface where pen angle management matters more than on flat cheek or forehead surfaces. Maintaining the pen head flush with the curved surface at consistent angle throughout each pass requires deliberate hand positioning adjustments as the pen travels along the jaw.
Crosshatch Pass Pattern, Overlap, and Channel Density: How the Variables Interact
Understanding how directional passes, overlap ratio, pen speed, and depth interact to determine channel density is essential for estheticians who want to adapt the crosshatch technique intelligently across different treatment indications rather than applying a fixed protocol regardless of the clinical goal. These variables are not independent — adjusting one changes the effective stimulation load on the tissue, which affects both treatment outcome and recovery intensity.
How Overlap Ratio Affects Treatment Uniformity
The overlap between adjacent passes within a single directional sequence is one of the most frequently underestimated technical variables in crosshatch technique. Too little overlap — below 20 percent of the pen head width — leaves uncovered gaps between pass lines that produce a striped rather than uniform channel pattern. These gaps are invisible during the session but become apparent in the healing phase as bands of differential erythema and variable texture response. Too much overlap — above 50 percent — creates excessive double-stimulation at every pass junction, increasing inflammatory load without adding to the even distribution of collagen induction across the zone.
The recommended overlap range of 30 to 40 percent produces consistent channel coverage across the full zone without redundant stimulation. Maintaining this ratio throughout a full directional sequence requires deliberate attention to pen positioning at the beginning of each stroke relative to the previous one — particularly toward the end of a directional pass sequence when the practitioner’s focus may shift toward completion rather than precision.
Why Pen Speed Matters More Than Practitioners Often Realize
Pen speed during crosshatch passes directly determines effective needle penetration depth, channel density, and the inflammatory response generated per unit area. A pen moved too slowly over skin creates overly dense channel clusters with heightened per-area trauma that extends recovery time without a proportional benefit in collagen induction yield. A pen moved too quickly reduces the effective contact time per area, preventing consistent needle engagement and producing shallower-than-intended channels even at a correctly set device depth.
Experienced practitioners typically develop a natural steady pace of approximately 1 to 2 centimeters per second that they can maintain consistently across a full directional pass. This pace is not something that can be precisely metered in real time — it is a trained physical rhythm. The most reliable way to develop it is through deliberate practice with focus specifically on speed consistency rather than allowing pace to vary based on the visual appearance of the skin response during the pass.
Post-Treatment Recovery After Crosshatch Microneedling: Why the Recovery Protocol Is Part of the Treatment
The collagen induction initiated during a crosshatch microneedling session is not complete at the moment the pen leaves the skin. The wound healing cascade triggered by microchannel creation — involving platelet aggregation, growth factor release, fibroblast migration, and new collagen synthesis — unfolds over days to weeks following the treatment. What happens immediately after the session directly influences how effectively that cascade proceeds and how clearly it translates into visible skin improvement.
The Heightened Permeability Window
Immediately following microneedling, the skin’s barrier is temporarily compromised and transepidermal permeability is at its highest point. This creates a narrow window — typically 20 to 40 minutes post-treatment — during which topically applied ingredients can penetrate significantly more deeply than they would on intact skin. Professional post-microneedling protocols are designed to use this window deliberately: applying hydrating and recovery-supportive serums while microchannels remain open, then sealing the skin with an occlusive mask layer that extends both the absorption window and the overall hydration response of the session.
Barrier Recovery and Occlusion
After the serum application layer, an occlusive recovery mask serves two simultaneous functions: it physically seals the skin surface to minimize transepidermal water loss during the initial barrier compromise phase, and it delivers additional hydration and barrier-supportive ingredients into contact with the skin surface for the duration of the mask dwell time. The quality of the mask formulation used in this step is not a secondary concern — it is a clinical decision that affects recovery speed, client comfort, visible post-treatment redness duration, and overall outcome satisfaction.
Estheticians performing crosshatch microneedling across multiple facial zones in a single session frequently report that the post-treatment recovery sequence is where the most meaningful outcome differentiation occurs between practitioners. The technique variables — pattern, depth, speed, overlap — create the induction stimulus. The recovery protocol determines how cleanly the skin barrier rebuilds around it.
Practitioners who incorporate Poly-Luronic™ Jelly Masks by Luminous Skin Lab as the occlusive recovery step in their post-crosshatch microneedling protocol consistently note several specific advantages in a high-volume clinical setting. The PGA + HA dual-humectant formulation takes full advantage of the heightened permeability window: PGA’s surface-sealing microgel layer combines with the physical occlusion of the set mask to create a layered moisture barrier, while HA delivers deeper-layer hydration during the same dwell window. Practitioners report that the immediate post-removal skin response — reduced erythema compared to cream mask alternatives, visibly improved hydration, and a more comfortable client experience — consistently supports client confidence in the treatment outcome before any delayed collagen remodeling results become visible. The fragrance-free formulation and clean ingredient profile remove sensitization risk from the recovery sequence, which matters particularly on skin that has just undergone multi-zone crosshatch stimulation at depth.
Managing Client Expectations During the Recovery Phase
Crosshatch microneedling produces visible erythema that can persist for 24 to 72 hours depending on pass count, depth, and individual skin reactivity. Some clients experience mild swelling or a tight sensation during the first 24 hours. These are expected and normal responses to controlled skin stimulation — but clients who are unprepared for them may interpret them as signs that something went wrong. Clear pre-treatment and post-treatment education about the expected recovery timeline is as important as technical precision during the session itself.
Post-treatment home care instructions should specifically address what clients should and should not apply during the 48 to 72 hours following treatment. Retinoids, exfoliating acids, active vitamin C formulations, and alcohol-based toners are typically contraindicated in the immediate post-treatment window. Fragrance-free hydrating moisturizers, broad-spectrum SPF, and gentle cleansers form the appropriate home care foundation during barrier recovery.
Common Crosshatch Technique Errors and How to Correct Them
The crosshatch technique is more forgiving of minor variations than stamp technique because its gliding nature naturally distributes stimulation across slight inconsistencies in speed or positioning. However, several recurring errors reduce its effectiveness, produce uneven outcomes, or create avoidable client discomfort. Recognizing these patterns in your own practice is the first step to correcting them.
Inconsistent Pen Speed Within a Single Pass
Slowing down at the beginning of a pass when setting the pen to the skin and speeding up toward the end to complete the stroke is one of the most common speed errors. This produces denser channel creation at the medial or superior zone entry point and shallower stimulation at the lateral or inferior exit — visible in the erythema pattern as a gradient of intensity from one side of the zone to the other. Consciously starting each pass at the rhythm you intend to maintain throughout its full length is the correction.
Insufficient Skin Tension for Zone Geometry
Applying adequate skin tension on a flat cheek surface is relatively straightforward. Maintaining adequate tension on the curved surfaces of the nose, along the jaw, or in the perioral zone while simultaneously moving the pen in a controlled directional pass requires deliberate adaptation of hand position throughout the stroke. Practitioners who establish their tension hand position at the beginning of a zone and then do not adjust it as the pen moves across the curved surface will produce inconsistent tension — and therefore inconsistent depth — as the zone geometry changes beneath the pen.
Carrying the Same Depth Setting Across Zone Transitions
Moving from a thicker zone such as the cheek directly into a thinner zone such as the periorbital area without resetting device depth is among the most consequential technique errors because the consequences are not immediately obvious during the session. The erythema response in the thinner zone may look similar to the thicker zone but the relative depth of channel creation relative to skin thickness is significantly greater. Confirming device depth before the first pass in every new zone as an explicit step — not as an afterthought — is the correction.
Adding Additional Passes Without Endpoint Assessment
Proceeding from a standard two-pass crosshatch into additional diagonal passes based on treatment plan rather than real-time erythema assessment removes the primary safety check in the technique. The endpoint assessment after each directional pass is not optional — it is the mechanism by which the practitioner confirms that the tissue has received adequate stimulation for the clinical goal before adding more. Normalizing the habit of pausing, observing, and making a deliberate decision before each additional pass is a professional discipline that protects clients and produces better controlled outcomes.
Professional and Scientific References
The clinical education content in this article draws from established dermatological and cosmetic science literature on collagen induction therapy, skin wound healing mechanisms, and microneedling technique:
- Collagen induction therapy mechanisms — wound healing cascade, platelet-derived growth factor release, fibroblast migration, and new collagen synthesis following controlled cutaneous micro-injury. Established dermatology and wound healing literature.
- Skin thickness variation by facial zone and its clinical implications for device-based treatments. Cosmetic dermatology anatomy references.
- Transepidermal water loss and skin barrier permeability changes following microneedling. Cosmetic formulation and dermatological procedure literature.
- Atrophic acne scar classification — boxcar, rolling, and ice pick types — and their response to multi-directional collagen induction stimulation. Acne scarring treatment literature.
- Post-microneedling enhanced ingredient absorption and the clinical rationale for occlusive recovery protocols. Transdermal delivery and professional protocol literature.
- PGA + HA dual-humectant post-treatment hydration mechanism and HAS-1, HAS-2, HAS-3 upregulation. MDPI 2024; Typology 2021–2025; Stanford Chemistry cosmetic formulation literature 2024.
For estheticians looking to complete their crosshatch microneedling protocol with a post-treatment recovery mask that delivers clinically meaningful hydration and barrier support, the Poly-Luronic™ Jelly Mask by Luminous Skin Lab is the formulation our education team most frequently references in post-microneedling recovery protocol contexts. The proprietary Poly-Luronic™ blend combines polyglutamic acid surface occlusion with hyaluronic acid deep-layer delivery and hyaluronidase inhibition — delivering the dual-depth hydration mechanism at precisely the moment when post-crosshatch skin permeability is at its highest. The formulation is fragrance-free, clean-label, and designed for professional post-treatment application on freshly treated skin.
Explore the ILUMIPEN Professional Nano Infusion DeviceFrequently Asked Questions: Crosshatch Microneedling Technique
What exactly is the crosshatch microneedling technique?
The crosshatch microneedling technique involves making a series of passes over a treatment zone in two or more perpendicular directions, typically horizontal followed by vertical, to create a uniform grid of microchannels across the skin surface. This pattern ensures every point within the treatment area receives stimulation from multiple directional angles, which produces more even collagen induction coverage compared to single-direction or circular motion approaches. Each directional pass is kept distinct rather than overlapping randomly, giving the practitioner systematic control over channel density and treatment uniformity.
How many passes should I do with the crosshatch technique and does more mean better results?
Most practitioners perform two to four directional passes per zone using the crosshatch technique: typically one horizontal and one vertical as a baseline, with one or two additional diagonal passes for areas requiring more intensive treatment such as deep acne scars or significant textural irregularities. More passes do not automatically produce better results. Excessive pass counts at aggressive depths increase inflammation, trauma, and recovery time without proportionally improving collagen induction. The goal is controlled, even stimulation — not maximum tissue disruption.
What needle depth should I use for the crosshatch pattern on different face zones?
Needle depth must be adjusted by zone when using the crosshatch technique because skin thickness varies significantly across the face. The forehead and cheeks can typically tolerate 1.0 to 1.5 mm for general collagen induction. The periorbital area requires significantly shallower depth, generally 0.25 to 0.5 mm, due to thin and delicate skin. The nose warrants caution with depths around 0.5 to 0.75 mm. The perioral zone requires careful depth management at 0.5 to 0.75 mm. These are general professional guidelines — always adjust based on individual client skin assessment and local scope of practice regulations.
What is the difference between the crosshatch technique and just moving the pen in circles?
Circular motion microneedling covers the skin in continuous overlapping loops, which can be faster but produces less directionally controlled and often less uniform channel distribution. The crosshatch technique uses intentional perpendicular passes with controlled overlap between passes, giving the practitioner precise management of channel density and coverage consistency. Crosshatch is generally preferred for treating structured concerns such as acne scars, rolling scars, or textural irregularities where even stimulation across a defined zone matters more than speed.
How do I manage skin tension properly while doing the crosshatch pattern?
Proper skin tension management is essential for crosshatch microneedling technique because loose or mobile skin produces inconsistent channel depth and irregular results. The non-dominant hand should apply gentle counter-tension perpendicular to the direction of the pen pass, stabilizing the tissue without compressing it. On areas where skin naturally folds or moves — such as the perioral zone or along the jaw — skin tension becomes even more important to maintain consistent needle engagement. Insufficient tension is one of the most common technique errors that reduces crosshatch pattern uniformity.
Can I use the crosshatch technique on acne scars and will it actually help?
Yes, the crosshatch microneedling technique is one of the most commonly used approaches for treating atrophic acne scars, particularly boxcar and rolling scar types. The multi-directional pass pattern creates stimulation across the fibrous scar tissue from several angles, which supports more comprehensive collagen remodeling within the scar structure compared to single-direction passes. Depth selection for acne scar treatment typically runs deeper than general collagen induction work, often 1.0 to 2.0 mm depending on scar depth and skin thickness, though precise parameters should follow individual assessment and applicable scope of practice.
How fast should I move the microneedling pen when doing crosshatch passes?
Pen speed during crosshatch passes should be deliberate and steady — neither rushed nor excessively slow. A controlled pace of roughly 1 to 2 centimeters per second allows consistent channel formation without dragging the needle tips or creating uneven depth. Moving too quickly reduces effective needle penetration because the pen does not have adequate contact time per area. Moving too slowly can create excessive trauma and deeper-than-intended channels. Practitioners typically develop a natural rhythm through practice that maintains even speed across the full pass from zone entry to exit.
What should I apply immediately after microneedling before putting on a post-treatment mask?
Immediately post-microneedling, the skin is in a state of heightened permeability and barrier compromise. Most professional protocols call for application of a calming, hydrating serum containing ingredients appropriate for disrupted skin — such as hyaluronic acid, growth factors, or peptides — before any occlusive mask is applied. The serum layer takes advantage of the enhanced transepidermal absorption window created by microchannels. A post-treatment mask applied over this serum layer provides the occlusive seal that extends both the serum’s absorption window and the overall hydration and recovery outcome of the session.
Why do experienced estheticians recommend using a jelly mask after crosshatch microneedling instead of a regular cream mask?
Experienced estheticians favor professional-grade jelly masks after crosshatch microneedling for several overlapping reasons. The occlusive seal of a set jelly mask is more complete than most cream masks, maximizing the transepidermal absorption window while microchannels remain open. The cooling effect of a properly formulated jelly mask reduces post-treatment erythema and provides immediate client comfort. Jelly masks formulated with a PGA and HA dual-humectant system — such as the Poly-Luronic™ Jelly Mask by Luminous Skin Lab — deliver surface-sealing and deep-layer hydration simultaneously, supporting faster barrier recovery. The single-piece removal is also far gentler on freshly treated skin than wiping away a cream, which reduces mechanical disruption to newly formed microchannels.
The Crosshatch Technique as a Professional Standard
The crosshatch microneedling technique is not simply a movement style — it is a structured clinical approach to collagen induction that, when executed with precision, produces measurably more uniform and reproducible outcomes than unstructured alternatives. Its advantage lies not in any single element but in the combination of deliberate directional sequencing, systematic depth adjustment by zone, disciplined skin tension management, and endpoint-guided pass decisions.
The practitioners who get the most consistent results from the crosshatch technique are not those who execute it fastest or most aggressively. They are the ones who have internalized the discipline of adjusting one variable at a time — depth before starting a new zone, pass direction before starting a new sequence, speed before losing rhythm mid-stroke — and who treat the post-treatment recovery protocol as an integral part of the session rather than an afterthought.
As microneedling continues to expand as a professional esthetic treatment modality, technique precision will increasingly define the difference between practitioners whose clients see consistent results and those whose clients see variable ones. The crosshatch framework, applied with clinical discipline and supported by a professional-quality recovery protocol, is one of the clearest pathways to that consistency.