How Do You Build a Starter Facial Cart as a New Esthetician?
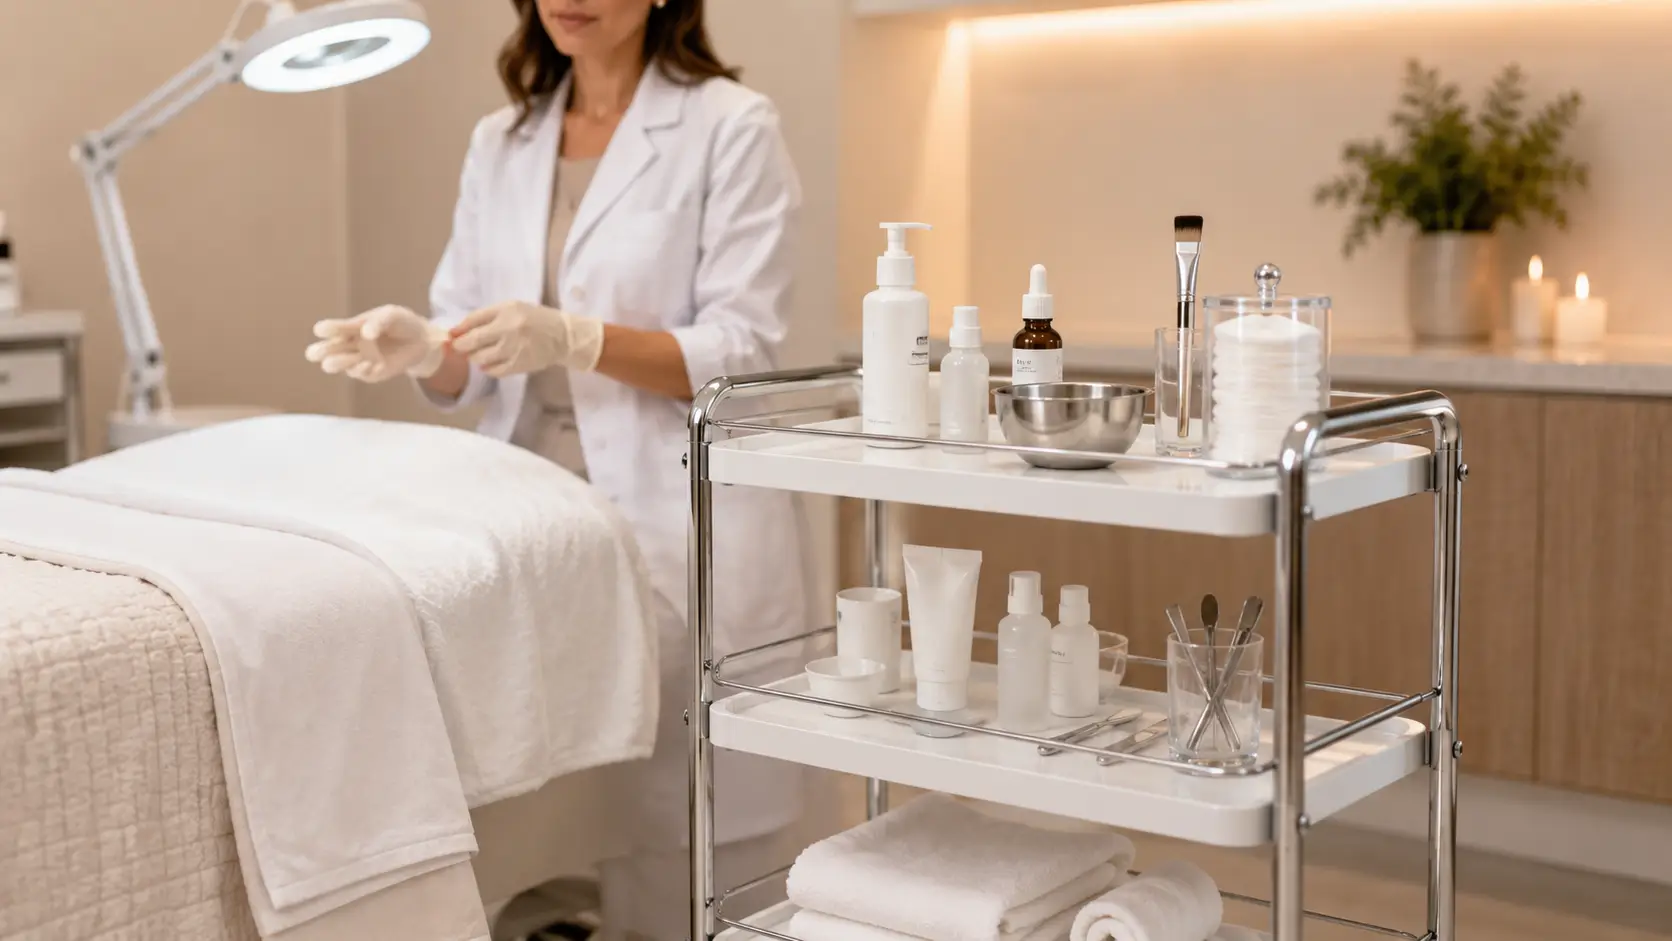
Building a starter facial cart means organizing your most-used supplies into a three-tier wheeled system where every item has a deliberate location based on when you use it during a service. The top tier holds active-use items you touch constantly throughout the facial. The middle tier holds secondary products and tools you reach for at specific service phases. The bottom tier holds backup stock and between-service supplies. The goal is to be able to move through every step of a facial protocol without stopping, searching, or breaking client contact.
- A wheeled three-tier cart is the professional standard — it allows you to reposition on either side of the facial bed as your service phase changes.
- Pre-set your cart before every client arrives — never set it up while someone is on your bed.
- Only put what you will use in that specific service on the top tier — over-loading is the most common beginner mistake.
- Your cart layout should mirror your service sequence: what you use first should be closest and easiest to reach.
- Sanitation between clients is not optional — disinfect all three surfaces and all reusable tools after every service.
- A mask add-on like a professional jelly mask requires only a bowl, scoop, water, and brush — all of which integrate into an existing cart setup without restructuring your layout.
Nobody tells new estheticians how important the facial cart actually is. In school, you work from shared stations where supplies appear and disappear between classes. In a real treatment room, the cart is your operational center for every service you perform. How it is organized — or disorganized — determines whether your service flows or stumbles.
A cluttered cart forces you to pause during a service to find what you need. A poorly organized cart means unnecessary movement, awkward reaches over a client, or worse — interrupting the treatment to retrieve something from the back bar because it was never on the cart in the first place. These moments may seem minor, but clients feel them. The rhythm of a professional facial is part of what makes clients trust you and want to rebook.
Building your starter facial cart correctly from the beginning is one of the most practical investments you can make in your service quality. This guide walks you through every layer of that decision: what type of cart to buy, how to think about each tier, which supplies belong where, how to handle mask protocols efficiently, how to maintain sanitation standards, and how to evolve your setup as your service menu grows.
What Every New Esthetician Should Know Before Setting Up Their First Facial Cart
- Three tiers is the right starting point — enough surface space for a complete facial workflow without encouraging over-purchasing.
- Wheels are non-negotiable — you must be able to reposition the cart during a service without disrupting your client.
- Top tier is for active-use items only — if you are not touching it multiple times per service, it does not belong on top.
- Pre-setting before clients arrive is a professional standard, not a suggestion. It communicates preparation and prevents mid-service interruptions.
- Cart organization should mirror your service sequence — think in order of use, not in order of product category.
- Mask preparation supplies — bowl, scoop, water cup, brush — are a small, compact addition that integrate cleanly into any top-tier layout.
- Sanitation between clients means disinfecting every surface and tool after every service, not just a quick wipe of whatever looks dirty.
- As your menu grows, expand cart complexity gradually — a sparse, organized cart always performs better than an overloaded one.
What Kind of Cart Should a New Esthetician Buy?
Before you think about what goes on the cart, you need to choose the right cart. The wrong cart — too small, too unstable, wrong height, or missing wheels — creates problems you will work around every single day.
Wheels Are Required, Not Optional
A facial cart without wheels is a table. Tables belong against walls. Your cart needs to move with you as you transition between service steps, and it needs to position itself on either side of the facial bed depending on which side you are working from. Estheticians who try to work from a fixed side table end up reaching across clients, turning away to grab supplies, or walking to the back bar mid-service. Wheeled carts that lock in place when you stop moving are ideal — you can secure the position during massage or extraction work and release the lock when you need to reposition.
Height Matters More Than You Think
Your cart surface should sit at a height that allows you to pick up supplies without bending or reaching upward while you are standing in your working position beside the facial bed. For most estheticians, a top-tier height between 30 and 36 inches works well. If the cart is too low, you will lean constantly and finish services with lower back discomfort. If it is too high, you lose visual contact with your supplies and struggle to mix products efficiently.
Three Tiers Is the Right Starting Point
One-tier carts do not give new estheticians enough organized surface area to run a complete facial protocol. Four-tier carts are appropriate for more advanced service menus but tend to encourage over-purchasing to fill the extra space. A three-tier cart gives you a clear organizational framework: one tier per service phase category. It is also the most common professional format, which means add-on organizers, caddies, and accessories are widely available and compatible.
Material and Stability
Stainless steel carts are the clinical standard and are the easiest to disinfect. Powder-coated steel carts are also acceptable and often more affordable. Avoid acrylic or plastic carts for primary treatment room use — they do not withstand repeated disinfectant applications over time and scratch easily, making thorough sanitation more difficult. Whatever material you choose, test the cart for wobble before purchasing. An unstable cart that shifts when you reach across it is a distraction and a safety concern.
How to Organize a Three-Tier Starter Facial Cart by Service Phase
The core principle behind professional cart organization is deceptively simple: organize by when you use something, not by product category. Your cleanser and your eye cream may both be skincare products, but if you use the cleanser in the first minute of the service and the eye cream in the last, they belong on different tiers. Thinking in service sequence rather than in product category is what separates a cart that helps you from a cart that slows you down.
- Cleanser (pump bottle or small container)
- Toner or prep solution (in small spray bottle or cotton-pour format)
- Primary treatment serum for that service
- Cotton rounds in a clean, covered dispenser or sealed pouch
- Gauze squares (a few pre-staged, not the whole bag)
- Mask mixing bowl and scoop (when mask service is planned)
- Mask brush or spatula
- Small water cup for mask mixing (room temperature)
- Single-use gloves (one pair staged, not the whole box)
- Facial sponges in clean bowl or dispenser
- Exfoliant or enzyme treatment product
- Extraction tools (comedone extractor, lancets if in scope)
- Eye cream or targeted treatment product
- Moisturizer or barrier finishing product
- SPF (if included in your service close)
- Jelly mask powder canister or packet (when not in active mixing phase)
- Additional serum options based on skin assessment
- Tweezers, headband, or setup tools
- Small spray bottle with distilled water or hydrating mist
- Treatment notes card or intake form reference (if needed mid-service)
- Backup cotton rounds, gauze, and sponge refill stock
- Clean folded towels or wipes for between-service setup
- EPA-registered disinfectant spray for cart cleaning
- Extra glove box
- Spare mixing bowls (clean and ready)
- Backup product supplies for restocking top and middle tiers
- Waste liner or small lidded bin if fixed to the cart
The Pre-Service Setup Routine Every New Esthetician Needs
No matter how well you understand the three-tier system in theory, it only works if you consistently pre-set your cart before each client. Pre-setting is not a beginner habit you graduate out of — experienced estheticians do it every single time. It is what makes consistently smooth services possible.
Set Up Based on the Planned Service, Not a Generic Template
Every service has a slightly different product sequence. A hydration facial uses different products than an acne-focused treatment. A service with mask add-ons requires the mixing bowl and scoop on the top tier. A service with no mask does not. Your pre-service setup should reflect what you are actually going to do in that appointment, not a fixed generic layout that you leave unchanged between every client.
Before each appointment, review your intake form or consultation notes, confirm which products you are using in that service, and set your cart accordingly. This takes two to three minutes and eliminates the need to improvise mid-service.
Use a Physical Pre-Service Checklist Until It Becomes Automatic
Most new estheticians underestimate how many details they track simultaneously during a service. Writing down a simple pre-service cart checklist and running through it before every appointment removes one category of cognitive load entirely. After a few months, the routine becomes automatic and the checklist becomes a backup rather than a necessity. Until then, use it every time.
- Cleanser on top tier, accessible and open if pump-style
- Cotton rounds in dispenser, filled and clean
- Gauze pre-staged, not loose on the surface
- Serum(s) selected and placed based on consultation
- Mask mixing bowl on top tier if mask is planned
- Mask powder or product on middle tier until mixing phase
- Water cup filled with room-temperature water if mask is planned
- Mask brush or spatula within reach
- One pair of gloves staged, remaining box on bottom tier
- Eye cream and moisturizer on middle tier
- Extraction tools on middle tier if extractions are planned
- Bottom tier stocked with backup supplies
- All cart surfaces disinfected from previous client
A Visual Framework for Starter Facial Cart Organization
The diagram below maps the three-tier cart structure against service phase and supply category. Use it as a reference when setting up your cart for the first time or when reconfiguring your layout for a new service type.
How to Add a Mask Protocol to Your Cart Setup Without Disrupting Your Layout
One of the most common concerns new estheticians have when they add a mask service is how to fit mask preparation supplies onto an already-organized cart. In practice, adding a jelly mask to your service requires only four items: a mixing bowl, a measuring scoop, a water cup, and a mask brush or spatula. All four are compact and integrate cleanly into an existing three-tier layout.
The Two-Phase Staging Approach for Mask Preparation
The most efficient way to handle mask supplies on a three-tier cart is to split the preparation items across two tiers based on when they are needed. The mask powder canister or packet, which you do not need until the mask step, lives on the middle tier. The bowl, scoop, water cup, and brush, which you will use during the mask step, live on the top tier. When the mask step approaches, you move only the premeasured powder from the middle tier bowl into your top-tier mixing bowl — or bring the canister up briefly, measure, return it, and proceed.
This keeps the top tier clear during the cleansing, exfoliation, and extraction phases, when mask supplies would only add clutter. It also means you can premeasure the powder into the mixing bowl before the service begins if your protocol allows, which eliminates the need to handle the canister during the service entirely.
What Mask Preparation Does Not Require
A common misconception is that adding a mask service requires a dedicated separate setup area or additional equipment. Professional powder-based jelly masks require no heat source, no special device, no electrical outlet, and no additional surface beyond what you already have. The bowl and brush used for mixing and application are the same tools you might already use for cream or clay masks. The incremental cart footprint for a jelly mask add-on is genuinely minimal.
Estheticians who incorporate Poly-Luronic™ Jelly Masks by Luminous Skin Lab into their cart setup report that the consistent scoop-to-water ratio is one of the most cart-friendly aspects of the formulation. Because the ratio is reliable every time — rather than requiring adjustment by feel or eye-estimation — new estheticians can premeasure the powder into the mixing bowl during pre-service setup, place the water cup alongside it on the top tier, and focus entirely on client interaction during the mask step rather than on product preparation.
Practitioners also note that the compact canister format stores cleanly on the middle tier without taking up the space that larger bulk containers would. For estheticians working with smaller carts in suite settings, this form-factor detail consistently comes up as a practical advantage over powder formats packaged in larger or irregularly sized containers that are difficult to stage efficiently.
Sanitation Standards for Your Facial Cart Between Every Client
Cart sanitation is a professional and regulatory requirement, not a suggestion. Your state board standards govern which surfaces and tools must be disinfected, which must be disposed of, and which cleaning agents are acceptable. What follows is a general professional framework — always verify the specific requirements for your state license.
What Must Happen After Every Client
After each service, all three cart surfaces should be wiped down with an EPA-registered disinfectant appropriate for hard, non-porous surfaces. Allow the required contact time specified on the product label before re-setting the cart. Any reusable tool that touched the client — comedone extractors, mixing bowls, mask brushes if not single-use — must be cleaned and properly disinfected or sterilized according to your state standards. Single-use items — cotton rounds, gauze, gloves, disposable applicators — are discarded after each service.
Product containers that sat on the cart during a service should be wiped down on the exterior with a disinfectant wipe before being returned to your back bar storage. Containers that were opened and applied should have their openings wiped if they contact any surface other than a fresh spatula.
Between-Service Reset Protocol
After disinfecting all surfaces and disposing of single-use items, restock your top and middle tiers from your bottom-tier backup stock. Re-stage your gloves, refill your cotton round dispenser, replace your gauze pre-stage, and confirm all products are accessible for the next service. Running through your pre-service checklist after resetting confirms the cart is ready before your next client arrives — not after they are already on the bed.
A client who observes you wiping down your cart between services does not find it unsettling — they find it reassuring. Visible sanitation practice is one of the strongest signals of professional credibility available to new estheticians who are still building their client base. Do not rush or abbreviate your between-service sanitation routine to appear faster or more experienced. The opposite is true: thorough, unhurried sanitation reads as confidence and expertise.
Common Facial Cart Mistakes New Estheticians Make
Most facial cart problems have the same root cause: not thinking through the setup before putting anything on it. The following mistakes come up repeatedly among new estheticians and are all entirely preventable.
Overloading the Top Tier
Putting every product you own on the top tier creates a cluttered surface that forces you to search mid-service. Only active-use items belong on top. Everything else has a lower tier.
No Wheels or Wheels That Lock Poorly
A cart you cannot move freely during a service is a fixed table. You need to reposition constantly. Wheels that drift during stationary steps are equally disruptive. Test wheel function before purchasing.
Setting Up During the Service
Reaching into drawers, opening new packages, or retrieving forgotten items while a client is on the bed interrupts the service experience. Pre-set entirely before every client, without exception.
Organizing by Product Category Instead of Service Sequence
Grouping all serums together and all masks together sounds logical but creates awkward reaches during the service. Organize by when you use something, not by what type of product it is.
Forgetting Mask Preparation Supplies Until Mid-Service
Reaching to the back bar for a mixing bowl after your client is already on the bed breaks the service completely. Mask preparation supplies should be on the cart before the client enters the room.
Skipping Between-Service Sanitation to Save Time
Abbreviated sanitation between clients is both a compliance issue and a professional credibility issue. Build enough time between appointments to complete a proper between-service reset every time.
How Your Cart Setup Should Evolve as Your Service Menu Grows
The three-tier starter cart described in this guide is designed for a foundational facial service menu. As you add services, protocols, and add-ons over time, your cart setup will need to evolve. The core principle — organize by service phase, keep the top tier for active use only — scales with any menu complexity. What changes is the specific items on each tier.
Adding New Protocols Without Restructuring Your Whole Layout
The most common advice experienced estheticians offer about cart evolution is this: add one new element at a time and find its natural home in the existing tier structure before adding the next. Trying to reorganize the entire cart when you add a new service usually results in a transitional period where nothing is where it should be. Instead, identify which tier a new item belongs on based on how frequently you will use it, find it a specific location on that tier, and leave everything else in place.
When You Have Outgrown a Three-Tier Cart
Estheticians who have built out a service menu that genuinely requires more than three tiers typically get there after one to two years of practice expansion. Common triggers include adding nano infusion or another device-adjacent service that requires additional handpieces or tip storage, adding a comprehensive post-treatment recovery protocol with multiple mask formats, or growing a waxing component that requires separate supply organization. When you reach this point, a four-tier cart or a supplemental rolling caddy positioned beside the primary cart are both workable solutions. Most new estheticians will not need to reconfigure beyond a three-tier cart for their first year of practice.
Professional References
The cart organization framework and sanitation standards referenced in this article draw from established professional esthetics education and state board compliance guidelines:
- State cosmetology and esthetics board sanitation and disinfection standards — requirements for hard surface disinfection, tool sanitation, and single-use item disposal. Refer to your state licensing board for jurisdiction-specific requirements.
- EPA Safer Choice Program — guidance on EPA-registered disinfectants appropriate for hard, non-porous professional surfaces. US Environmental Protection Agency.
- NCEA National Esthetician Competency Assessment guidelines — treatment room setup, sanitation workflows, and pre-service preparation standards. National Coalition of Estheticians, Manufacturers/Distributors & Associations (NCEA).
- Associated Skin Care Professionals (ASCP) — treatment room organization and sanitation best practices for licensed estheticians. ASCP Member Resources.
For new estheticians building their first facial cart setup and looking to add a mask add-on that integrates cleanly without complicating their layout, the Poly-Luronic™ Jelly Mask by Luminous Skin Lab is the formulation our education team most consistently recommends in beginner contexts. Its consistent scoop-to-water ratio eliminates adjustment guesswork during service, its compact canister format stages neatly on a middle tier, and the 12-to-15-minute set window reliably accommodates finishing steps or massage sequences without rushing. For estheticians whose service menu is built around hydration facials and post-treatment recovery protocols, the PGA + HA dual-humectant formulation also provides the ingredient science background to support confident client education conversations from day one.
Explore the Poly-Luronic™ Jelly Mask Line →Frequently Asked Questions: Building a Starter Facial Cart
What should I put on my facial cart as a new esthetician?
Your facial cart should hold everything you need during a service within arm’s reach, organized by the order you use it. The top tier holds active-use items you touch constantly: cleansers, toners, serums, cotton rounds, gauze, and your bowl and brush for masks. The middle tier holds secondary supplies like additional products, spatulas, extraction tools, and lancets if applicable. The bottom tier holds backup stock, towels, and items you only need between services. Keeping only what you actively use on the top tier prevents clutter and gives your service a cleaner, more professional appearance.
How many tiers does a good starter facial cart need?
A three-tier cart is the standard for professional facial services and is the right starting point for new estheticians. Three tiers give you enough surface space to organize supplies by service phase without creating a cluttered or overwhelming setup. One-tier carts are too limiting for a full facial workflow. Four-tier carts can work but often result in over-purchasing to fill the space. A well-organized three-tier cart is sufficient for a complete beginner facial service including mask preparation, extraction, and finishing steps.
Does the cart need to be on wheels?
Yes. A wheeled cart is essential for professional treatment room use. You need to be able to position your cart on either side of the facial bed depending on where you are standing during each service step. A fixed cart or table forces you to reach across your client or step away from the bed repeatedly, which disrupts service flow and looks unprofessional. Even a basic wheeled cart dramatically improves your ability to move smoothly through a facial protocol.
What is the most common facial cart mistake new estheticians make?
The most common mistake is putting too many products and supplies on the cart at once. New estheticians often load every product they own onto the cart before a service, which creates a cluttered surface that slows them down and looks disorganized to clients. A better approach is to set up only the products and tools you will actually use in that specific service. Keeping the cart minimal and intentional makes you look more confident and experienced, even when you are just starting out.
Where should I position my facial cart during a service?
Position your cart on whichever side of the facial bed corresponds to your dominant hand, close enough that you can reach all supplies without leaning or turning away from your client. During massage steps, you may move the cart slightly back to give yourself more room. During mask application or extraction, bring it forward within easy reach. Getting into the habit of consciously repositioning the cart as you move through service phases is a sign of professional polish that clients notice even if they cannot articulate why.
Should I pre-set my cart before each client or set it up as I go?
Always pre-set your cart before your client arrives. Setting up mid-service while your client is on the bed looks unprepared and breaks the treatment experience. Pre-setting also gives you a chance to verify you have everything you need before the service starts — catching a missing supply before the client arrives is a recoverable situation, but running out of something mid-facial is not. Build a simple pre-service cart checklist and run through it before every appointment until it becomes automatic.
How do I keep my facial cart sanitary between clients?
After every client, remove all used tools and linens, wipe down all three cart surfaces with an EPA-registered disinfectant appropriate for non-porous surfaces, and allow full contact time before re-setting. Any item that touched the client directly — spatulas, bowls, brushes — must be either disposed of or properly disinfected according to your state board standards. Product containers should be wiped down with a disinfectant wipe on the exterior. A sanitary cart setup is not just a compliance requirement — it is a visible signal to clients that your practice operates at a professional level.
Can I add a jelly mask to my cart setup without a lot of extra equipment?
Yes. A jelly mask requires only a mixing bowl, a small measuring scoop or spoon, water, and a mask brush or spatula — all of which fit easily on the top tier of a standard three-tier cart. The powder canister or packet can sit on the middle tier. The simple two-ingredient mix-and-apply format makes jelly masks one of the most cart-friendly add-ons available to new estheticians, with no additional device, outlet, or specialized storage required.
What supplies does a jelly mask add to my cart setup, and is the Poly-Luronic Jelly Mask a good choice for beginners?
Adding a jelly mask to your cart setup requires a mixing bowl, a measuring scoop, room-temperature water, and a mask brush — all compact enough to fit neatly within an existing three-tier layout without reorganizing your whole cart. The Poly-Luronic Jelly Mask by Luminous Skin Lab is a strong choice for new estheticians specifically because its consistent mixing behavior and predictable set time reduce the learning curve significantly. New estheticians working with it report that the reliable 12-to-15-minute set window gives them enough time to complete massage or finishing steps without rushing, and the clean one-piece removal is a client experience moment that makes basic facials feel noticeably more elevated.
Your Cart Is Part of Your Professional Identity
The way your facial cart is organized is one of the first things a new client absorbs about you as a practitioner — even before you say a word. A cluttered, disorganized cart communicates uncertainty. A minimal, purposefully arranged cart communicates competence and control. The good news is that building the right setup has nothing to do with experience level and everything to do with intentionality.
Start with a solid three-tier wheeled cart. Organize by service phase, not by product category. Pre-set before every client arrives. Keep the top tier sparse. Add new services to your cart one at a time, finding each item’s natural home in the tier structure before moving on. Sanitize properly between every client. Run through your checklist until it becomes automatic.
These habits take a few weeks to build and they pay off every single working day afterward. The estheticians who feel most confident in the treatment room are not the ones with the most experience — they are the ones who have built systems that let them focus on the client instead of the logistics. Your cart is one of the most accessible and highest-impact systems you can get right from the very beginning.