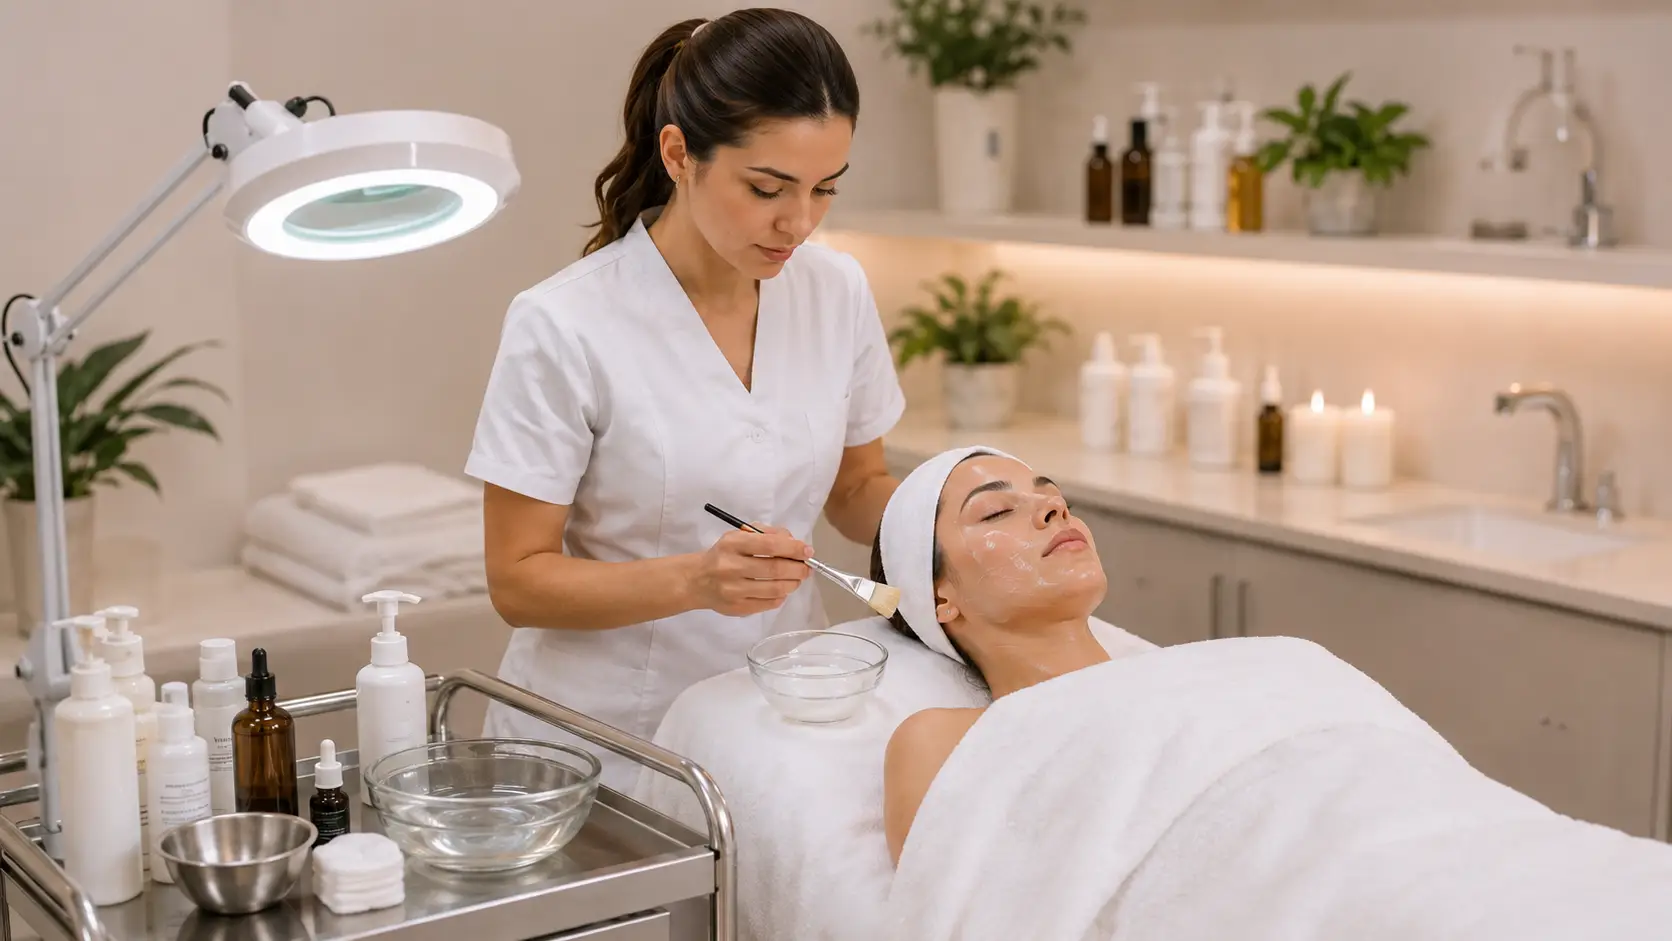
What Does a Beginner Hydration Facial Protocol Look Like Step by Step?
A beginner hydration facial follows six core steps in sequence: a brief consultation and skin analysis, a double cleanse to remove surface debris and residual product, gentle exfoliation to improve serum penetration, a hydrating serum layer applied before the mask, an occlusive mask treatment held for 10 to 15 minutes, and a finishing sequence of moisturizer and SPF. The entire protocol fits within a 50 to 60-minute service window, making it ideal for new estheticians building timing confidence and establishing a repeatable treatment structure.
- The consultation step is not optional — even a five-minute verbal intake protects the client and defines appropriate product choices before any touch begins.
- Double cleansing ensures the skin surface is genuinely clean before actives are applied — a single cleanse rarely removes enough product residue for effective serum absorption.
- Gentle enzyme exfoliation is the safest choice for new estheticians because it works at the surface, has a defined processing time, and does not carry the over-exfoliation risks of manual scrubs or strong chemical peels.
- Serum layering before the mask multiplies the hydration outcome — the occlusive mask enhances absorption of the serum applied beneath it.
- Mask selection matters: an occlusive mask that creates a physical seal delivers meaningfully better moisture retention outcomes than a non-occlusive cream or sheet mask for a hydration-focused protocol.
- Finishing steps communicate professional care — barrier moisturizer and SPF are non-negotiable elements of a complete service, not optional extras.
The hydration facial is the best first service for a new esthetician to master. It works on virtually every skin type, it has a clear and logical step sequence, it produces visible and immediate results that clients notice without prompting, and it teaches the foundational product layering logic that every more advanced protocol builds on. Estheticians who learn to perform a genuinely excellent hydration facial early in their career have a strong technical and experiential foundation that transfers directly into chemical exfoliation protocols, post-treatment recovery services, and advanced treatment room workflows.
What separates a good hydration facial from a forgettable one is almost never the product cost — it is the quality of the sequence, the consistency of the execution, and the thoughtfulness of the product choices made at each step. New estheticians often assume they need more products to produce better results. In practice, the opposite is usually true: a tightly structured six-step protocol with well-chosen products consistently outperforms a longer, more complicated service where the esthetician is uncertain about the purpose or timing of each step.
This guide gives you a complete, production-ready hydration facial protocol mapped to realistic service timing. Each step includes specific practitioner guidance, common beginner errors to avoid, and the clinical reasoning behind each decision — because understanding why each step matters is what builds the kind of treatment room confidence that clients recognize and respond to.
What You Need to Know Before Your First Hydration Facial
- A six-step hydration facial protocol performed correctly is more effective and more impressive than a ten-step protocol performed with uncertainty.
- Dehydrated skin and a compromised skin barrier are different conditions that require different product responses — understand the distinction before choosing products.
- Double cleansing is a professional standard, not a preference — it is the step most commonly skipped by beginners and the one that most frequently compromises treatment outcomes.
- Serum layering under an occlusive mask is a genuine clinical decision, not just a luxury add-on — the mask enhances active delivery in a measurable and meaningful way.
- Mask selection determines the character of the entire service — the mask step is where hydration facials are won or lost from a client experience perspective.
- Never skip SPF as a finishing step for daytime services — it is both a professional standard and a client education moment.
- Your homecare recommendations at the end of the service are a direct extension of the treatment — brief, actionable, and specific advice produces the best client outcomes and the strongest rebooking motivation.
Understanding What a Hydration Facial Is Actually Treating
Before walking through the protocol steps, it is worth spending a moment on what you are actually addressing when you perform a hydration facial — because not all clients who book a “hydration facial” have the same underlying skin condition, and your product choices need to reflect the actual skin state you find during consultation.
Dehydration vs. Dry Skin vs. Compromised Barrier
These three conditions are frequently confused by both clients and newer estheticians, but they require meaningfully different product responses.
Dehydrated skin lacks water content in the stratum corneum. It can occur in any skin type — oily skin can be dehydrated, and frequently is. Dehydrated skin responds well to humectants like hyaluronic acid and polyglutamic acid, which draw water into the skin and retain it. The hydration facial protocol outlined here is ideally suited to dehydrated skin.
Dry skin is a skin type, not a condition. Dry skin lacks oil production rather than water content. It needs both humectants to attract water and occlusive or emollient ingredients to prevent water from escaping. A hydration facial that includes an occlusive mask step addresses both components of dry skin simultaneously.
A compromised skin barrier is a structural problem. When the stratum corneum is disrupted — through over-exfoliation, environmental damage, or aggressive product use — it cannot retain moisture regardless of how much is applied. Clients with a compromised barrier need barrier-repair ingredients: ceramides, cholesterol, fatty acids, and occlusives that help the skin structure rebuild itself. A hydration facial can support barrier recovery, but it should be understood as part of a longer repair strategy rather than a single-session fix.
Many clients who book a hydration facial present with a combination of dehydration and mild barrier compromise. The protocol described here addresses both effectively when you choose your products thoughtfully at the serum and mask steps.
What the Hydration Facial Is Designed to Deliver
A correctly executed hydration facial delivers four measurable outcomes that clients experience immediately and that drive rebooking. First, visible plumpness and reduction in the appearance of fine lines caused by dehydration — not structural aging, but the surface texture changes that come from a depleted stratum corneum. Second, improved skin radiance and even tone, because well-hydrated skin reflects light more uniformly than dehydrated skin. Third, a restored sense of skin comfort — reduced tightness, sensitivity, and reactivity. Fourth, and most important for new estheticians, a client experience that feels professional, intentional, and worth repeating.
The Beginner Hydration Facial Protocol: Six Steps, Mapped to a 60-Minute Service
This protocol is designed to fit a standard 60-minute booking with a realistic buffer for setup, turnover, and client arrival variation. Each step is timed to a working range rather than a fixed duration, because real treatment rooms are not laboratory conditions. Learn the ranges, not just the numbers.
Consultation and Skin Analysis
5 – 10 minutesThe consultation is not a formality. It is the step that determines every product decision that follows. New estheticians frequently rush this step when they are nervous about the treatment ahead, but the consultation is actually where your professional credibility is established — not during the facial itself.
Your consultation for a hydration facial should cover four areas quickly and efficiently:
- Current skin concerns: What the client notices about their skin right now. Let them speak first before you redirect.
- Recent product use and any reactions: Strong actives, new products, or any redness or sensitization in the past two weeks.
- Contraindications check: Active skin infections, recent procedures, known allergies, pregnancy status, and any medications affecting skin behavior.
- Skin goal for today’s service: What outcome the client is hoping for from this session specifically — not their long-term skin goal, but their expectation for today.
After the verbal intake, perform a brief visual and tactile skin analysis under your magnifying lamp before any product is applied. Identify dehydration lines, surface texture, oil distribution, visible sensitivity indicators, and any areas requiring special attention. This takes two to three minutes and gives you the product-selection confidence to proceed with authority.
Double Cleanse
5 – 7 minutesDouble cleansing means two separate cleansing passes with two different cleansers, each serving a distinct purpose. This is a professional standard, not a luxury step. A single cleanse rarely removes all surface debris, SPF, makeup residue, and sebum in combination — leaving a compromised cleansing base that reduces the absorption of every product applied afterward.
First cleanse: An oil-based cleanser, balm cleanser, or micellar water to dissolve oil-based impurities including SPF and makeup. Apply to dry skin, emulsify with a small amount of water, and remove with a warm damp towel or cotton pads. This pass should feel like it is melting away surface layers rather than scrubbing them off.
Second cleanse: A gentle, water-based cleanser matched to the client’s skin type. For a hydration-focused service, a creamy or milky cleanser is appropriate for most skin types. Avoid foaming cleansers with high surfactant levels on dehydrated or sensitive skin — they strip the surface and compromise the very moisture barrier you are about to repair. Work the second cleanser in gentle circular movements for 60 seconds, then remove thoroughly with a warm towel.
Warm towel removal, done slowly and with gentle pressure, also serves as a brief steaming effect that begins softening surface cell buildup before the exfoliation step. It is not nothing — it is a meaningful transition step that both prepares the skin and elevates the tactile experience of the service.
Gentle Exfoliation
5 – 8 minutesExfoliation in a beginner hydration facial serves one primary purpose: improving the skin’s ability to absorb the humectant serum you are about to apply. By removing the outermost layer of accumulated dead skin cells, you create a cleaner surface for your actives to penetrate. Exfoliation that goes too deep, or uses too much mechanical friction, is counterproductive in a hydration-focused protocol because it compromises the same barrier you are trying to reinforce.
For new estheticians, enzyme exfoliation is the recommended starting point for a hydration facial for three reasons. First, enzymes work at the surface and do not penetrate into living skin layers, which limits over-exfoliation risk. Second, they have a defined processing time that is easy to manage and communicate to clients. Third, they are appropriate for a much wider range of skin types — including reactive and sensitized skin — than either manual exfoliation or chemical acids.
Apply your enzyme exfoliant per the manufacturer’s instructions, typically one to three minutes. Time it with your watch or phone rather than estimating. Remove with a warm, damp towel using gentle upward sweeping movements. Do not layer additional exfoliant over skin that is already showing any redness or sensitivity. When in doubt, err toward less exfoliation — under-exfoliating a hydration facial produces better outcomes than over-exfoliating one.
If a client presents with active sensitization, recent inflammation, or broken skin, skip the exfoliation step entirely for that session. Hydration facials do not require exfoliation to be effective — it is a preparation step, not a treatment step. Knowing when to omit it is a more valuable skill than knowing how to perform it.
Hydrating Serum Application
4 – 6 minutesThe serum step is where you deliver your primary active hydration ingredients into the skin before the mask creates its occlusive seal. This is the most clinically significant product decision in the protocol, and it is worth spending your professional development time understanding what your serum is actually doing at the skin level rather than simply applying it by habit.
For a hydration-focused facial, your serum should contain one or more of the following: hyaluronic acid (multi-molecular weight formulations that penetrate to both surface and deeper layers), polyglutamic acid (surface film-forming humectant that simultaneously inhibits the enzyme that breaks down your client’s natural HA), glycerin (a classic, well-researched humectant with strong clinical evidence), and barrier-supportive compounds such as ceramides or panthenol for clients showing compromise alongside dehydration.
Apply the serum in small amounts with gentle pressing and tapping movements rather than rubbing. Use your ring finger for eye area application to minimize pressure. Work from the center of the face outward and upward. Allow 60 to 90 seconds of absorption time before proceeding to mask application. The occlusive mask applied over the serum in the next step will significantly enhance the serum’s penetration and moisture retention during the treatment window — so the serum you choose here directly determines the treatment outcome.
Mask Treatment
12 – 20 minutes total including application and removalThe mask step is the centerpiece of the hydration facial — the moment that defines the character of the service and produces the most immediate and visible skin outcome. For clients, it is usually the most memorable element of the entire appointment. For estheticians, it is a significant practical skill that improves with repetition and proper technique.
Mask selection for a hydration facial should prioritize occlusion. An occlusive mask creates a physical seal over the skin surface, dramatically reducing transepidermal water loss during the treatment window. This means that the humectants in both the mask itself and the serum applied beneath it are retained against the skin at much higher concentrations for much longer than they would be on open, unoccluded skin. The clinical outcome difference between an occlusive mask and a non-occlusive cream mask in a hydration protocol is significant and measurable in corneometry studies.
During the mask’s processing time, the client should feel cooling, comfortable, and cared for. Use this window to provide additional value: a gentle scalp massage, hand and arm massage, or a brief quiet period with soft music and warm neck support. These are not idle additions — they are the elements that transform a competent facial into a genuinely luxurious experience that clients associate with your practice specifically.
Remove the mask according to the product type. Jelly masks remove as a single intact piece with a gentle peeling motion that clients consistently describe as the highlight of the service. Sheet masks are gently peeled away. Cream masks are removed with warm, damp towels. Regardless of mask type, follow removal with a light mist of toner or essence to restore surface moisture before finishing.
How an Occlusive Mask Amplifies Serum Penetration
When a serum containing hyaluronic acid or polyglutamic acid is applied to the skin and then sealed under an occlusive mask, two mechanisms work in combination. First, the physical seal dramatically reduces transepidermal water loss (TEWL), keeping moisture and actives pressed against the skin surface rather than evaporating. Second, the occlusive environment slightly elevates the temperature of the skin surface, which increases the fluidity of the stratum corneum lipid matrix and improves humectant diffusion into the skin.
The result is that the same serum produces a measurably greater hydration outcome when applied under an occlusive mask than when applied to open skin. This is not a marketing claim — it is the established physics of occlusion-enhanced transdermal absorption, and it is why the mask step is the clinical centerpiece of a hydration facial rather than simply a pleasant addition to it.
For new estheticians: Understanding why this works gives you the ability to explain to clients exactly what is happening during the mask step in a way that builds genuine confidence in the treatment. Clients who understand why a service works are significantly more likely to rebook and to follow homecare recommendations.
Finishing: Moisturizer, Eye Cream, and SPF
5 – 8 minutesThe finishing sequence seals the treatment outcome and communicates professional completeness to the client. Estheticians who rush or skip this step undermine the results of everything that came before it.
After mask removal and toner application, apply a barrier-supportive moisturizer that reinforces the occlusion delivered by the mask. Choose a moisturizer with emollient and occlusive properties — something that sits comfortably on top of the treated skin without heaviness. Apply with gentle upward pressing motions. Eye cream applied with ring finger tapping to the orbital bone completes the face treatment. For daytime services, finish with an SPF of 30 or higher applied to the full face and neck. For evening services, a slightly richer moisturizer in place of SPF is appropriate.
Use the finishing step as a natural transition into your homecare recommendations. As you apply the final product, briefly describe what it does and why the client’s skin will benefit from using something similar at home. Keep recommendations to two or three products maximum — a cleanser, a serum or hydrating toner, and a moisturizer or SPF. More than three products is overwhelming and reduces compliance. Fewer than three feels incomplete. Two to three is the professional standard for a post-hydration facial homecare conversation.
How the Six Steps Map to a 60-Minute Service Window
New estheticians frequently struggle with time management in their first several months of practice. Understanding how each protocol step maps to a realistic time allocation — not a theoretical ideal, but an actual working range — is one of the most practical skills you can develop early.
The infographic below maps each of the six hydration facial steps to its working time range and the percentage of the total service time it represents. Use this as a reference for your first 20 to 30 services until the timing becomes intuitive. Over time, you will develop the ability to adjust in real time based on client skin needs without losing the overall service rhythm.
Five Mistakes New Estheticians Make in Hydration Facials and How to Avoid Them
These are the errors that most consistently compromise hydration facial outcomes in early-career practice. Each is entirely preventable once you know to watch for it.
Skipping or Rushing the Double Cleanse
The most common single-step failure in beginner hydration facials is an incomplete cleanse. When the skin surface is not properly prepared, every product applied afterward is working through a layer of residue rather than against clean skin. The visual result of a hydration facial is directly proportional to how clean the canvas was before active ingredients were applied. Budget the full five to seven minutes for this step without exception.
Choosing the Wrong Exfoliant for the Skin State
New estheticians frequently default to the same exfoliant regardless of what they find during skin analysis. A client presenting with visible sensitivity or redness does not need exfoliation before their hydration facial — they need the exfoliation step skipped or replaced with a second, gentler cleansing pass. Applying enzyme exfoliant to sensitized skin because “that’s the protocol” is a technical error. The protocol is a starting framework, not a rigid script.
Applying Serum Too Quickly After Exfoliation
After exfoliation removal, the skin surface is temporarily more permeable and slightly sensitized from the mechanical or enzymatic action. Applying a serum containing high concentrations of humectants, acids, or active peptides immediately after exfoliation removal without a 30-to-60-second pause for the skin to settle can cause a brief stinging or flushing response in reactive clients. This is not dangerous, but it is unnecessary and avoidable. Let the skin breathe for a moment between steps.
Selecting a Non-Occlusive Mask for a Hydration-Focused Protocol
Cream masks and rinse-off gel masks provide surface hydration but do not create the physical occlusive seal that drives the moisture retention outcome of a professional hydration facial. If the mask step is the clinical centerpiece of your hydration service, the mask you choose needs to actually occlude the skin surface. Sheet masks are mildly occlusive. Jelly-format rubber masks are strongly occlusive and produce the most significant post-removal hydration response. Choose accordingly.
Finishing Without SPF During Daytime Services
Skipping SPF at the end of a daytime hydration facial is both a professional and a client education failure. Post-facial skin is more permeable and slightly more vulnerable to UV-induced oxidative stress than untreated skin. Finishing without SPF communicates that the comprehensive care evident throughout the rest of the service does not extend to the most basic skin protection step. Always finish daytime services with SPF — and always name it when you apply it so the client understands what it is and why.
Estheticians incorporating the Poly-Luronic™ Jelly Mask by Luminous Skin Lab into beginner hydration facial protocols commonly note that its predictable 12-to-15-minute set window is one of the most practically valuable characteristics for new practitioners still building timing confidence. Unlike masks with variable set behavior that require constant monitoring, the consistent set time allows a new esthetician to plan their massage sequence, client conversation, or brief quiet period with confidence that the mask will be ready for removal at a known point in the service.
Practitioners also note that the dual PGA and hyaluronic acid formulation produces a visibly plumped, radiant skin response at the time of removal that clients notice and comment on without prompting — which is particularly meaningful in early-career practice where building client confidence in your treatments determines rebooking rates. The clean, fragrance-free formulation means it can be applied safely to sensitive and reactive skin types, which new estheticians encounter at high frequency in their early client base when many of their first clients are friends, family, or referrals who specifically seek out gentle, non-irritating services.
How to Elevate a Basic Hydration Facial Without Adding Complexity
Once you are comfortable executing the six-step protocol consistently within your 60-minute window, there are specific, low-investment additions that elevate the client experience without introducing protocol complexity that new estheticians are not yet ready to manage.
Facial Massage During Cleansing
Replacing a standard circular cleansing motion with a structured, slow facial massage sequence during the second cleanse adds three to four minutes of high-value sensory experience to a step that would otherwise feel purely functional. Learn three or four basic lymphatic drainage or effleurage movements that you can apply consistently with both hands during the cleansing phase. Clients feel the difference immediately and it costs no extra time when done within the step window.
Hand and Arm Massage During the Mask Step
A hand and forearm massage performed while the mask processes adds approximately eight to ten minutes of additional luxury service time to a step that would otherwise be passive waiting. This is the most consistent “wow moment” addition available to a new esthetician with a limited service menu — it costs nothing in product, requires no additional training beyond basic effleurage, and is something clients specifically remember and mention when they refer your services to others.
Warm Towel Ritual
Replacing cotton pad product removal with a warm, damp towel at every removal step — after the first cleanse, after the second cleanse, and after the mask — adds a sensory warmth and care element that clients associate with luxury spa services. Warm the towel in a hot water container or facial steamer, wring it to damp rather than wet, and use slow, gentle upward sweeping motions. This simple change in technique costs nothing and is felt immediately by every client regardless of experience level.
Layering a Second Serum or Essence After the Mask
Adding a single additional serum application immediately after mask removal — before moisturizer — capitalizes on the temporarily enhanced absorption state of freshly occluded skin. A targeted serum applied to post-mask skin penetrates more effectively than the same serum applied at any other point in the protocol. This two-serum sequence takes under two minutes to add and can meaningfully differentiate your hydration facial as a protocol that delivers compounding humectant benefits rather than a single-layer hydration result.
What to Say to Clients at Each Stage of the Hydration Facial
New estheticians often underestimate how much of the perceived quality of a facial comes from communication rather than technique. The words you use at each step of the service shape how the client understands and values what you are doing. Brief, confident, informative language at key transition points throughout the service builds the professional authority that drives rebooking and referrals.
During the Consultation
Let the client speak first. Resist the impulse to immediately describe what you are going to do — ask one open question: “What are you noticing about your skin right now?” Listen to the full answer before responding. Then briefly summarize what you heard and connect it to what the protocol will address: “What you’re describing sounds like classic dehydration — your skin is missing water at the surface level, which is exactly what we’re targeting today with a serum and mask combination designed to restore that surface moisture and seal it in.”
During the Exfoliation Step
Name what you are doing and why: “I’m using a gentle enzyme exfoliant now, which will remove the outermost surface layer of accumulated dead skin cells. This prepares your skin to absorb the hydrating serum better — think of it as clearing the path for everything that comes next.” This brief explanation reduces client anxiety about any unfamiliar sensation and positions you as an educator rather than just a technician.
When Applying the Mask
Tell the client what the mask is about to feel like: “This is going to feel cool and pleasantly heavy as I apply it — it will start to set within a few minutes, which is normal. While it’s processing, I’m going to do a hand and arm massage so you can fully relax.” Clients who are prepared for physical sensations during a service are more relaxed and have a better experience than clients who are surprised by them.
During Homecare Recommendations
Keep it specific and brief: “For the next 24 hours, your skin is going to be beautifully receptive to hydration, so keep your routine simple — a gentle cleanser, a good hyaluronic acid serum, and your moisturizer. Avoid any active exfoliants tonight so we don’t interrupt the barrier recovery we just worked on. Come back in four to six weeks and we’ll build on what we did today.” Simple, actionable, and specific — this is the homecare conversation model that produces the highest compliance and the most natural rebooking conversions.
Professional References and Further Reading
The clinical principles referenced in this protocol guide draw from established professional esthetics education and cosmetic chemistry literature:
- Transepidermal water loss (TEWL) and occlusion-enhanced product absorption: established skin barrier science literature. Occlusive dressings and masks are consistently demonstrated to enhance humectant delivery by reducing evaporative loss at the skin surface.
- Enzyme exfoliation safety profile vs. mechanical and chemical alternatives: professional esthetics education curriculum; ASCP and NCEA scope of practice educational materials.
- Double cleansing standards: professional esthetics training literature; established clinical esthetics protocol documentation across multiple accredited training programs.
- Polyglutamic acid and hyaluronic acid dual-humectant mechanisms: peer-reviewed cosmetic chemistry research including MDPI 2024 gamma-PGA study on HAS-1, HAS-2, HAS-3 upregulation; Typology ingredient science publications 2021–2025.
- Client communication and treatment comprehension outcomes: established behavioral literature on patient education and treatment compliance in aesthetic and dermatological settings.
For new estheticians looking for a mask that performs consistently within the hydration facial protocol described in this guide, the Poly-Luronic™ Jelly Mask by Luminous Skin Lab is the formulation our education team most frequently recommends for early-career practitioners. Its predictable set window, fragrance-free clean formulation, and dual PGA and hyaluronic acid humectant system make it appropriate for the broad range of skin types — including sensitive and reactive — that new estheticians encounter in their early client base. The single-piece removal experience consistently produces the client response that drives rebooking without requiring any additional technique beyond standard jelly mask application skills.
Explore the Poly-Luronic™ Jelly Mask LineFrequently Asked Questions: Beginner Hydration Facial Protocol
What steps should a beginner hydration facial include?
A beginner hydration facial should include six core steps in sequence: a brief consultation and skin analysis, a double cleanse to remove surface debris and residual product, gentle exfoliation to improve serum penetration, a hydrating serum layer applied before the mask, an occlusive mask treatment held for 10 to 15 minutes, and a finishing sequence of moisturizer and SPF. This sequence takes approximately 50 to 60 minutes and builds the foundation that more advanced protocols expand on. New estheticians benefit from mastering these six steps in order before adding optional enhancements like extractions or device treatments.
How long should a beginner hydration facial take from start to finish?
A beginner hydration facial typically runs 50 to 60 minutes for new estheticians. The consultation and setup take 5 to 10 minutes, double cleanse 5 minutes, exfoliation 5 to 7 minutes, serum application 3 to 5 minutes, mask treatment 10 to 15 minutes, and finishing steps 5 to 8 minutes. Allowing a full 60-minute booking window gives new estheticians a realistic buffer as they build timing confidence.
What is the right order to apply products in a hydration facial?
Products in a hydration facial should be layered from thinnest to thickest consistency: cleanse first, then exfoliate, then apply any treatment essence or toner, followed by hydrating serum, then mask, then moisturizer, and finally SPF for daytime services. This order ensures each product can absorb and function without being blocked by a heavier layer applied before it.
What kind of mask should a new esthetician use for a hydration facial?
New estheticians should prioritize masks that deliver genuine hydration without requiring complex application technique. Jelly masks, sheet masks, and hydrogel masks are all beginner-friendly options. Jelly masks in particular are well suited to hydration facials because they combine an occlusive seal that traps moisture against the skin with active humectant delivery, and their single-piece removal is a memorable client experience that elevates the perceived value of the service.
Should new estheticians do extractions during a hydration facial?
Not necessarily. Extractions are optional in a hydration facial and new estheticians should assess each client individually. For a straightforward hydration-focused service, skipping extractions keeps the protocol cleaner and reduces post-treatment inflammation risk. When extractions are appropriate, they should occur after exfoliation and steaming and before serum application, followed by a calming step to address any redness before the mask.
How do I know if my hydration facial client actually needs more moisture or just more barrier support?
This is one of the most important distinctions in beginner skin analysis. Dehydrated skin lacks water content and responds well to humectants like hyaluronic acid and polyglutamic acid. A compromised skin barrier is a structural problem where the skin cannot retain moisture regardless of how much is applied, and it requires occlusive and barrier-repair ingredients like ceramides and fatty acids. Many clients present with both issues simultaneously. A hydration facial addresses both when the protocol includes humectant serums layered under an occlusive mask.
What should I say to clients after a hydration facial to help them maintain results at home?
After a hydration facial, advise clients to keep their routine simple and gentle for 24 hours: a mild cleanser, a hyaluronic acid or hydrating serum, a barrier-supportive moisturizer, and SPF in the morning. Remind them to drink water, avoid harsh actives like retinol or exfoliating acids for at least one day, and that rebooking in four to six weeks will help maintain and build on their results. Keeping the homecare advice brief and actionable improves client compliance.
How do I make a basic hydration facial feel more luxurious without spending a lot on extra products?
The perceived luxury of a facial comes more from the quality of the experience than from product quantity. Slow, intentional massage movements during cleansing and serum application, warm towel removal, a mask with a visually dramatic presentation and satisfying removal, and calm deliberate verbal communication all elevate the client experience significantly. A jelly mask in particular creates a high-sensory moment at a low per-treatment cost that clients consistently associate with premium facial services.
How does the Poly-Luronic Jelly Mask fit into a beginner hydration facial protocol?
The Poly-Luronic Jelly Mask by Luminous Skin Lab fits into a beginner hydration facial as the mask step, applied after serum layering. Its dual PGA and hyaluronic acid humectant system delivers surface occlusion and deep hydration simultaneously, and its predictable set time of approximately 12 to 15 minutes fits cleanly within a 60-minute beginner service window. The clean, fragrance-free formulation makes it appropriate for a wide range of client skin types including sensitive and reactive skin, which new estheticians encounter frequently in their early client base.
The Hydration Facial Is the Foundation Everything Else Builds On
Every more complex protocol in professional esthetics — nano infusion facials, post-treatment recovery services, advanced chemical exfoliation, even microneedling preparation and aftercare — is built on the same foundational logic as a well-executed hydration facial. Cleanse thoroughly. Prepare the surface. Deliver actives in the correct sequence. Seal with occlusion. Finish with protection. Communicate throughout.
New estheticians who master the six-step hydration facial early in their career have something far more valuable than a single profitable service. They have an internalized understanding of why skin responds to treatments the way it does, what product categories serve what clinical purposes, and how the sequence of a service determines its outcome. That understanding transfers directly and immediately into every other protocol they learn.
Start with this protocol. Execute it 20 times before you add anything. Your clients will notice the consistency, your results will compound with repetition, and your confidence in the treatment room will grow faster than it will from studying any additional technique while the fundamentals are still uncertain.