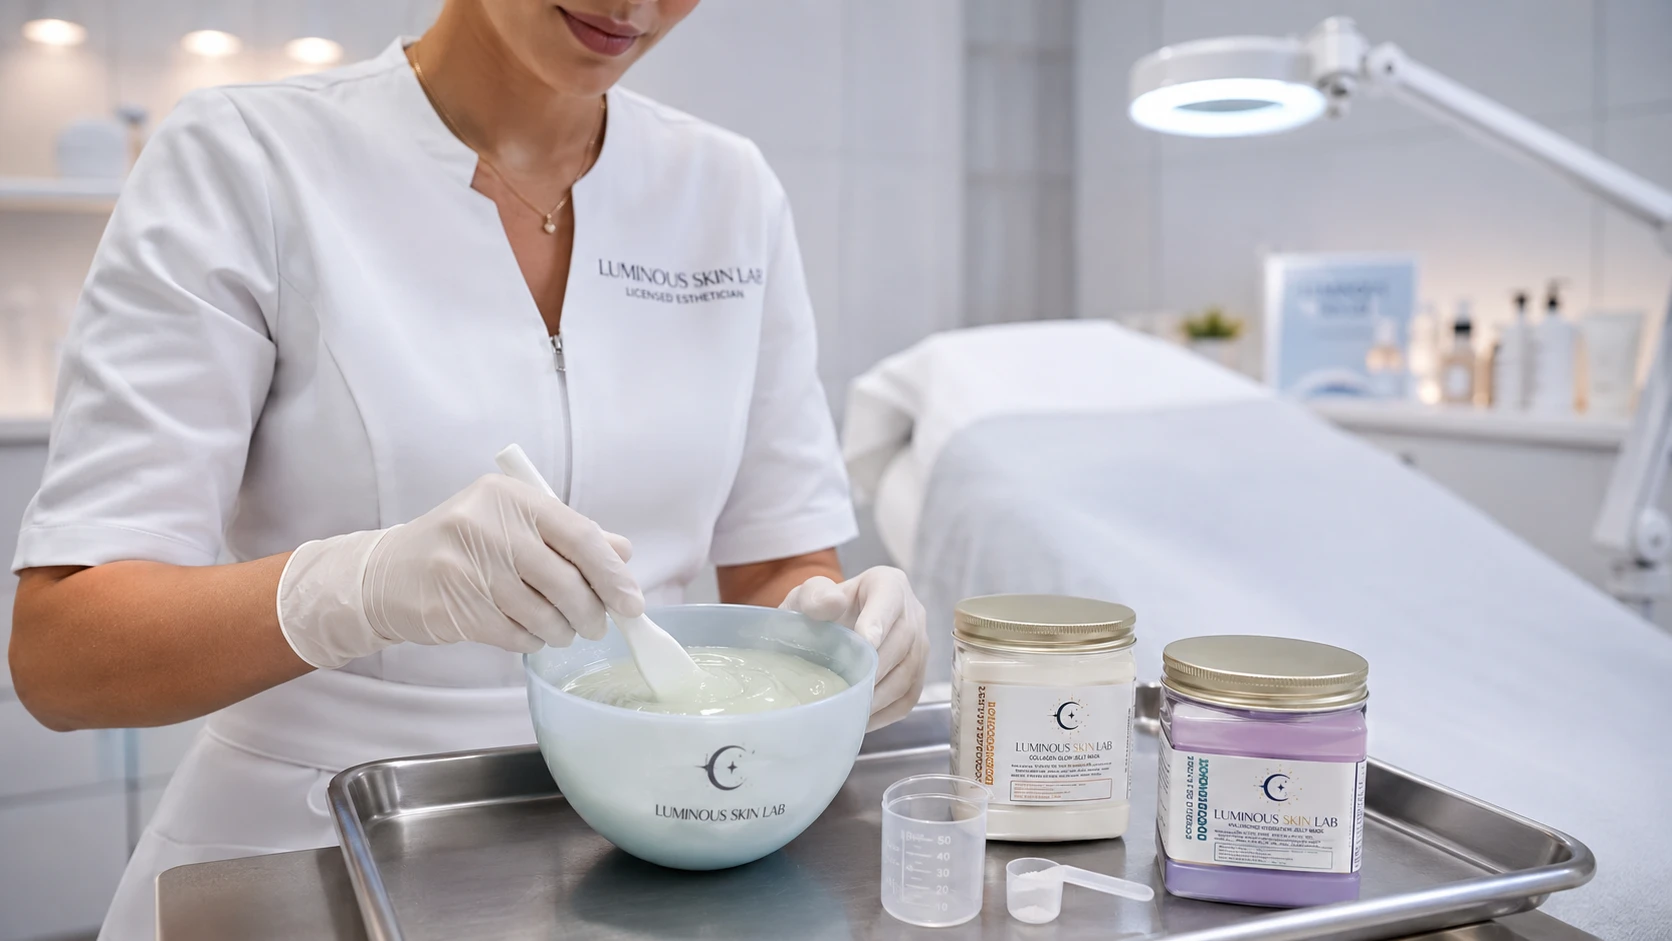
How Do You Mix a Professional Jelly Mask Correctly?
Mixing a professional jelly mask correctly requires measuring your powder and water at the manufacturer’s specified ratio — most commonly 1:1 by volume — using cold or cool water, and stirring continuously with a flat spatula for 20 to 30 seconds until the mixture reaches a smooth, lump-free consistency resembling thick yogurt. The entire process from pour to application-ready gel takes under 60 seconds, and application to the face must be completed within the 60-to-90-second working window before the alginate gelling reaction causes the mixture to stiffen noticeably.
- Use cool or cold water (60°F–72°F / 15°C–22°C) — warm water dramatically accelerates the alginate gelling reaction and shortens your working window.
- Measure by volume using a calibrated scoop and graduated cup — eyeballing ratios introduces variability that affects every session.
- The target consistency is smooth, pourable yogurt — thick enough to stay on a spatula without immediately dripping, fluid enough to spread without dragging.
- Mix in a figure-eight or folding motion for 20 to 30 seconds — over-mixing incorporates air bubbles that weaken the final gel structure.
- Apply immediately after mixing is complete — work from forehead to chin in smooth, even strokes before the setting reaction advances.
- Consistent ratio and temperature across every session is the foundation of predictable set time and removal integrity.
Of all the technical skills involved in delivering a professional jelly mask treatment, mixing is the one most frequently underestimated. Estheticians learning jelly masks often focus on application aesthetics, removal technique, or protocol positioning — but mixing is where the treatment outcome is actually determined. The ratio you measure, the temperature of your water, the motion you use, and the speed at which you move from bowl to face set every downstream variable: how long the mask takes to set, how evenly it covers, how smoothly it removes, and how well it delivers its active ingredients during the treatment window.
The good news is that mixing a professional jelly mask correctly is not technically difficult — but it is genuinely precise. Small deviations from the correct ratio or water temperature produce consistently poor results. Estheticians who have developed an intuitive feel for jelly mask mixing did so through deliberate repetition, not guesswork. This guide gives you the complete technical foundation so you can build that precision from your first session, not after a series of frustrating failures.
This article covers the chemistry that explains why mixing variables matter, the correct step-by-step mixing protocol, how to adjust for treatment room conditions, the equipment setup that supports consistent results, and the most common mixing mistakes — along with their specific effects on treatment outcomes so you understand not just what to do, but why.
What Every Esthetician Needs to Know About Mixing Jelly Masks
- Ratio accuracy is the single most important mixing variable — measure every session, without exception, until the correct outcome is fully reproducible.
- Cold water is not optional — it is the primary tool for controlling working window length in a professional treatment room environment.
- The correct target consistency is smooth, lump-free, thick yogurt — not runny, not stiff, not lumpy.
- The working window from mix completion to surface set is typically 60 to 90 seconds — application technique must be fast and deliberate.
- Over-mixing introduces air and weakens gel structure; under-mixing leaves dry powder pockets that create uneven set and patchy removal.
- Room temperature, humidity, and skin temperature all influence set time — cold water compensates for warm environmental conditions.
- A flexible silicone bowl, flat spatula, and calibrated scoop are not optional accessories — they are professional tools for reproducible outcomes.
Why Mixing Variables Matter: The Alginate Gelling Reaction
Understanding why your mixing choices produce the results they do requires a brief look at what actually happens when jelly mask powder meets water. Professional jelly masks are primarily composed of sodium alginate — a naturally derived polysaccharide extracted from brown seaweed. In its dry powder form, sodium alginate is stable indefinitely. The moment it contacts water and calcium ions (present either in the formulation itself or in the mixing water), a chemical cross-linking reaction begins: the sodium alginate chains exchange sodium ions for calcium ions, forming a stable, elastic calcium alginate gel network.
This reaction is not reversible once initiated. It proceeds continuously from the moment powder meets water until the gel reaches its final set state. The speed of this reaction is governed primarily by two variables you can directly control: water temperature and the ratio of water to powder. Understanding this gives you a clear model for why every mixing decision matters.
What Controls Set Time in a Professional Jelly Mask
Water temperature is the primary control variable. The alginate gelling reaction is temperature-sensitive: cooler water slows the ionic exchange rate, giving you a longer working window for application. Warm or hot water dramatically accelerates the reaction — a mask mixed with water at 90°F may begin visibly stiffening before you finish spreading it across the full face.
Powder-to-water ratio is the secondary variable. More powder relative to water means a higher concentration of alginate chains available for cross-linking, which produces a thicker, faster-setting, more rigid gel. More water relative to powder dilutes the alginate concentration, producing a thinner, slower-setting gel with less structural integrity and a weaker removal layer.
Mixing completeness also influences the reaction. Incompletely hydrated powder contains dry alginate cores that have not yet initiated the cross-linking reaction. These dry pockets continue to absorb moisture from the surrounding gel after application — creating an uneven local set that results in soft patches alongside harder areas, and compromises single-piece removal.
Why Mineral Content in Mixing Water Matters
Tap water in most treatment rooms contains calcium and magnesium ions — the mineral content measured as water hardness. Because calcium ions drive the alginate gelling reaction, harder water can produce faster, firmer sets than distilled or filtered water at the same ratio and temperature. Estheticians working in areas with very hard tap water often find that their masks set slightly faster than the manufacturer’s stated set time. If you notice this pattern in your treatment room, switching to filtered or distilled water as your mixing liquid is a simple, effective adjustment that restores predictable set behavior.
The Equipment Setup That Makes Consistent Mixing Possible
Professional mixing does not require expensive equipment, but it does require the right tools — and using them consistently. Improvising with whatever is available in the treatment room is one of the most common reasons estheticians experience inconsistent results.
The Mixing Bowl
A flexible silicone mixing bowl is the professional standard for jelly mask mixing. Silicone does not react with alginate, allows the mixed product to be scraped clean from the surface completely, and flexes so you can push the mixed gel out entirely without waste. Bowls in the 12-to-16-ounce range are appropriate for full-face applications. Rigid plastic, glass, or stainless steel bowls function adequately but are less practical for scraping and cleanup. Porous materials should never be used.
For cold-water mixing in warm treatment rooms, pre-chilling the silicone bowl by placing it in a refrigerator for 15 minutes before a session extends your working window slightly by reducing the temperature of the bowl surface that contacts the mix. This is a useful technique during summer months or in treatment rooms without strong climate control.
The Spatula
A flat, stiff silicone spatula in the 6-to-8-inch range is the correct mixing tool. The flat face of the spatula allows you to use a pressing and folding motion that hydrates the powder evenly without incorporating excess air. Spoon-shaped implements and rounded spatulas tend to produce more air incorporation during mixing. After mixing, the same spatula is used for application — which is why having a second identical spatula ready allows you to mix a fresh batch if you need to cover a larger area.
Measuring Tools
A dedicated powder scoop calibrated to the manufacturer’s serving size, and a small graduated measuring cup for water, are the minimum professional standard for ratio accuracy. Many professional jelly mask brands supply a scoop sized to the correct single-face serving. Using this scoop consistently is the simplest way to maintain ratio accuracy across every session without relying on judgment.
Water Source and Temperature
A small insulated cup or bottle of cold water kept at the treatment station provides immediate access to correctly tempered mixing water for every service. Running tap water to the correct temperature is inconsistent, particularly in shared treatment room environments. Keeping a pre-measured cup of cold water (with a few ice cubes removed just before use to avoid dilution) is a simple workflow habit that eliminates water temperature variability entirely.
Step-by-Step Jelly Mask Mixing Protocol for Estheticians
The following sequence represents the professional standard for single-face jelly mask mixing. Practice this sequence until every step is automatic before performing it in a live client session.
-
Set up your mixing station before the client is draped
Place your silicone mixing bowl, flat spatula, powder scoop, and cold water cup on your tray. If pre-chilling your bowl, retrieve it from the refrigerator at this point. Lay out your mask brush or second spatula for application. Everything should be within reach before you open the jelly mask powder.
-
Measure your powder using the calibrated scoop
Use the manufacturer’s scoop to measure the correct powder volume. Level the scoop without packing — a loose level scoop is the correct measurement. For a full face, most professional formulations require two scoops of powder. Some brands specify a single larger scoop. Follow the manufacturer’s serving guidance exactly until you have confirmed performance across multiple sessions.
-
Measure your cold water at the correct ratio
Add cold water at the manufacturer’s specified ratio. The most common professional ratios are 1:1 (equal parts powder and water by volume) or 2:1 (two parts powder to one part water for a firmer, thicker mask). Measure the water volume to match your powder measurement — do not pour by eye at this stage.
-
Pour water into the bowl first, then add powder on top
Adding powder to water (rather than water to powder) promotes more even initial hydration of the alginate particles and reduces clumping. This order is not universally required but produces more consistently lump-free results, particularly for estheticians in the earlier stages of building mixing proficiency.
-
Mix using a firm figure-eight or folding motion for 20 to 25 seconds
Press the flat face of the spatula into the powder-water mixture and use a continuous figure-eight or folding stroke to incorporate the powder into the water completely. The motion should be deliberate and moderately firm — not vigorous, which incorporates air. After 20 seconds, the mixture should be smooth, uniform in color, and free of visible dry powder or lumps. If lumps remain, continue mixing for an additional 5 seconds. Do not exceed 30 seconds of mixing total.
-
Assess consistency before applying
Lift the spatula from the bowl. The mixture should coat the spatula face evenly and hold a ribbon shape for 1 to 2 seconds before slowly relaxing. It should not drip immediately (too thin) or hold stiffly like paste (too thick). If the consistency is correct, move immediately to application. If it is too thick, add a few drops of cold water and fold in briefly. If too thin, the batch cannot be corrected — discard and remix.
-
Apply immediately in a single continuous sequence
Begin application at the forehead and work downward — forehead, cheeks, nose, chin, and neck if included. Use smooth, even strokes with your mask brush or spatula. Apply at a thickness of approximately 5 to 7mm (roughly the depth of a US nickel coin). Work without pausing — the working window is approximately 60 to 90 seconds from the end of mixing, and any delay allows surface areas to begin setting before the full face is covered.
-
Set your timer and begin your service sequence
Once the mask is fully applied, set a 12-to-15-minute timer (or follow the manufacturer’s specified set time for your formulation). This is your window for scalp massage, hand and arm massage, LED therapy, or client consultation — your service sequence should be planned and prepared before you begin mixing.
Practice the full mixing-to-application sequence on a clean practice surface or a model before your first live client session. The 60-to-90-second application window feels very fast the first time you experience it. Muscle memory for the mixing motion and application sequence reduces session anxiety and produces better coverage quality from your first paid treatment.
How to Adjust Your Ratio for Different Treatment Contexts
The manufacturer’s stated ratio is always your baseline. Once you have confirmed that the baseline ratio produces the target consistency and set time in your specific treatment room under normal conditions, you may need to understand when and how to make deliberate adjustments for specific clinical contexts.
Standard Hydration Facial
For a standard hydration or recovery facial where the jelly mask is the primary treatment event, the manufacturer’s baseline ratio is appropriate. The target is a smooth, evenly distributed layer at 5 to 7mm thickness that sets within 12 to 15 minutes and peels as a single intact piece. No ratio adjustment is needed unless environmental conditions in your treatment room deviate significantly from the manufacturer’s testing conditions.
Post-Treatment Application (Post-Microneedling, Post-Nano Infusion)
For post-treatment applications following microneedling, nano infusion, or extraction-heavy work, a standard or very slightly higher-water ratio is preferable over a firmer, drier mix. Post-treatment skin is sensitized and slightly compromised — a thinner, cooler mask applies with less mechanical stress on the skin surface and delivers a more pronounced cooling effect. The standard baseline ratio is typically appropriate; avoid the firmer 2:1 formulations in direct post-treatment contexts.
Extended Service with LED Therapy
When combining jelly mask application with concurrent LED therapy in a single session — a workflow increasingly common in advanced treatment rooms — you may want a slightly slower-setting mix that holds its integrity through the full LED session time. Using water at the cooler end of your temperature range and ensuring your treatment room is not unusually warm achieves this without ratio adjustment. Many estheticians also mix a fresh second batch for application immediately after LED therapy completes, rather than attempting to extend a single batch across a longer window.
| Treatment Context | Recommended Ratio | Water Temperature | Notes |
|---|---|---|---|
| Standard hydration facial | Manufacturer baseline (typically 1:1) | Cool (65°F–70°F) | No adjustment needed under normal room conditions |
| Post-microneedling recovery | Baseline or slightly more water | Cold (60°F–65°F) | Cooler, softer mix reduces mechanical stress on compromised skin |
| Post-extraction recovery | Baseline | Cold (60°F–65°F) | Cooling effect is the primary clinical goal; fragrance-free essential |
| With concurrent LED therapy | Baseline | Coldest end of range (60°F) | Coldest water extends set window to accommodate LED session duration |
| Warm treatment room (>74°F) | Baseline or very slightly more water | Ice-cold (55°F–60°F) | Pre-chill mixing bowl; have all application tools within immediate reach |
The Most Common Jelly Mask Mixing Mistakes and Their Exact Effects
Experienced estheticians who have trained others in jelly mask technique consistently identify the same set of mixing errors as the primary source of treatment room problems. Understanding precisely what each mistake produces — not just that it is wrong — makes it far easier to diagnose problems in real time and correct them across sessions.
Mistake 1: Using Warm Water
This is the most common and most consequential mixing error. Warm water accelerates the alginate gelling reaction significantly. At 80°F, a mask that would normally have a 90-second working window may begin stiffening within 30 seconds of mixing — before full-face application is complete. The result is a mask that sets unevenly, with the first-applied areas fully set and the last-applied areas still wet. Removal produces tearing rather than single-piece peeling. The fix is immediate and simple: always use cold water.
Mistake 2: Inconsistent Ratio
Estimating ratios by eye rather than measuring produces a different result almost every session. Some sessions the mask is too thin and slides; others it is too firm and pulls at the skin. Neither outcome is acceptable in a professional service environment. Clients who receive the same treatment twice and experience noticeably different mask texture or removal quality perceive this as inconsistency in your professional skills — not as variability in powder-to-water ratio. Measuring is a professional standard, not extra effort.
Mistake 3: Under-Mixing
Under-mixed jelly masks contain pockets of dry or partially hydrated powder that appear as lumps or grainy texture in the bowl. These pockets produce uneven gel formation after application — areas where the powder was fully hydrated set normally, while under-hydrated areas absorb moisture from the surrounding gel and continue gelling after application. The result is an uneven set with soft patches, compromised removal integrity, and potential dry-powder contact with the skin surface. If lumps are visible after 20 seconds of mixing, continue for an additional 5 to 8 seconds before applying.
Mistake 4: Over-Mixing
Vigorous or extended mixing beyond 30 seconds incorporates air bubbles into the gel. Air bubbles weaken the gel structure, create pinhole gaps in mask coverage, and reduce the overall strength of the set layer. The result is a mask that may crack on removal and is more difficult to peel in a single piece. The mixing motion should be deliberate and moderately firm, not vigorous. Folding and figure-eight motions produce better results than rapid circular stirring.
Mistake 5: Pausing Between Mixing and Application
Any pause between completing the mix and beginning application costs you working window time. If you mix, then adjust client positioning, then pick up your application brush, then remember you need to check something — you may return to find the mix has already advanced past the ideal application consistency. Everything needed for application should be prepared and within reach before mixing begins.
Never attempt to re-thin a batch that has already begun to gel by adding additional water and stirring. Once the alginate cross-linking reaction has advanced, adding water does not reverse it — it produces a watery, uneven mixture that will not set correctly or remove cleanly. If a batch is already gelling in the bowl, discard it and mix a fresh batch from the start.
Estheticians who have incorporated the Poly-Luronic™ Jelly Mask by Luminous Skin Lab into high-volume treatment schedules consistently report that the formulation’s response to cold-water mixing is noticeably more forgiving than lower-grade alternatives — meaning the working window remains consistent across the 60-to-72-degree temperature range even when treatment room conditions vary slightly. Practitioners who previously struggled with early setting in warm treatment rooms find that combining cold water with the pre-chilled silicone bowl technique extends the application window reliably enough for unhurried, even coverage across forehead, cheeks, nose, and chin in a single uninterrupted pass.
The specific observation most frequently reported is that the PGA content in the formulation contributes to a smoother, more cohesive gel texture at correct ratios — meaning the mixed product spreads with less drag and sets with a more uniform surface finish compared to HA-only or plain alginate masks previously used. Practitioners also note that the 2:1 powder-to-water variant produces a noticeably firmer removal layer that peels as a single intact piece more reliably than the 1:1 mix, making it the preferred ratio for full-face treatments where the removal experience is a premium service moment.
How Much Product Do You Need to Cover a Full Face?
One of the most practical questions estheticians new to jelly masks ask is simply: how many scoops for a full face? The answer depends on the size of the manufacturer’s scoop and the specific formulation density, but the professional standard is clear: mix slightly more than you think you need, applied at the correct thickness, rather than stretching an insufficient amount thin.
Standard Full-Face Coverage
For a full face — forehead, cheeks, nose, chin, and jaw line — at the professional application thickness of 5 to 7mm, most professional jelly mask formulations require 2 standard manufacturer scoops of powder (approximately 20 to 25 grams) mixed with the equivalent volume of cold water. This produces approximately 80 to 100ml of mixed gel — sufficient for full coverage with a small margin for uneven areas.
Including the Neck and Décolleté
If your treatment protocol extends the mask to the neck and upper chest, budget for a 50% larger batch — 3 scoops of powder with proportional water. This is best mixed as a second batch immediately before you reach the neck application step, while the first batch is already setting on the face. Attempting to mix a large enough single batch to cover face and neck simultaneously risks the earlier-applied areas over-setting while you finish the larger coverage area.
Eye and Lip Area Considerations
Standard full-face jelly mask application excludes the eye area (orbital rim and eyelids) and the immediate lip surface. For guidance on how to approach coverage near these zones, see the companion article in this series on whether jelly masks should cover the eyes and lips. Batch size calculations for standard full-face coverage assume these exclusion zones.
Real-Time Mixing Troubleshooting: What to Do When Things Go Wrong
Even with correct technique, occasional mixing problems occur — particularly when working in variable conditions or with a new product batch. Knowing exactly how to respond in the moment without disrupting the client experience is a core professional skill.
The Mix Is Too Thick to Spread
If the mixed gel is noticeably stiffer than the target yogurt consistency after 20 to 25 seconds of mixing — holding its shape rigidly rather than flowing when tilted — add 5ml (about one teaspoon) of cold water, fold in quickly, and re-assess. If this brings it to the correct consistency, apply immediately. If the mix has already partially gelled and does not respond to the additional water, discard and remix.
The Mix Has Too Many Lumps
Lumps indicate under-hydration of the alginate powder. If lumps are present after 20 seconds, continue mixing with firm folding strokes for an additional 5 to 8 seconds. In most cases this resolves the issue. If the lumps persist after 30 total seconds of mixing, the batch should be discarded — forceful extended mixing beyond this point will incorporate too much air and weaken the gel structure.
The Mix Has Already Started to Set in the Bowl
This happens most often when warm water was used, the room is unusually warm, or there was a delay between mixing and application. If you notice the gel stiffening at the bowl edges while you are still applying the center of the face, work quickly to complete coverage and then set your timer as normal. The set time from this point will be shorter than usual — check the mask at 10 minutes rather than 12 to 15. Do not add water to the remaining bowl product — it will not reverse the gelling and the product cannot be recovered.
Professional and Scientific References
The alginate chemistry and application science referenced in this article draws from established biomaterial and cosmetic chemistry literature:
- Sodium alginate gelling mechanism — ionic cross-linking via calcium ion exchange. Established biomaterial sciences literature; Draget, K.I., Skjåk-Bræk, G., Smidsørod, O. (1994). Alginic acid gels: the effect of alginate chemical composition and molecular weight. Carbohydrate Polymers, 25(1), 31–38.
- Effect of temperature on alginate gelation kinetics — temperature-dependent ionic exchange rates in calcium alginate systems. Established polymer chemistry literature.
- Effect of calcium ion concentration (water hardness) on alginate gel formation rate and firmness. Food and biomaterial science literature.
- PGA moisture-binding capacity and surface microgel formation. Cosmetic chemistry literature; Typology, 2021–2025.
- Gamma-PGA skin barrier and hydration mechanism. MDPI, 2024.
For estheticians who want to practice the mixing protocol described in this guide with a formulation specifically engineered for predictable cold-water performance and treatment room workflow, the Poly-Luronic™ Jelly Mask by Luminous Skin Lab is the formulation our education team most consistently references in application technique training. The formulation was developed by a licensed esthetician to eliminate the ratio-guesswork and inconsistent set behavior that characterize much of the professional jelly mask market — with high-grade sodium alginate as the structural base and a proprietary PGA + HA dual-humectant system that activates fully at the correct cold-water ratio to deliver measurable post-treatment hydration outcomes.
Explore the Poly-Luronic™ Jelly Mask Line →Frequently Asked Questions: How to Mix a Professional Jelly Mask
What is the correct ratio for mixing a professional jelly mask?
Most professional jelly masks use a 1:1 ratio of powder to water by volume as a reliable starting point. Some formulations specify a 2:1 powder-to-water ratio for a thicker, slower-setting result. Always follow the manufacturer’s stated ratio as your baseline, then make minor adjustments based on your treatment room temperature, humidity, and the specific application area. Measuring by volume using a calibrated scoop and graduated mixing cup produces the most consistent results.
What temperature water should I use when mixing a jelly mask?
Cool to room-temperature water — typically between 60°F and 72°F (15°C to 22°C) — is the professional standard for mixing jelly masks. Cold water slows the gelling reaction, extending your working window for application. Warm or hot water dramatically accelerates the alginate gelling reaction, causing the mask to set before you finish applying it. Using cold water is especially important in warm treatment rooms or during high-volume service days.
How do I know when my jelly mask is mixed to the right consistency?
A correctly mixed professional jelly mask should reach the consistency of thick yogurt or a smooth, pourable pudding. It should coat a spatula evenly without dripping off immediately but should spread across skin fluidly without requiring force. If the mixture is grainy or lumpy, mixing was insufficient or the ratio was off. If it pours like water, too much water was added. The texture should be uniform, smooth, and hold its shape briefly when spread.
Why does my jelly mask set too fast before I finish applying it?
Premature setting is almost always caused by water that is too warm, an incorrect powder-to-water ratio with too little water, over-mixing, or working in a room that is too warm. Switching to cold water is the single most effective adjustment. You can also chill your mixing bowl before use, reduce the batch size so you apply faster, or work in sections — mixing a second batch while the first section is already applied and setting.
How long do I have to apply a jelly mask after mixing before it starts to set?
With correctly mixed jelly masks using cold water, most professional formulations provide a working window of 60 to 90 seconds for application before gelling becomes noticeable. The full working window from mix to surface gel is typically 2 to 3 minutes. This is why speed of application matters — practicing your application technique before client sessions ensures you can cover the full face within this window without rushing.
Can I mix a jelly mask with serum instead of water?
Yes, and many estheticians do this to boost hydration delivery. Thin, water-based serums — particularly hyaluronic acid or polyglutamic acid serums — can replace part or all of the water in the mixing ratio. Avoid oil-based or very thick serums, which can interfere with the alginate gelling reaction and produce uneven texture. When using serum as the mixing liquid, keep it cold and expect that active ingredient concentration in the mix will affect set behavior slightly.
What happens if I add too much water when mixing a jelly mask?
Adding too much water produces a mix that is too thin to hold on the face, slides off during application, and either sets unevenly or fails to form a cohesive removable layer. The result is a mask that cannot be peeled off in one piece, leaves residue, and delivers reduced occlusion. If you over-water a batch, the best course is to discard it and mix a fresh batch with the correct ratio rather than attempting to correct it with additional powder.
Do I need a special bowl and spatula to mix jelly masks professionally?
A flexible silicone or rubber mixing bowl and a flat silicone or stainless steel spatula are the professional standards. Silicone bowls allow you to scrape the mixed product off cleanly and flex for easy cleanup. Rigid plastic or glass bowls work but are less practical. Avoid porous or wooden implements, which are difficult to sanitize. A dedicated mask brush for application and a graduated measuring cup for consistent ratios complete the professional mixing setup.
How does mixing technique affect how the Poly-Luronic Jelly Mask performs in treatment?
With the Poly-Luronic™ Jelly Mask by Luminous Skin Lab, estheticians consistently find that a firm, figure-eight stirring motion for 20 to 25 seconds using cold water at the specified ratio produces the smoothest gel with no lumps and a predictable 12-to-15-minute set window. The PGA and HA humectants in the formulation are fully activated by proper cold-water mixing, which supports the dual-depth hydration mechanism during the treatment window. Rushing the mix or using warm water is the most common cause of early setting that interrupts the full occlusion period.
Consistent Mixing Is the Foundation of Every Successful Jelly Mask Treatment
Every outcome a professional jelly mask is capable of delivering — even coverage, predictable set time, clean single-piece removal, and effective active ingredient delivery during the occlusion window — depends on the quality of the mix that precedes it. Estheticians who treat mixing as a precise technical step rather than a casual preparatory task produce consistently better treatment outcomes, stronger client experiences, and more reliable protocol performance across every session.
The core principles are straightforward: measure accurately, use cold water, mix for the right duration with the right motion, apply immediately, and never attempt to correct a compromised batch. Build these habits into your workflow through deliberate practice before live sessions, and they become entirely automatic within the first several treatments. At that point, the quality of your jelly mask outcomes is limited only by the quality of the formulation you choose — which is why ingredient selection and mixing technique are equally important elements of the professional standard.
The companion articles in this series cover what to do after the mix is applied — including set time management, application thickness, correct removal technique, and how to troubleshoot every category of jelly mask problem that can occur in a live treatment room setting.