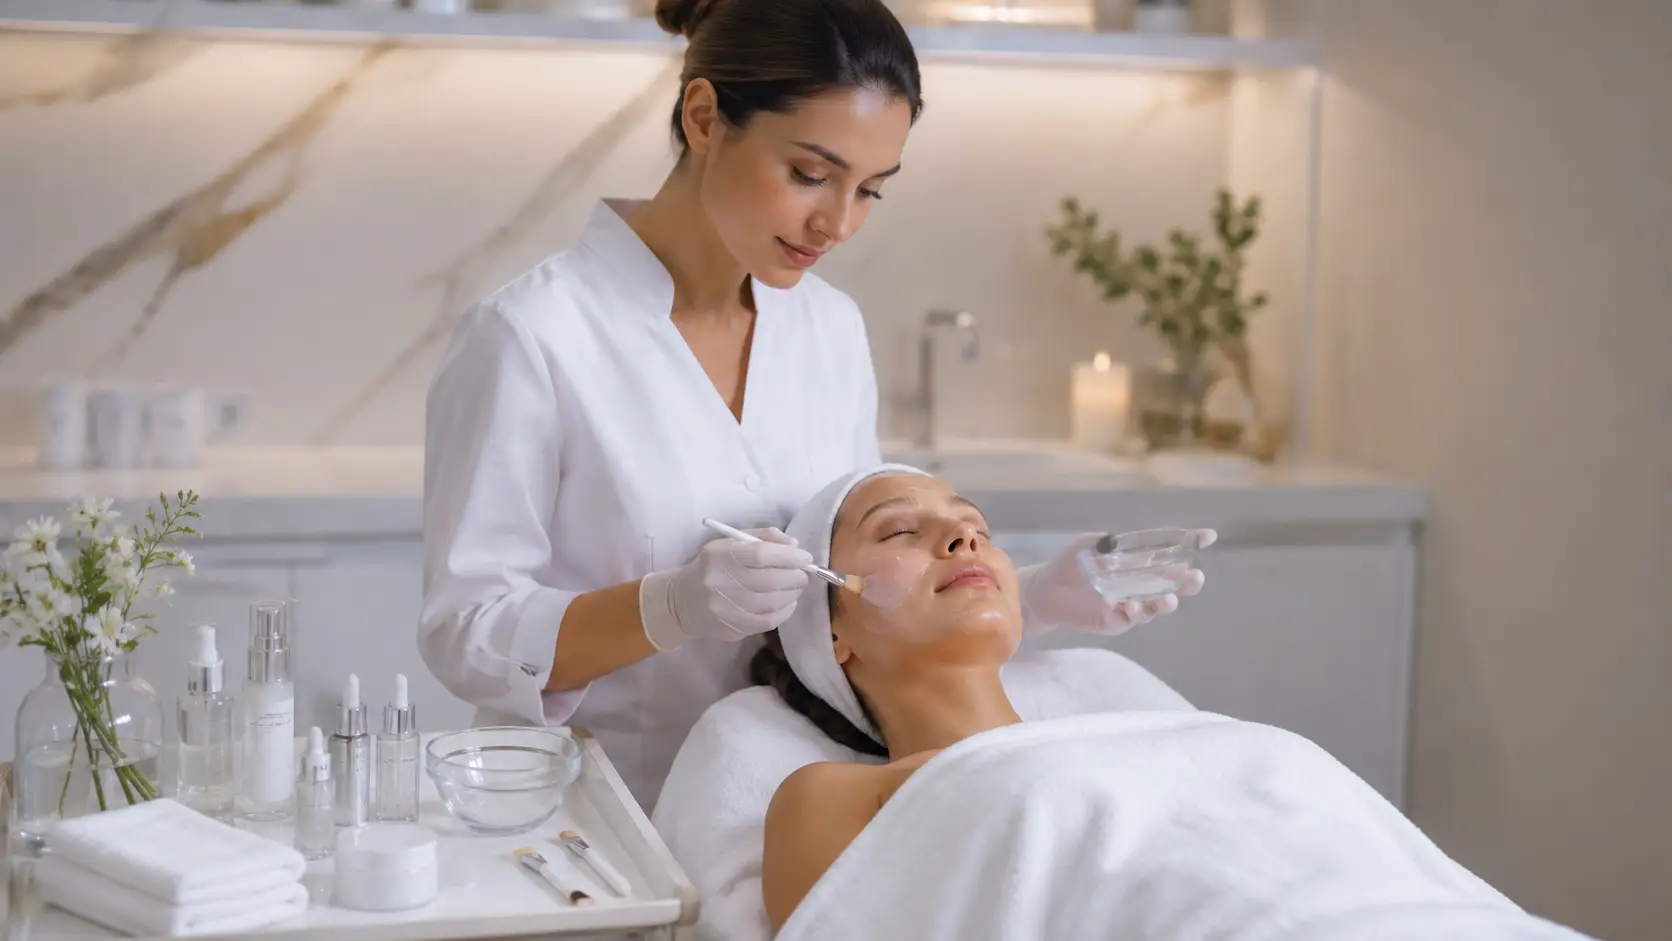
What Does a Beginner Barrier-Support Facial Protocol Look Like, and How Does It Work?
A beginner barrier-support facial is a gentle, restorative treatment designed to repair and reinforce the skin’s protective outer layer without causing further disruption. It avoids all forms of exfoliation, uses fragrance-free and sensitizer-free ingredients, layers humectants and barrier-repair compounds in sequence, and finishes with an occlusive mask to lock in the treatment benefits. It is one of the safest and most clinically meaningful services a new esthetician can offer from the start of their career.
- The skin barrier — the stratum corneum and its lipid matrix — is the body’s primary defense against water loss and environmental irritants. When it is compromised, skin becomes reactive, sensitized, and unable to hold moisture without clinical support.
- A barrier-support facial succeeds through restraint: fewer products, no exfoliation, no friction-heavy massage, and a deliberate ingredient sequence that builds from hydration to repair to seal.
- The correct ingredient order is cleanser, toner or essence, humectant serum, barrier-repair serum, occlusive mask, finishing moisturizer. Each layer prepares the skin to receive the next.
- Occlusive mask application is the most impactful single step in the protocol — it creates a physical seal that holds barrier-repair ingredients in contact with the skin and significantly reduces transepidermal water loss during the treatment window.
- Fragrance-free formulations are not optional in this protocol — they are required because sensitized skin has a heightened response to any potential irritant during the repair phase.
- New estheticians should view the barrier-support facial as a core clinical skill, not a niche specialty — a large proportion of clients arriving at any practice are in some degree of barrier dysfunction, whether they know it or not.
One of the most important things new estheticians learn quickly in practice — sometimes after a difficult session — is that a meaningful percentage of incoming clients have compromised skin barriers. They may not arrive with that complaint. They may come in asking for a brightening facial or a deep pore cleanse. But when you observe stinging responses to basic products, redness that does not calm quickly, flaking alongside visible oiliness, or a history of aggressive home skincare use, you are looking at barrier dysfunction.
Knowing how to recognize it and respond with a protocol designed for it — rather than pushing forward with an inappropriate treatment plan — is one of the clearest early markers of a skilled esthetician. And the good news for new practitioners is that a well-executed barrier-support facial does not require advanced devices, complex product systems, or years of experience. It requires knowledge, restraint, and a clear step-by-step approach.
This guide gives you everything you need to build and deliver a beginner-appropriate barrier-support facial: the underlying science, a complete step-by-step protocol with timing, the ingredients that belong in this service and the ones that do not, how to talk about it with clients, and how to use an occlusive mask as your most powerful finish.
What Matters Most in a Beginner Barrier-Support Facial
- Barrier dysfunction is common. Many clients presenting with sensitivity, reactivity, or persistent dehydration are experiencing compromised barrier function, not a skin type issue.
- Restraint is the core technique. Doing less — no exfoliation, no active stimulation, no fragrance — is the clinical decision that makes this protocol work.
- Ingredient sequence matters as much as ingredient selection. Humectants before barrier-repair actives before occlusive seal is the correct clinical order.
- An occlusive mask is not optional — it is the step that seals all of the layered ingredients in place and produces the most visible immediate result.
- Fragrance-free throughout is a professional safety standard for this protocol, not a personal preference.
- This facial can be offered confidently from the first weeks of practice. Its low risk profile makes it ideal for building clinical confidence with sensitive skin clients.
- Educating the client about what you are doing and why builds trust, reduces anxiety about gentle treatment, and dramatically increases rebooking rates.
What Is Skin Barrier Dysfunction and Why Do So Many Clients Have It?
The skin’s barrier function is primarily carried out by the stratum corneum — the outermost layer of the epidermis — and the lipid matrix that fills the spaces between its cells. This structure is often described using a brick-and-mortar analogy: the corneocytes are the bricks, and the lipid matrix — composed primarily of ceramides, fatty acids, and cholesterol in a roughly 1:1:1 ratio — is the mortar that holds them together and prevents water from evaporating out.
When this lipid matrix is disrupted, the barrier becomes permeable. Water escapes more readily, causing transepidermal water loss (TEWL) to rise. Irritants and allergens penetrate more easily, triggering inflammatory responses. The skin becomes sensitized to products it previously tolerated. Redness, stinging, tightness, and paradoxical dryness alongside oiliness become the client’s daily experience.
Why Is Barrier Dysfunction So Common Right Now?
Several converging factors have made barrier dysfunction increasingly prevalent among the clients new estheticians encounter in practice. Retinoid use has expanded dramatically among younger demographics following years of skincare content on social media, and retinoids compromise barrier integrity when introduced too aggressively or without adequate moisturization. Active ingredient stacking — layering vitamin C, AHAs, BHAs, and niacinamide without understanding their interactions — is now a common home skincare pattern. Frequent exfoliation, whether chemical or physical, removes lipids from the stratum corneum and interrupts its repair cycle. Environmental exposure and mask-wearing habits in previous years have added additional stressors.
The practical result is that a significant number of clients arriving at any esthetic practice — regardless of their stated skin concern — are in some degree of barrier compromise. Recognizing it during intake is as important as knowing how to treat it.
The Lipid Matrix: What Gets Damaged and What Repairs It
The stratum corneum’s lipid matrix is composed of approximately 50% ceramides, 25% cholesterol, and 15% free fatty acids. When any of these three components is depleted — through over-exfoliation, harsh surfactant use, or environmental stripping — barrier permeability increases measurably. Ceramides are particularly critical: they regulate the water-holding channels between corneocytes and prevent microorganisms from penetrating into deeper skin layers.
Topical application of a ceramide-dominant barrier repair formula — especially when delivered under an occlusive seal — has been shown to meaningfully restore barrier function by supplying the depleted lipid components the skin needs to reassemble its matrix. The occlusion is a critical part of this mechanism: it prevents the applied ingredients from evaporating before absorption and creates a stable moisture environment in which barrier cell repair can proceed more efficiently.
The Natural Moisturizing Factor (NMF) — a collection of water-soluble compounds including amino acids, pyrrolidone carboxylic acid, lactic acid, and urocanic acid — also plays a central role in barrier hydration by keeping the stratum corneum supple enough to maintain its structural integrity. NMF depletion, which occurs with harsh cleansing and over-exfoliation, is one of the earliest signs of barrier disruption and one of the first things an effective hydrating serum application begins to restore.
How to Recognize Barrier Dysfunction During Consultation
Estheticians working with new clients who may have compromised barriers should listen for and observe several key indicators during intake. Clients often describe their skin as “sensitive to everything lately” even if they have not historically had sensitive skin. They may mention that their usual moisturizers have started to sting or feel insufficient. Products that worked previously now cause redness or flushing. They may have recently intensified their skincare routine in response to a skin concern, often making barrier dysfunction worse in the process.
Visually, compromised barrier skin often presents with uneven texture — some patches feel rough or flaky while others appear shiny or congested. Redness that does not calm down within a few minutes of being touched or cleansed is a reliable clinical marker. The skin may feel tight immediately after even gentle cleansing.
Any client presenting with two or more of these signs warrants a shift toward a barrier-support protocol rather than a treatment targeting their stated concern.
What Products Belong in a Barrier-Support Facial and What Should You Completely Avoid?
Product selection for a barrier-support facial is as much about what you leave out as what you include. Many of the standard facial service defaults — exfoliation, enzyme masks, vitamin C applications, stimulating massage — are exactly what compromised skin cannot tolerate. Getting this right from the beginning of a session is critical to the protocol’s success.
- Gentle low-pH or cream-based cleanser
- Fragrance-free calming toner or essence
- Niacinamide serum (strengthens barrier, reduces redness)
- Panthenol (vitamin B5) serum or essence
- Ceramide + fatty acid barrier repair serum
- Hyaluronic acid or polyglutamic acid humectant serum
- Professional-grade occlusive hydration mask
- Fragrance-free finishing moisturizer or barrier cream
- SPF (end of service client education, not applied in room)
- AHAs (glycolic, lactic, mandelic acid) in any concentration
- BHAs (salicylic acid) even at low percentages
- Enzyme exfoliants (papain, bromelain)
- Physical scrubs or exfoliant pastes
- Vitamin C (ascorbic acid) — too acidic for compromised skin
- Retinoids or retinol of any kind
- Fragranced products of any category
- Extractions of any kind
- High-frequency or aggressive device use
- Stimulating massage with heavy pressure or friction
New estheticians sometimes feel the pressure to add more steps or more actives to justify a treatment’s value to a client. In a barrier-support facial, restraint is the skill. A client whose skin responds calmly throughout the session and leaves visibly improved understands the value of what happened far more clearly than a client who has been over-treated and leaves red and reactive.
The Complete Beginner Barrier-Support Facial Protocol: Step by Step
This protocol is structured for a 50-to-60-minute service. Each step has a defined purpose within the barrier-repair sequence — understanding why each step is in the order it is will help you adapt it intelligently as your practice grows.
Intake, Consultation, and Skin Assessment
Begin with a thorough intake review and verbal consultation. Ask specifically about recent product changes, anything the skin has reacted to recently, and how the skin feels after washing. Ask whether their skin stings when they apply moisturizer. Observe the skin under magnification before any product is applied: look for uneven texture zones, areas of visible redness or capillary dilation, flaking, and how quickly the skin returns to a neutral appearance after you lightly press a clean tissue to different zones.
Confirm the barrier-support protocol with the client before beginning. Explain that you will be using a gentle, restorative approach with no exfoliation, and that the goal is to calm and repair rather than to stimulate. Clients who have experienced over-treatment in the past respond well to this framing and tend to show strong loyalty to estheticians who treat them this way.
Double Cleanse with a Barrier-Safe Cleanser
Use a gentle, non-stripping cleanser — a cream, balm, or micellar-type formula with a pH between 4.5 and 6.5. Avoid foaming cleansers with sulfates, which disrupt the lipid matrix. Perform a first cleanse to remove makeup and surface debris, and a second cleanse to prepare the skin for treatment. Apply with minimal friction, using your fingertips in light, circular motions rather than pressing or dragging. Remove with damp, warm (not hot) towels.
Avoid steam during a barrier-support protocol. Extended steam exposure can further dilate capillaries on already-reactive skin and transiently increases TEWL rather than supporting barrier recovery.
Calming Toner or Essence Application
Apply a fragrance-free calming toner or hydrating essence using a cotton pad or clean fingertip patting technique. Pressing rather than wiping avoids friction on sensitized skin. Look for toners containing panthenol, allantoin, bisabolol, centella asiatica extract, or niacinamide at 2–4%. These ingredients begin the calming and barrier-preparation process immediately after cleansing, preparing the skin to absorb the humectant layer that follows. Allow 60 seconds of absorption time before moving to the next step.
Humectant Serum Application
Apply a humectant-focused serum while the skin is still slightly damp from the toner step. Hyaluronic acid, polyglutamic acid, or a combination of both are the appropriate choices here. The damp skin environment supports humectant binding — applying humectants to completely dry skin in a low-humidity treatment room can draw moisture out of the skin rather than into it. Work the serum in gently using light pressing and patting motions across the full face.
If your serum contains polyglutamic acid, it will begin forming its surface film during this step, which supports the occlusive effect of the mask that follows and inhibits the enzymatic breakdown of any HA already present in the skin from the serum and from the skin’s own reserves. Allow the serum to absorb for 90 seconds before the next layer.
Barrier-Repair Serum Application
Apply your barrier-repair serum over the humectant layer. This product should contain ceramides, free fatty acids, or cholesterol — or a combination of all three — to directly replenish the lipid matrix components the compromised barrier is deficient in. Niacinamide at concentrations up to 10% can also be incorporated here to support barrier protein synthesis and reduce redness. Apply with the same minimal-friction patting technique and allow 90 seconds to absorb fully before mask application.
At this point in the protocol, the skin has received a complete foundational repair stack: calming and barrier-priming toner, moisture-binding humectants, and lipid-matrix rebuilding actives. The next step seals all of it in place.
Occlusive Mask Application and Dwell Time
Mix and apply a professional-grade occlusive mask according to the manufacturer’s mixing ratio instructions. Apply in a smooth, even layer using a mask brush, working outward from the nose across the full face. The occlusive set creates a physical seal over the entire barrier-repair ingredient stack applied in steps 3 through 5, dramatically reducing TEWL during the dwell window and holding the ceramide and humectant layers in close contact with the skin for enhanced absorption.
During the mask dwell time, use the service window for gentle scalp massage, hand or arm massage as a luxury add-on, or client education about home care. This portion of the service is where the clinical repair work largely happens — the esthetician’s role is to hold space for it rather than to fill it with additional active steps. Do not apply LED therapy or any device during a barrier-support facial unless you have specific training in skin-state device compatibility for compromised barriers.
Remove the mask as a single intact piece once set. Clean any residue with a damp warm towel using minimal pressure.
Finishing Moisturizer and Barrier Cream Application
After mask removal, apply a fragrance-free finishing moisturizer or barrier-repair cream to complete the treatment layer. This step adds a final protective coating over the freshly treated skin and bridges the in-room treatment to the client’s home care environment. Choose a cream or lotion with occlusive properties — petrolatum, shea butter, squalane, or a ceramide-rich emulsion are appropriate choices. Avoid anything containing alcohol, fragrance, or exfoliating compounds.
Post-Treatment Education, Home Care Recommendations, and Rebooking
Use the close of service to educate the client on what you observed, what the treatment addressed, and what their skin needs at home to continue recovering. The most important home care messages for a barrier-support client are: use a gentle cleanser only morning and night, stop all active ingredients (retinoids, AHAs, BHAs, vitamin C) for at least two to three weeks, apply a ceramide moisturizer twice daily, and wear SPF every morning without exception.
Explain that barrier dysfunction did not develop overnight and will not resolve in a single session. Three to four weekly or biweekly sessions are typically needed before barrier integrity is meaningfully restored. Framing this clearly at the end of the first visit sets up a natural series conversation and gives the client a realistic expectation of the timeline for improvement.
Visualizing the Protocol: How Each Step Builds on the Last
One of the most common beginner mistakes in barrier-support facials is applying ingredients out of sequence — not because the products are wrong, but because the layering order determines how effectively each ingredient can do its job. The infographic below maps the eight-step protocol and shows how the skin state progresses from compromised to repaired through the treatment sequence.
Why the Occlusive Mask Step Is the Most Important Part of This Protocol
New estheticians sometimes view the mask step as a comfort element — something the client enjoys while the esthetician catches up on prep or performs add-on services. In a barrier-support facial, the mask step is the primary clinical mechanism of the entire protocol. Understanding why elevates the way you select, apply, and present this part of the service.
The Occlusion-Absorption Relationship
When a semi-occlusive or occlusive mask is applied over a stack of barrier-repair ingredients, it prevents the moisture and actives from evaporating into the air. This keeps the barrier-repair serums in sustained contact with the skin surface throughout the dwell period, allowing for greater absorption of ceramides, fatty acids, and humectants than open-air application of the same ingredients would produce. Research in cosmetic dermatology consistently demonstrates that occlusion meaningfully enhances both the depth and duration of topical ingredient activity.
Reducing TEWL During the Treatment Window
In compromised barrier skin, transepidermal water loss is already elevated. An occlusive mask physically blocks the evaporation pathway at the skin surface, allowing the stratum corneum to exist temporarily in a more hydrated, less water-stressed state. This is not just a cosmetic effect — it creates the microenvironment in which barrier cell repair processes are most efficient.
The Client Experience Signal
Beyond the clinical rationale, the mask step provides something equally important from a practice-building perspective: a clear, tangible, memorable experience. Clients who feel the cooling, sealing sensation of an occlusive mask setting over calming serums, and then see their skin visibly transformed upon removal, understand the value of the service in a way that no verbal explanation can fully replicate. New estheticians who master the mask step early have a powerful retention and referral tool built directly into their most accessible protocol.
Estheticians who have incorporated the Poly-Luronic™ Jelly Mask by Luminous Skin Lab into barrier-support protocols consistently note that the formulation’s PGA-forward dual-humectant system produces a noticeably different immediate post-removal skin response compared to single-humectant alternatives previously used in the same protocol position. The PGA surface film that forms as the mask sets appears to compound the occlusive barrier effect of the mask itself, creating a layered moisture seal that holds barrier-repair serums in more sustained contact with the skin throughout the dwell window than a standard alginate mask without active humectants.
Practitioners report that on clients with visibly compromised, sensitized skin, the combination of a ceramide serum applied at step five followed by the Poly-Luronic™ Jelly Mask produces consistently calm, visibly hydrated post-removal skin without the redness or stinging that less carefully formulated masks have caused in the same client population. The fragrance-free, clean-label formulation is specifically noted as a requirement for this client group — practitioners who have tested alternatives containing fragrance compounds report that sensitized clients consistently comment on discomfort during application that the Poly-Luronic™ formulation does not produce. The consistent 12-to-15-minute set window gives new estheticians a predictable, manageable dwell period without the workflow uncertainty that less stable formulations introduce during their early months of practice.
Common Mistakes New Estheticians Make in Barrier-Support Facials
Most beginner errors in barrier-support protocols fall into two categories: doing too much, or underestimating the significance of individual ingredient choices. Both categories are addressable once you understand what the mistakes actually look like in practice.
Defaulting to Exfoliation Out of Habit
Many new estheticians have learned facial protocols that include an exfoliation step as a default. In a barrier-support context, this is the single most damaging thing you can do. Any exfoliant — chemical or physical — removes lipid-containing cells from the stratum corneum, worsening the very condition you are trying to repair. If you feel the urge to exfoliate because the skin looks textured or dull, recognize that this is barrier dysfunction presenting as texture, not texture that exfoliation will resolve. Exfoliation will make it worse.
Using Products with Fragrance Because They Seem Gentle
Fragrance is a common sensitizer even on non-compromised skin. On skin with barrier dysfunction — where permeability is elevated and the skin’s defensive capacity is reduced — even low concentrations of synthetic fragrance can trigger inflammatory responses, histamine release, and contact dermatitis. A product that smells pleasant and appears calming in its marketing is not automatically appropriate for this protocol. Check the INCI list. If the word “parfum”, “fragrance”, or any individual fragrance chemical appears anywhere in the ingredient list, it does not belong in a barrier-support session.
Overcrowding the Protocol with Actives
Estheticians who are enthusiastic about skincare ingredients sometimes feel that more actives equal a better outcome. In barrier-support work, the opposite is true. Adding vitamin C, retinol, AHAs at low concentrations, or high-strength niacinamide alongside barrier-repair actives does not enhance results — it introduces competing mechanisms and sensitization risks that undermine the core protocol objective. Select one humectant serum, one barrier-repair serum, and an appropriate finishing cream. That is enough.
Never perform extractions during a barrier-support facial. Compromised barrier skin has reduced healing capacity and heightened sensitization. Extractions on this skin state carry an elevated risk of post-inflammatory hyperpigmentation, secondary infection, and a prolonged post-treatment recovery period. If a client presents with both barrier dysfunction and active congestion, address the barrier in the first series of sessions. Once barrier function is restored, extractions can be reintroduced with appropriate post-extraction calming protocols.
Skipping the Post-Treatment Education Conversation
New estheticians sometimes feel uncertain about delivering detailed home care instructions, especially in the first months of practice. In barrier-support work, this conversation is as clinically important as any step in the treatment protocol. If the client leaves your treatment room and reapplies their standard active-heavy home routine that same evening, the barrier damage will begin to rebuild. The in-room results will be partially or fully reversed. Your job is to ensure they understand what to stop, what to start, and for how long.
How to Explain a Barrier-Support Facial to Clients Without Sounding Technical
One of the practical challenges new estheticians face with barrier-support facials is explaining the protocol in a way that resonates with clients who came in asking for something else — or who are skeptical that a “gentle” treatment can produce results.
Lead With the Skin’s Story, Not the Protocol Name
Rather than saying “I think you need a barrier-support facial,” describe what you are observing in language the client can connect to their own experience. Something like: “What I’m seeing is that your skin’s protective layer is a bit depleted right now — which is why products that used to work fine are suddenly feeling like they’re stinging or not absorbing the way they should. What your skin needs most right now is to be calmed and replenished, not stimulated. That’s exactly what we’re going to do today.”
Reframe Gentleness as Precision
Clients sometimes interpret a gentle protocol as a less effective one. Address this directly: “The reason we’re keeping this very calm today isn’t because we’re being conservative — it’s because the most targeted thing we can do for your skin right now is give it exactly what it needs to repair itself, without anything that would interfere with that process. You’ll see the difference in how your skin feels after the mask comes off.”
Set Realistic Expectations for the Series
Barrier dysfunction that has developed over months of over-exfoliation or aggressive product use will not resolve in a single session. Estheticians who communicate this honestly — and who frame a three-to-four-session series as the proper treatment course — build the kind of client trust that produces consistent rebooking and referrals. Clients who see their skin genuinely improving across a series understand the value of the work in a way that single-visit treatment cannot create.
Professional and Scientific References
The skin barrier science and ingredient information referenced in this article draws from established dermatological and cosmetic chemistry literature:
- Elias, P.M. “Stratum corneum defensive functions: an integrated view.” Journal of Investigative Dermatology, 2005. Foundational reference for the lipid matrix brick-and-mortar model and the role of ceramides, fatty acids, and cholesterol in barrier permeability.
- Draelos, Z.D. “The science behind skin care: moisturizers.” Journal of Cosmetic Dermatology, 2019. Reviews occlusive, humectant, and emollient mechanisms in barrier repair and restoration.
- Fluhr, J.W.; Darlenski, R.; Surber, C. “Glycerol and the skin: holistic approach to its origin and functions.” British Journal of Dermatology, 2008. Covers Natural Moisturizing Factor components and their role in stratum corneum hydration.
- Polyglutamic acid NMF stimulation and HAS upregulation: MDPI, 2024. Gamma-PGA upregulation of HAS-1, HAS-2, HAS-3 expression and aquaporin-3 in reconstructed skin model.
- Maibach, H.I.; Pirot, F. “Transepidermal water loss measurements: methods, applications, limitations.” General dermatological reference on TEWL as a marker of barrier function and the impact of occlusion on water loss reduction.
For new estheticians building a barrier-support facial protocol and looking for an occlusive mask formulation that meets the clinical and safety requirements of this protocol, the Poly-Luronic™ Jelly Mask by Luminous Skin Lab is the formulation our education team most frequently references for this application. Its PGA and HA dual-humectant system delivers both surface occlusion and deep humectant action, its fragrance-free clean-label formulation meets the sensitization safety requirement for compromised barrier skin, and its consistent set time and single-piece removal provide the workflow predictability new estheticians need when building confidence with their first barrier-repair protocols.
Explore the Poly-Luronic™ Jelly Mask Line →Frequently Asked Questions: Beginner Barrier-Support Facial Protocol
What is a barrier-support facial and how is it different from a regular hydration facial?
A barrier-support facial is specifically designed to repair and reinforce the skin’s protective outer layer rather than simply adding surface moisture. Unlike a standard hydration facial, which focuses on delivering water content to the skin, a barrier-support facial uses a deliberately gentle, minimal-friction protocol to avoid further disrupting a compromised barrier, layers ingredients that rebuild lipid structure and NMF components, and finishes with an occlusive seal to hold everything in place. The goal is restoration, not stimulation.
How do I know if a client actually needs a barrier-support facial instead of something else?
Clients who need barrier-support facials typically present with visible redness or a flushed appearance that does not resolve quickly, skin that stings or burns when gentle products are applied, tightness immediately after cleansing, flaking or rough patches alongside oiliness, or a history of over-exfoliation or overuse of retinoids. During your consultation, asking how their skin feels when they wash their face and whether products have been causing unusual sensitivity will surface these signs quickly.
What products should new estheticians use in a barrier-support facial?
New estheticians should build their barrier-support protocol around a gentle, low-pH or pH-balanced milky or cream cleanser, a fragrance-free calming toner or essence containing niacinamide or panthenol, a barrier-repair serum with ceramides, fatty acids, or cholesterol, a professional occlusive hydration mask to seal the layered ingredients, and a finishing moisturizer or barrier cream. Avoid anything with AHAs, BHAs, retinoids, vitamin C, or active exfoliants in a barrier-support session.
Can new estheticians safely perform barrier-support facials right after graduation?
Yes. A barrier-support facial is one of the safest and most beginner-appropriate services a new esthetician can offer because it relies on gentle technique and restorative ingredients rather than aggressive treatments or devices. The protocol avoids exfoliation, extractions, and advanced modalities, making the risk of adverse reactions very low. It is an excellent starting point for building confidence with sensitive skin clients.
Why should I skip exfoliation during a barrier-support facial?
Exfoliation removes the outermost layer of the stratum corneum, which is the very layer that forms the physical barrier you are trying to rebuild. Applying any chemical or physical exfoliant to already-compromised skin increases transepidermal water loss, heightens sensitization risk, and delays the repair process. Skipping exfoliation entirely in a barrier-support session is not a limitation of the protocol — it is the correct clinical decision.
How does an occlusive mask help rebuild the skin barrier?
An occlusive mask creates a physical seal over the skin surface that dramatically reduces transepidermal water loss during the treatment window. This seal holds the barrier-repair ingredients in close contact with the skin, enhancing their absorption and allowing them to work without the disruption of evaporation. Occlusion also temporarily normalizes the skin’s moisture environment, giving compromised barrier cells a more stable condition in which to begin repair. A professional-grade occlusive mask applied over ceramide and humectant serums produces measurably better post-treatment skin feel than open-air application of the same ingredients.
What mistakes do beginner estheticians make most often during barrier-support facials?
The most common beginner mistakes in barrier-support facials include using a cleanser that strips the skin under the belief that the skin needs to be deeply clean before treatment, adding a light exfoliation step out of habit rather than clinical intention, using too many products and layering so many actives that the skin cannot respond calmly, using products containing fragrance on sensitized skin, and applying massage techniques with too much friction on inflamed or reactive skin. Restraint and simplicity are the defining skills of a well-executed barrier-support facial.
How long should a beginner barrier-support facial take?
A well-structured beginner barrier-support facial runs comfortably in 50 to 60 minutes. The consultation and intake review takes roughly 10 minutes, double cleanse 5 minutes, toning 3 minutes, serum application and absorption 7 minutes, mask application and dwell time 15 to 20 minutes, mask removal and finishing 5 minutes, and post-treatment education and rebooking 10 minutes. This timing is manageable for a new esthetician and leaves room to work calmly without rushing.
What makes the Poly-Luronic Jelly Mask a good choice for a beginner barrier-support facial?
The Poly-Luronic™ Jelly Mask by Luminous Skin Lab is formulated with a PGA and HA dual-humectant system in a fragrance-free, clean-label base — making it a strong match for barrier-support protocols where sensitization risk must be minimized. PGA seals moisture at the skin surface and inhibits the enzyme that breaks down natural hyaluronic acid, while HA delivers hydration to deeper skin layers. The occlusive set mask format amplifies the barrier-repair serums applied underneath, and the consistent set time gives new estheticians a predictable, manageable application window without the workflow uncertainty of less stable formulations.
Barrier-Support Facials: A Core Clinical Skill From Day One
The barrier-support facial is not a niche service for specialists. It is a foundational protocol that addresses one of the most common and under-recognized skin conditions new estheticians will encounter in their first year of practice. Clients with compromised barriers arrive at every kind of practice — from budget-friendly community spas to high-end boutique studios — and many of them do not yet know what is happening to their skin or why.
Estheticians who can recognize barrier dysfunction during intake, pivot to an appropriate protocol, deliver it with calm, skilled restraint, and then educate the client meaningfully about what they observed and what comes next are estheticians who build loyal, recurring client relationships quickly. The barrier-support facial is gentle enough to be one of the first services you offer with full confidence, and meaningful enough to be one of the most clinically impactful things you do for a client’s skin in your entire career.
Master the eight-step sequence. Understand the why behind each ingredient decision. Learn to read the signs of barrier dysfunction before the first product touches the skin. These are not advanced skills — they are the foundational skills that define a thoughtful, competent esthetician at any stage of practice.